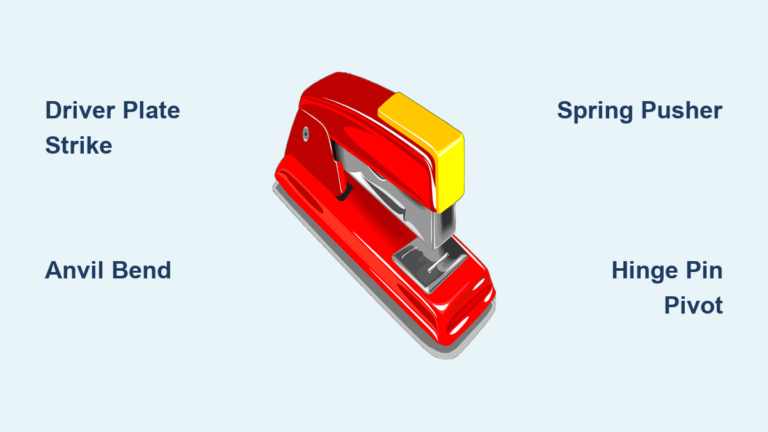
How to Use a Skin Stapler: Quick Steps
If you have ever watched a surgeon close a long abdominal incision in seconds, you have likely seen a skin stapler in action. These devices are staples, literally and figuratively, in modern surgical and emergency wound closure. How to use a skin stapler effectively hinges on more than just squeezing a trigger: it demands proper patient selection, precise technique, and awareness of complications. Whether you are a medical student, resident, or frontline clinician, mastering this tool can save critical time in the operating room or emergency department without sacrificing wound integrity. This guide walks you through every step, from assessing suitability to staple removal, using evidence-based practices and clinical best practices.
Assess Wound Suitability Before Stapling
Before reaching for the stapler, confirm the wound meets clinical criteria for safe and effective closure.
Check for Proper Indications
Skin staplers work best on linear, low-tension wounds with well-approximated edges. They are ideal for surgical incisions such as after hernia repair or laparotomy, scalp lacerations in adults, and longitudinal wounds on the trunk or extremities. Stapling reduces closure time by up to 66.6 percent compared to sutures, averaging just 10.89 minutes per wound, making them invaluable in high-volume or time-sensitive settings.
Avoid High-Risk Areas
Do not use skin staplers on the face or neck where cosmetic outcomes are poor, on hands, feet, joints, or flexion creases due to high tension and mobility, on pediatric patients because of pain and cooperation issues, or on infected or contaminated wounds unless thoroughly cleaned. Using staples in these areas increases risks of dehiscence, scarring, and patient discomfort.
Evaluate Tissue Quality
Ensure adequate soft tissue coverage exists with no significant tissue loss or undermining. Verify that prior deep dermal closure has been performed if the wound is under tension. Skin staplers are not substitutes for layered closure. They close only the epidermal and dermal layers after deeper tissues are already secured.
Prepare Equipment and the Wound
A clean, organized setup prevents delays and complications during closure.
Gather Essential Tools
You will need several key items for successful stapling:
- Skin stapler, preloaded and disposable, for consistent staple formation
- Staple remover, required for safe extraction
- Sterile forceps for edge approximation and stabilization
- Needle driver for tissue handling if needed
- Sterile gloves, drapes, and gauze to maintain asepsis
Prep the Wound Bed
Follow this sequence for optimal preparation. First, control bleeding with pressure or electrocautery. Second, irrigate thoroughly with sterile saline to remove debris. Third, inspect for foreign bodies or deeper injuries. Fourth, debride non-viable tissue if needed. Fifth, anesthetize the area with lidocaine one to two percent. Sixth, manually approximate edges using forceps to ensure dermal-to-dermal alignment before stapling.
Pro Tip: For minor lacerations, placing one or two staples may be less painful than local anesthetic injection.
Position and Fire the Stapler Correctly
Proper technique ensures secure closure and minimizes complications.
Align Stapler Perpendicular to Skin
Hold the stapler at 90 degrees or slightly oblique to the skin surface. Center the device directly over the incision line. Ensure wound edges are evenly apposed with no gaping or bunching. Use your non-dominant hand to stabilize tissue in solo procedures, employ forceps for precision in tight spaces, or request an assistant in operative settings.
Warning: Off-center placement causes asymmetric staples and poor wound apposition.
Deploy Staples with Controlled Pressure
Press the stapler firmly but avoid excessive force. Squeeze the handle until you hear a distinct click, which fires one staple. Let the device do the work. Over-pressing drives staples too deep, making removal difficult.
Visual Cue: A well-formed staple looks like a symmetrical B with equal leg length and a flat crown above the skin.
Inspect and Correct Each Staple

Immediate feedback prevents long-term issues.
Verify Proper Formation
After each staple, check for even skin edge approximation with no puckering or gapping. Verify no subcutaneous fat is trapped and confirm symmetrical staple shape. If any defect is noted, remove and replace immediately.
Fix Misplaced Staples Promptly
To correct errors, slide the staple remover under the crown. Squeeze fully to bend the staple into a U shape. Lift gently out of the skin. Re-approximate tissue. Fire a new staple with corrected alignment.
Never leave a malformed staple in place. It increases scarring, infection risk, and dehiscence.
Space Staples Evenly and Systematically

Consistency in spacing and pattern improves healing and appearance.
Maintain Proper Staple Distance
Space staples three to five millimeters apart. Use three-millimeter spacing for higher tension or shorter wounds. Use five-millimeter spacing for low-tension, longer incisions such as those on the back or abdomen. Even distribution reduces localized stress and prevents edge necrosis.
Use Anchoring Technique
Place first and last staples at wound ends to lock alignment. Work from one end to the other in a steady rhythm. Keep angle, pressure, and spacing uniform throughout the entire closure.
Adapt for Solo Operators
When working alone, use your non-dominant hand to pinch edges together. Employ toothed forceps for fine control. Pause between staples to reassess alignment.
Expert Note: The quality of tissue approximation matters more than speed. You reapproximate the skin edges, dermal to dermal, and you just fire the staple.
Use Alternatives When Needed
Not all wounds benefit from external metal staples.
Consider Subcuticular Options
For improved cosmesis or hard-to-remove areas, consider bioabsorbable staples such as SubQ It! SU-25. Subcuticular sutures with device-assisted delivery and dissolvable staples in select pediatric or facial cases offer speed advantages without visible hardware or need for removal.
Choose Sutures for Precision
Opt for sutures when closing near eyes, lips, or joints. Also choose sutures when the wound has irregular edges or when the patient values cosmetic outcome, such as young adults. Sutures allow finer control, though they take longer.
Remove Staples at the Right Time
Timing and method of removal affect healing and scarring.
Follow Location-Based Removal Schedule
Different body areas require different removal timelines. Remove scalp staples at seven days. Remove abdominal, back, and extremity staples at ten to fourteen days. For high-risk patients, remove at fourteen to twenty-one days with monitoring.
Adjust for Patient Factors
Remove earlier at five to seven days with steri-strips if the wound is stable, risk of railroading is high in pigmented skin, or the patient prefers early removal. Delay removal up to three weeks only for diabetics, smokers, malnourished individuals, or high-tension sites.
Never exceed three weeks. Prolonged retention causes permanent track marks and inflammation.
Apply Correct Removal Technique
Position staple remover jaws under the crown. Squeeze handles fully to reform the staple into a U. Lift gently without pulling upward without reforming first. Inspect the site for redness, discharge, or separation. Apply steri-strips if additional support is needed.
Critical Warning: Improper removal causes trauma, bleeding, and delayed healing.
Prevent and Manage Complications
Most complications are avoidable with proper preparation and technique.
Common Issues and Solutions
Prevent infection by irrigating well and maintaining sterility. Prevent poor cosmesis, known as railroading, by removing early and using steri-strips. Prevent difficult removal by avoiding over-pressing during placement. Prevent dehiscence by performing layered closure first. Prevent tissue trauma by ensuring no fat is caught in the staple. Use alternatives in patients with metal allergy.
Stop Railroading Before It Starts
Railroading is linear hyperpigmentation along the staple line. It is caused by prolonged retention exceeding two to three weeks, especially in darker skin. Prevent it by removing staples within seven to fourteen days and applying moisturizer post-removal.
Train Before You Operate
Skill comes with practice. Do not learn on live patients.
Practice on Simulation Models
Effective training tools include banana peels to simulate skin elasticity and tear resistance, pig skin models for realistic texture and thickness, and commercial training kits with lifesize mannequins and replaceable skin. Focus on edge approximation, consistent hand pressure, and visual recognition of proper staple formation.
Supplement with Instructional Videos
Supplement hands-on practice with operating room procedure recordings, manufacturer tutorials, and peer-reviewed surgical demonstrations.
Final Tip: The stapler is only as good as the operator. Technique trumps technology.
Frequently Asked Questions About Skin Staplers
How do skin staplers work?
Skin staplers deploy pre-formed metal staples that penetrate both wound edges and are bent into a closed B shape beneath the skin, pulling the dermal layers together. The crown remains above the skin for later removal.
When should staples be removed?
Typically remove staples between seven and fourteen days, depending on location and healing progress. Remove scalp staples at approximately seven days. Remove trunk and extremity staples at ten to fourteen days. Staples can be removed as early as five days with steri-strip support.
Are skin staples better than sutures?
Staples are faster, up to 66.6 percent quicker, especially for long incisions. Sutures offer superior precision and are preferred in cosmetically sensitive areas. The choice depends on clinical context.
What are the most common complications?
Common complications include infection, visible scarring known as railroading, difficult removal, tissue trauma, and rare metal sensitivity. Most complications are preventable with proper technique.
Can skin staples be used on all body parts?
No. Staplers are avoided on the face, neck, hands, feet, and joints. They are best suited for the scalp, trunk, and extremities.
What should I do if a staple is misplaced?
Remove it immediately with a staple remover. Control any bleeding. Re-approximate the edges. Replace with a correctly placed staple.
Key Takeaways for Using a Skin Stapler
Mastering how to use a skin stapler means balancing speed with precision. When used correctly on suitable wounds, with proper preparation, alignment, and timely removal, staples offer fast, reliable closure with excellent outcomes. However, skin staplers demand respect. Missteps lead to avoidable complications such as infection, scarring, and wound breakdown. Follow this guide, train deliberately on simulation models before clinical use, and prioritize tissue handling over mechanical action. Your patients will heal faster and look better for it.