How to Use a Staple Gun: Quick Steps
You’ve got a project that needs fastening. Maybe you’re reupholstering a chair, installing insulation, or securing carpet. A staple gun is the perfect tool for the job, but only if you know how to use it correctly. Improper use leads to jams, weak holds, or even injury. This guide walks you through every step, from loading the right staples to firing safely and troubleshooting common issues, so you can work efficiently and confidently.
Choose the Right Staple Gun for Your Project

The first step in using a staple gun effectively is picking the right one for your task. Not all staple guns are the same, and choosing incorrectly can slow you down or damage materials.
Manual vs Electric vs Pneumatic Staple Guns
Different power sources deliver different performance levels. Manual staple guns work best for light-duty tasks like crafts, fabric mounting, or small upholstery jobs. They require hand strength but are portable and affordable. Electric models are ideal for medium-duty work such as baseboards, insulation, or drywall. They fire with minimal trigger pressure and work quickly on large surfaces. Pneumatic guns are the most powerful option, used for roofing, subflooring, or heavy carpentry. They require an air compressor but deliver consistent, high-speed performance.
For frequent or professional use, electric or pneumatic models save time and reduce hand fatigue significantly.
Select the Correct Staples
Using the wrong staples is the number one cause of jams, poor holding power, and tool damage. Always match the staple to both your gun and your material.
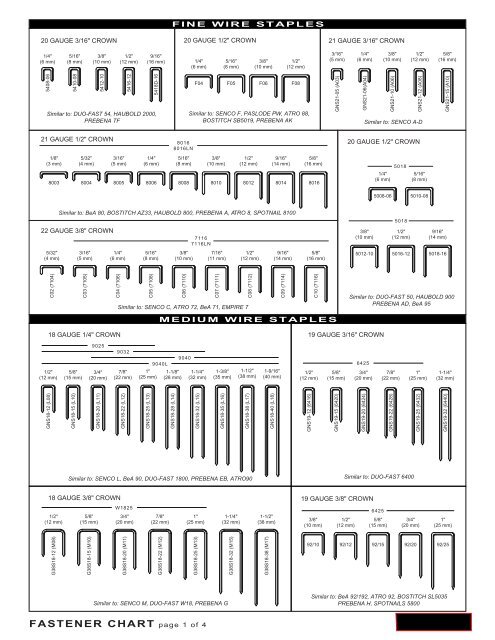
Understand Staple Codes and Sizes
Staples are labeled with codes like T50, 24/6, or 141. T50 staples are universal size for general construction and upholstery. Narrow crown staples like 24/6 work best for trim and cabinetry. Heavy-duty staples like 141 are designed for roofing felt or thick insulation. Always check your tool’s manual or label for compatible staple types before purchasing.
Match Staple Length to Material
Choose the right staple leg length based on what you’re fastening. For fabric and foam, use 1/4 inch to 3/8 inch staples. For trim and drywall, 1/2 inch staples work well. Plywood and paneling require 3/4 inch to 1 inch staples. Roofing and lumber need 1 inch to 2 inch staples. Never use staples longer than necessary because they risk piercing wires or pipes behind walls.
For outdoor projects, use galvanized or stainless steel staples to prevent rust and corrosion.
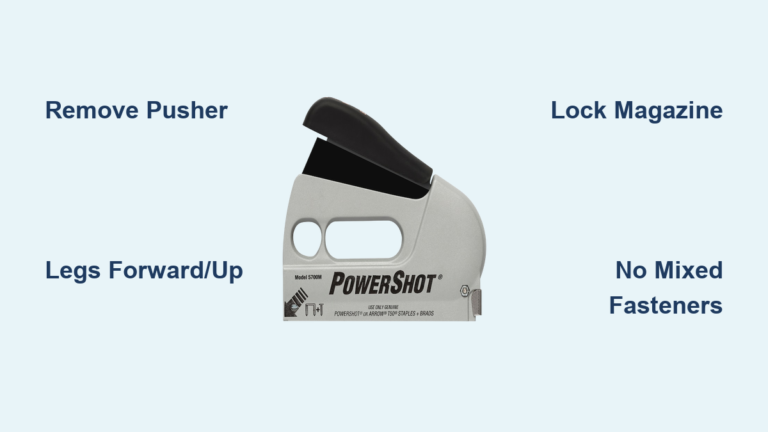
Load Staples Correctly
Improper loading causes misfires and jams. Most staple guns are either bottom-loading, top-loading, or side-loading, and orientation matters significantly.
Bottom-Loading Procedure
Most modern staple guns use bottom-loading design. Turn the gun upside down. Slide or press the latch on the bottom to open the magazine. Insert staples with legs pointing up and crown facing forward. Push the latch closed until it clicks. Verify staples sit flush in the guide rails. Look through transparent trays to monitor staple levels during use.
Top-Loading Procedure
Older models use top-loading design. Press the release lever at the top or rear. Open the chamber and insert staples with legs up and crown forward. Close securely and test-fire into scrap wood before starting your project.
Side or Rear Loading for Electric Models
Electric models sometimes feature side or rear loading mechanisms. Pull out the rear pin or slide open the side panel. Insert staples with legs down in some models, so confirm the direction first. Reinsert the pin or close the panel fully before use.
Never load while the tool is powered. Unplug electric models and disconnect pneumatic hoses first.
Adjust Staple Depth
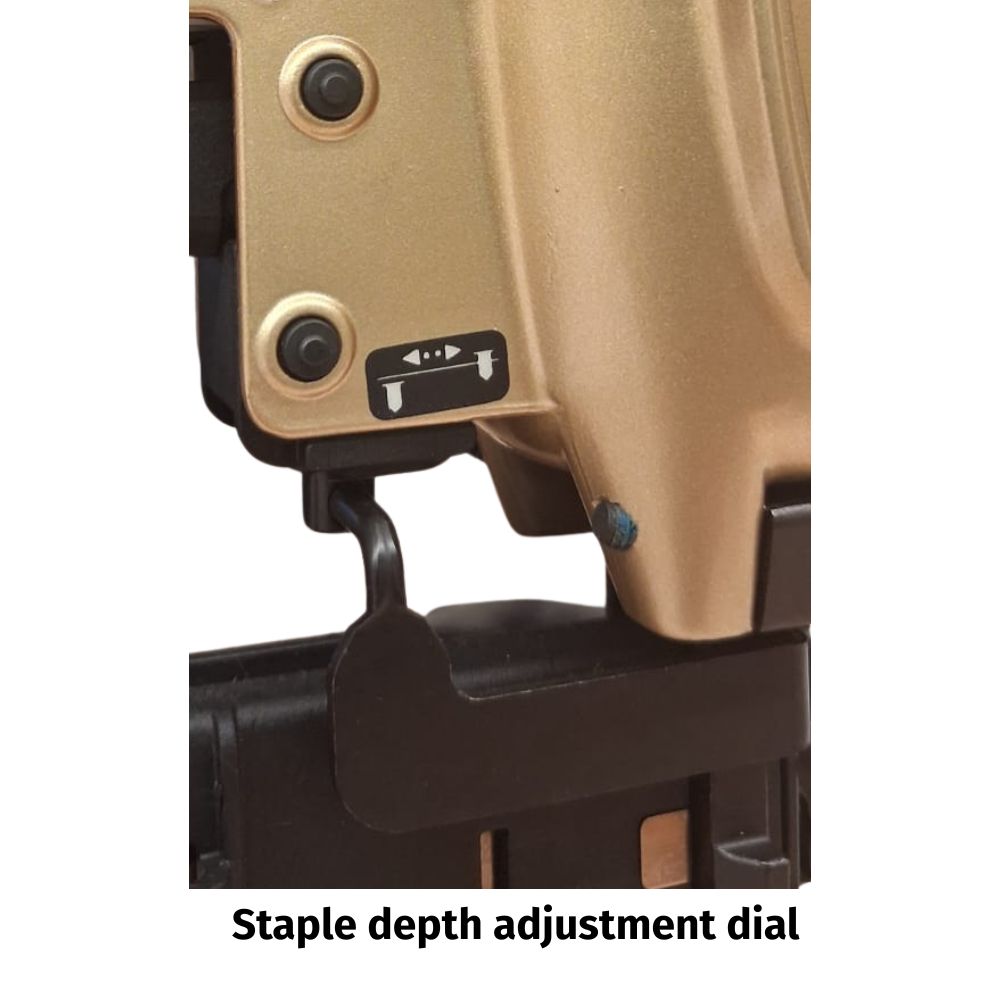
Many electric and pneumatic guns let you control how deeply staples drive into the material. Proper depth adjustment ensures secure fastening without surface damage.
Set the Drive Depth Properly
Turn the adjustment dial or screw near the nose. Clockwise rotation increases depth, driving staples deeper. Counterclockwise rotation reduces depth for shallower penetration. Test on scrap material before starting your project. Adjust based on material density and thickness.
Avoid These Depth Mistakes
Staples that are too shallow won’t seat fully, causing fabric to loosen or material to lift. Staples driven too deep cause surface damage like dented drywall or pierced utilities hidden behind walls. Always test and adjust before committing to your actual workpiece.
Prepare for Safe Operation
Before firing, take safety and workspace setup seriously. One mistake can cause injury or damage to your project.
Wear Protective Gear
Safety glasses protect your eyes from flying staples or debris. Work gloves guard your hands when handling sharp staples or working near edges. Long sleeves prevent cuts from accidental contact with the tool or materials.
Clear Your Workspace
Remove pets, children, and clutter from the work area. Ensure good lighting, especially in tight spaces like under cabinets. Keep cords or air hoses untangled to prevent tripping hazards or tool damage.
Inspect the Tool Before Use
Check for cracks in the body or handle. Look for worn triggers or damaged safety mechanisms. Inspect power cords for damage on electric models or hoses on pneumatic models. Clear any debris from the nose or magazine. If the tool is damaged, repair or replace it before use.
Fire the Staple Gun Safely
Even experienced users make mistakes when rushing. Follow these steps to ensure clean, secure fastening every time.
Understand Trigger Modes
Single-shot mode fires one staple per trigger pull, best for precision work like trim or upholstery. Continuous-fire mode fires multiple staples while both trigger and nose are pressed, ideal for fast coverage on carpet, roofing, or insulation projects. In continuous mode, both trigger and safety tip must be pressed, so never place your hand in front of the nose.
Step-by-Step Firing Technique
Grip the gun firmly with your dominant hand, keeping fingers away from the trigger until ready. Place the baseplate flat on the surface and hold the gun perpendicular to avoid crooked staples. Align the nose exactly where you want the staple. Apply steady downward pressure using your forearm or body weight. Squeeze the trigger smoothly without jerking. Wait for full seating before moving to the next spot. Repeat with consistent spacing based on your project type.
For upholstery, space staples 1 to 2 inches apart. For carpet, use 2 to 4 inch spacing. For insulation, space staples 6 to 8 inches apart. Lean into the tool with your body weight, especially when using manual guns, to improve penetration.
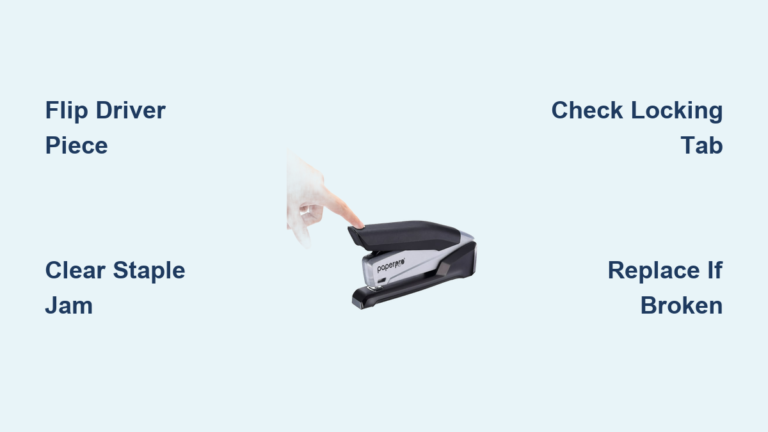
Fix Common Problems Fast
Even well-maintained tools can jam or misfire. Here’s how to diagnose and fix issues quickly.
Troubleshoot Frequent Issues
Staples that won’t fire usually mean the safety lock is engaged, the magazine is empty, or there’s a jam. Disengage the lock, reload, or clear the jam. Staples that bend or break are often caused by low-quality staples or excessive compression depth. Use high-grade staples and reduce the depth setting. Double feeding happens when the spring is worn or the wrong staple strip is loaded. Replace worn parts and check compatibility. Poor holding power results from wrong staple size or shallow driving. Use longer staples and adjust the depth setting.
Clear a Jam in Five Steps
Disconnect the power source by unplugging or disconnecting the air hose. Open the magazine carefully. Remove stuck staples with needle-nose pliers. Clean debris from the track and nose. Reassemble and test on scrap material before continuing your project.
Lubricate moving parts every few months to prevent rust and jams.
Maintain Your Staple Gun
A well-cared-for tool lasts years and performs reliably. Make maintenance part of your routine.
After Every Use
Wipe down the exterior with a dry cloth. Check for loose screws or damaged parts. Store the gun unloaded with the safety lock engaged.
Monthly or Heavy-Use Maintenance
Clean the magazine and nose to remove dust and old staple fragments. Lubricate moving parts with lightweight machine oil, avoiding over-oiling. Inspect cords, hoses, and springs for wear. Replace any damaged components promptly.
Long-Term Storage Tips
Store in a dry, secure place, preferably in a case. For pneumatic models, drain the air hose and coil it neatly. Keep spare staples and a mini-toolkit nearby including pliers, oil, and spare parts.
Refer to your manual for model-specific care instructions.
Apply Skills in Real Projects
Now that you know how to use the tool, here’s how it works in practice.
Reupholster a Chair Seat
Remove old fabric and staples from the frame. Load hook-shaped or square staples compatible with your gun. Adjust the depth for fabric and padding thickness. Fire staples every 1 to 2 inches around the frame edge, pulling fabric taut as you go for a smooth finish. This technique produces a professionally finished, securely fastened seat.
Install Roofing Felt
Use a pneumatic roofing staple gun with long, galvanized staples. Load staples with 1 to 1.5 inch legs. Fire every 6 to 8 inches along seams and edges, walking backward to avoid stepping on loose material. This method provides fast, weather-resistant underlayment installation.
Attach Insulation Batts
Use an electric staple gun with medium-leg staples between 1/2 inch and 3/4 inch. Align batts between studs. Fire one staple per stud every 12 to 16 inches. Ensure the vapor barrier faces the correct direction. This approach saves significant time compared to using tacks or adhesive.
Follow Safety Rules Always
A staple gun fires at high speed. Respect it like any power tool.
Critical Safety Practices
Never point the gun at yourself or others. Keep fingers clear of the nose during firing. Unplug or disconnect air before loading or clearing jams. Store locked and unloaded, especially around children. Never carry a loaded gun. Remove staples when the tool is not in use.
Never test-fire into the air because a staple can travel over 100 feet and cause serious injury.
Maximize Performance and Longevity
Use these expert tips to get the most from your staple gun.
Pro Tips for Better Results
Use OEM or high-quality staples because they feed smoother and jam less. Apply downward pressure with your arm, not just your hand, especially with manual models. Check staple alignment before each shot because crooked staples weaken holds. Keep spare staples on hand because running out mid-project slows progress. Use LED-lit models in dark areas like under floors or inside cabinets.
Users with hand strength issues benefit from electric or pneumatic tools that rely on trigger pull rather than grip force.
Know When to Upgrade
Your staple gun should match your workload. Consider upgrading when you experience frequent jams despite using correct staples. Inconsistent firing or double-feeding indicates worn components. Excessive hand fatigue with manual models slows your progress. Slow progress on large jobs suggests you need more power.
Upgrade to electric or pneumatic models for efficiency and comfort on repetitive tasks.
Final Checklist Before You Start
Before beginning any project, verify you’ve completed each step. Select the right staple gun for your project. Load compatible staples with correct type, size, and orientation. Adjust depth setting and test on scrap material. Wear safety glasses and gloves. Clear your workspace and inspect tool condition. Unplug or disconnect before loading or maintenance.
Key Takeaways for Using a Staple Gun
Using a staple gun correctly means more than just pulling the trigger. It’s about choosing the right tool for your project type, loading staples properly with correct orientation, adjusting depth for your material thickness, applying safe technique with proper grip and pressure, and maintaining your equipment for years of reliable service. Always wear safety gear and never skip the pre-use inspection. Whether you’re a DIYer tackling home projects or a professional doing regular work, following these steps ensures strong, clean fastening every time without frustration or risk. Now you’re ready to tackle upholstery, insulation, roofing, and more with confidence and precision.
Frequently Asked Questions About Using a Staple Gun
What is the best staple gun for beginners?
A manual bottom-loading staple gun is best for beginners because it’s affordable, lightweight, and easy to understand. However, if you plan to do more than occasional projects, an electric model reduces hand fatigue and provides more consistent results.
How do I know what size staples to use?
Match staple leg length to your material thickness. Use 1/4 to 3/8 inch staples for thin fabric, 1/2 inch for drywall and trim, 3/4 to 1 inch for plywood, and 1 to 2 inches for roofing or thick lumber. Always err on the shorter side to avoid piercing hidden wires or pipes.
Why does my staple gun keep jamming?
Jams usually stem from using low-quality or wrong-type staples, loading staples backward, or debris in the magazine. Always use high-quality compatible staples, verify orientation before loading, and clean the magazine regularly.
Can I use a staple gun on hardwood?
Yes, but use the right staples. Choose sharp-pointed, thick-gauge staples designed for dense materials. Adjust the depth setting to drive staples deeply enough for proper holding power. Test on scrap hardwood first to ensure proper penetration.
How do I prevent staples from bending when I fire?
Staples bend when the depth setting is too high or when using low-quality staples. Reduce the depth setting and switch to high-grade staples that match your gun. Apply steady downward pressure without excessive force.
Is it safe to use a staple gun for outdoor projects?
Yes, but use corrosion-resistant staples. Galvanized or stainless steel staples resist rust and weather damage. Store your tool properly and maintain it regularly to extend its lifespan for outdoor use.