How to Use a Stapler: Quick Steps
You’ve got a stack of papers and a stapler in hand, but are you using it correctly? Whether you’re in an office, classroom, or home workspace, knowing how to use a stapler properly ensures clean, secure binding and helps you avoid frustrating jams. This guide walks you through every step, from loading staples to troubleshooting common problems.
Choose the Right Stapler for Your Task
Not all staplers are designed for the same jobs. Selecting the appropriate type ensures clean results and prevents damage to your device.
Match Stapler Type to Your Needs
Consider how many sheets you need to bind and what materials you’re working with.
Standard manual staplers work best for up to 20 sheets of regular paper, making them ideal for everyday office or school use. Heavy-duty staplers handle 45 to 160 sheets, perfect for reports, contracts, or thick booklets. Electric staplers let you staple 20 to 50 sheets automatically at the press of a button, great for high-volume jobs. Tacking-enabled staplers allow you to attach paper to corkboards or walls, but only manual models support this feature.
Never use an electric stapler for tacking applications, as this can cause overheating or mechanical failure.
Load Staples Correctly
Proper loading prevents jams and ensures reliable stapling every time. The method depends on your stapler’s design.
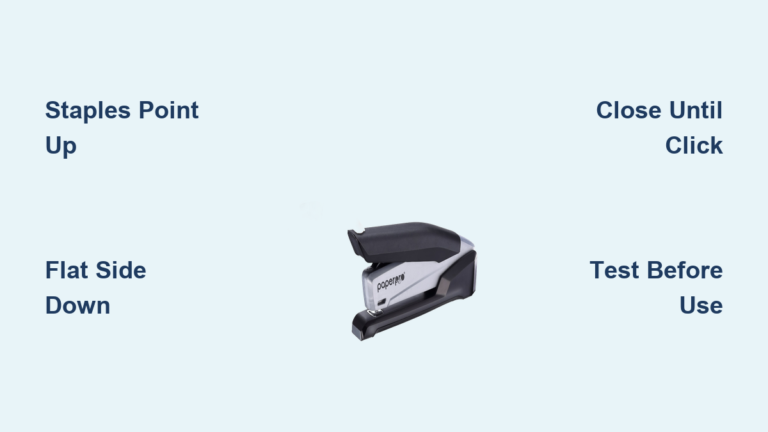
Load a Top-Load Stapler
Follow these steps for quick reloading.
Hold the base steady with one hand. Lift the top cover at the rear until it clicks open. Insert a full strip of staples with the points facing downward into the channel. Push them all the way in until seated. Close the cover until it locks with an audible click. Check the side window if available to confirm staples are visible.
Use chisel-point staples, which reduce jams by up to 60 percent compared to standard options.
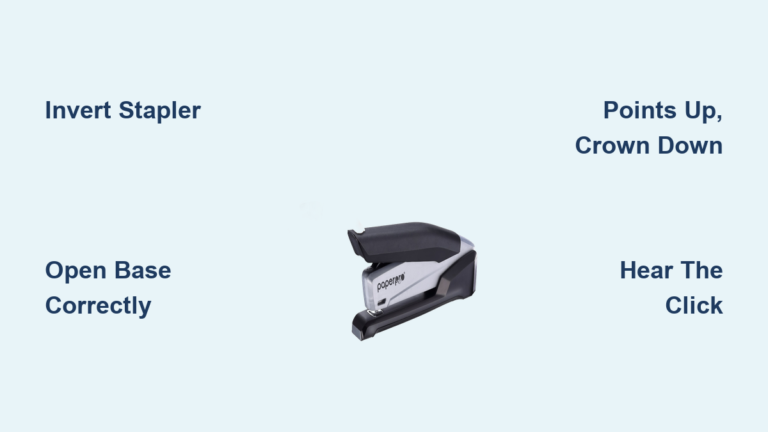
Load a Back-Load Stapler
This design keeps the stapler desk-bound during reloading.
Press the release button on the back of the stapler. Slide out the staple tray completely. Insert staples pointed end first, ensuring they align with the guide rails. Slide the tray back in until it clicks into place. Test with a quick press to confirm proper feeding.
Common mistake loading staples upside down causes immediate jams. Always ensure points face down.
Adjust the Anvil for Permanent or Temporary Binding
Your stapler’s base contains a setting that controls how staples bend, determining whether they’re easy to remove.
Switch Between Clinch Modes
The anvil adjustment changes staple leg behavior.
Closed clinch mode bends legs inward for permanent, secure binding. Open clinch mode bends legs outward slightly, allowing easy removal without tearing paper.
To adjust, turn the stapler over and locate the anvil release lever on the bottom. Press it up and rotate the base to select setting A for permanent binding or setting B for temporary removal. Release the lever to lock the position.
Use open clinch for drafts and rough edits. Use closed clinch for final documents, contracts, and submissions.
Align Paper for Clean, Professional Results
Misaligned stacks lead to crooked staples and unprofessional documents. Proper alignment takes only a moment.
Use a Wall for Perfect Alignment
Place your paper flush against a wall or desk edge. Position the stapler base against the same edge. Keep both paper and stapler square to the surface. This technique delivers consistent results every time.
Tap the stack on the desk to align edges before stapling. Avoid curling or wrinkled pages. Never exceed the stapler’s capacity, which is typically 20 sheets for standard models.
Overloading causes jams and can bend internal parts permanently.
Staple with Proper Technique and Pressure
Using the right amount of force ensures complete staple formation.
Apply Pressure Correctly
Fingertips lack the strength needed for thick stacks. Place the staple gap over the desired location, typically the top-left corner. Hold the base flat on the surface. Press down firmly using the palm of your hand, not your fingers. Listen for a crisp click indicating the staple has clinched.
Lift and inspect the result. The front should show a smooth U-shape. The back should display fully bent legs.
For 45 or more sheets, switch to a heavy-duty or plier-style stapler for better leverage.
Use Advanced Stapling Angles for Binders
Rotating your stapler reduces bulk and improves document functionality.
Staple at a 45-Degree Angle
When binding multi-page reports or booklets, rotate the stapler 45 degrees from the paper edge. Staple near the top-left corner. This technique makes pages flip easier and documents lie flatter in binders, reducing bulk by approximately 30 percent.
Tack Paper to Boards Safely
Only manual staplers with tacking mode can attach paper to corkboards or walls.
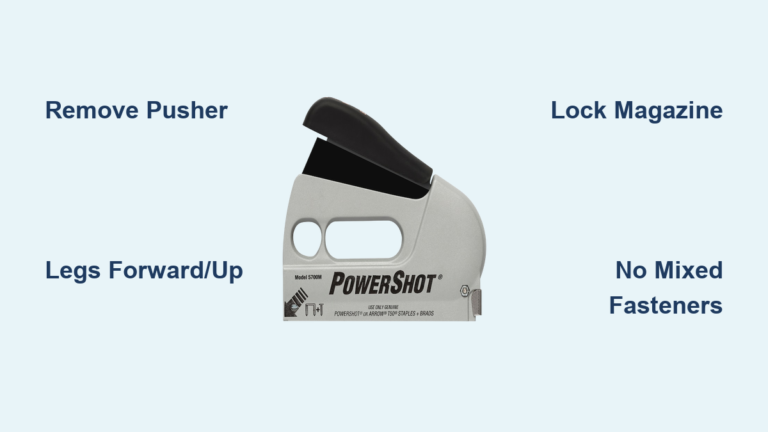
Enable Tacking Mode
Two common methods exist. The silver tab method requires pressing the silver button on the bottom rear, which pops up the tacking head. The slide housing method involves pulling back the top cover to expose the tacking mechanism.
Never attempt tacking with electric staplers.
Tack Paper Securely
Position paper on your corkboard or soft wall. Tape corners lightly if working alone. Place the stapler over the paper edge. Press down firmly until you hear penetration. Repeat at other corners as needed.
Avoid concrete, plaster, or walls with electrical wiring. Use hooks or nails instead for those surfaces.
Troubleshoot Common Stapler Problems
Even with proper technique, issues can occur. Knowing how to address them saves time and frustration.
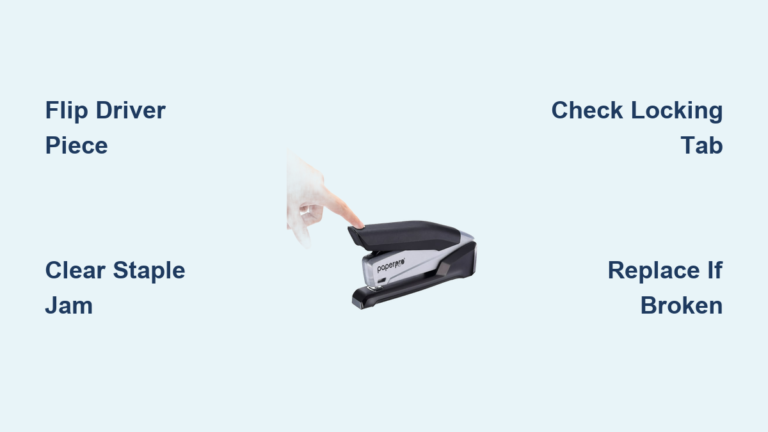
Clear a Stapler Jam
Jams happen when staples misalign or you overload the stack.
Open the staple tray. Use tweezers or needle-nose pliers to remove stuck staples. Check the spring and channel for damage. Reload with correct staples positioned points down. For electric models, always unplug first before clearing jams.
Prevention involves using only recommended staples and never exceeding sheet limits.
Fix Loose or Bent Staples
If a staple doesn’t clinch properly, carefully pry open the legs with a flat tool. Remove the staple completely. Re-staple in the same spot or nearby.
Increasing hand pressure or reducing paper count typically resolves this issue.
Follow Essential Safety Rules
Staplers are simple tools but can cause injury if misused.
Keep Fingers Clear
Never place fingers underneath the stapler during use. The staple gap is dangerous and can cause pain, bleeding, and infection. Supervise children closely around staplers. Never use a stapler as a toy.
Avoid Wrong Materials
Do not staple cardboard, plastic, leather, or fabric unless using a specialty stapler. These materials jam the mechanism or damage the anvil.
Only staple paper with standard office staplers.
Maintain Your Stapler for Long-Term Use
Regular care extends your stapler’s life and prevents jams.
Clean and Inspect Regularly
Wipe the exterior with a dry cloth. Blow out dust with compressed air. Check the anvil for bent staple residue. Replace damaged springs promptly. Store in a dry place to prevent rust.
Prevent Jams Long-Term
Use chisel-point staples for cleaner performance. Avoid dropping the stapler, as impacts misalign internal parts. Never force the stapler when it won’t engage properly.
Users who align paper against a wall report 85 percent neater results compared to freehand stapling.
Pick the Right Staples for Best Performance
Using correct staples prevents jams and ensures secure binding.
Choose Compatible Staple Types
Standard 26/6 staples work for up to 20 sheets. Heavy-duty 23/8 or 23/10 staples handle thick stacks. Chisel-point staples cut cleanly and reduce friction.
Recommended brands include Swingline Speedpoint S.F. 4, Stanley Bostitch B8 Full Strip, and Universal UNV79000 Chisel Point.
Always check your stapler’s manual for compatible staple types before purchasing.
Know When to Upgrade Your Stapler
Sometimes your stapler simply can’t keep up with your needs.
Signs You Need a Better Stapler
Frequent jams despite correct use indicate worn components. Inability to staple more than 10 to 15 sheets reliably means the stapler is undersized. A bent or wobbly anvil requires replacement. Daily stapling of 50 or more sheets demands heavier-duty equipment.
Upgrade options include heavy-duty manual models like the Swingline 160-sheet stapler for thick documents. Electric staplers provide speed and consistency for high-volume work. Plier-style staplers like the Bostitch B8 excel with thick materials.
High-volume users save significant time and reduce hand strain by switching to electric or reinforced models.
Frequently Asked Questions About Using a Stapler
What is the proper way to load staples in a stapler?
Insert staples with points facing downward into the staple tray or channel. For top-load models, lift the rear cover and place the strip in the channel. For back-load models, press the release button, slide out the tray, and insert staples pointed end first. Always ensure staples align with guide rails.
How do I adjust my stapler for temporary binding?
Turn the stapler over and locate the anvil release lever on the bottom. Press it up and rotate the base to select setting B for open clinch. This creates staples with legs bending outward, allowing easy removal without tearing paper. Switch back to setting A for permanent binding.
Why does my stapler keep jamming?
Jams typically occur from overloading the sheet capacity, using incorrect staple types, or loading staples upside down. Clear jams by opening the staple tray and removing stuck staples with tweezers. Always use manufacturer-recommended staples and never exceed the stapler’s capacity.
Can I staple cardboard or plastic materials?
Standard staplers should not be used on cardboard, plastic, leather, or fabric. These materials jam the mechanism and damage the anvil. Use specialty staplers designed for thick materials, or consider glue, clips, or other binding methods for these items.
How do I tack paper to a corkboard?
Use only a manual stapler with tacking mode. Press the silver tab on the bottom rear or pull back the top housing to expose the tacking mechanism. Position paper on the corkboard, place the stapler over the edge, and press down firmly. Never use electric staplers for tacking.
Key Takeaways for Mastering Stapler Use
Using a stapler correctly involves more than simply pressing down. Choose the right stapler type for your task, whether standard manual, heavy-duty, or electric. Load staples correctly with points facing downward, and adjust the anvil setting for permanent or temporary binding as needed.
Align your paper against a wall or desk edge for professional results. Apply firm palm pressure rather than fingertip force, and consider the 45-degree angle technique for binder-friendly documents. Maintain your stapler regularly with cleaning and proper storage, and upgrade when your needs exceed your current model’s capacity.
With the right technique, proper maintenance, and smart staple selection, you’ll achieve clean, secure binding every time while extending your stapler’s lifespan significantly.