Fix Brad Nailer Not Driving Deep Enough
If your brad nailer isn’t driving nails deep enough, you’re not alone. This common issue, where nails remain partially exposed or sit too high, can ruin finishes, weaken joints, and slow down your workflow. Known as nail pop-out or shallow driving, it often stems from simple, fixable causes like incorrect air pressure, wrong nail size, or worn internal parts. Left unaddressed, it leads to rework, material damage, and frustration.
The good news? Most problems can be resolved in minutes with a few quick checks and adjustments. This guide walks you through the top reasons your brad nailer isn’t sinking nails properly and exactly how to fix each one.
Check Nail Size Compatibility
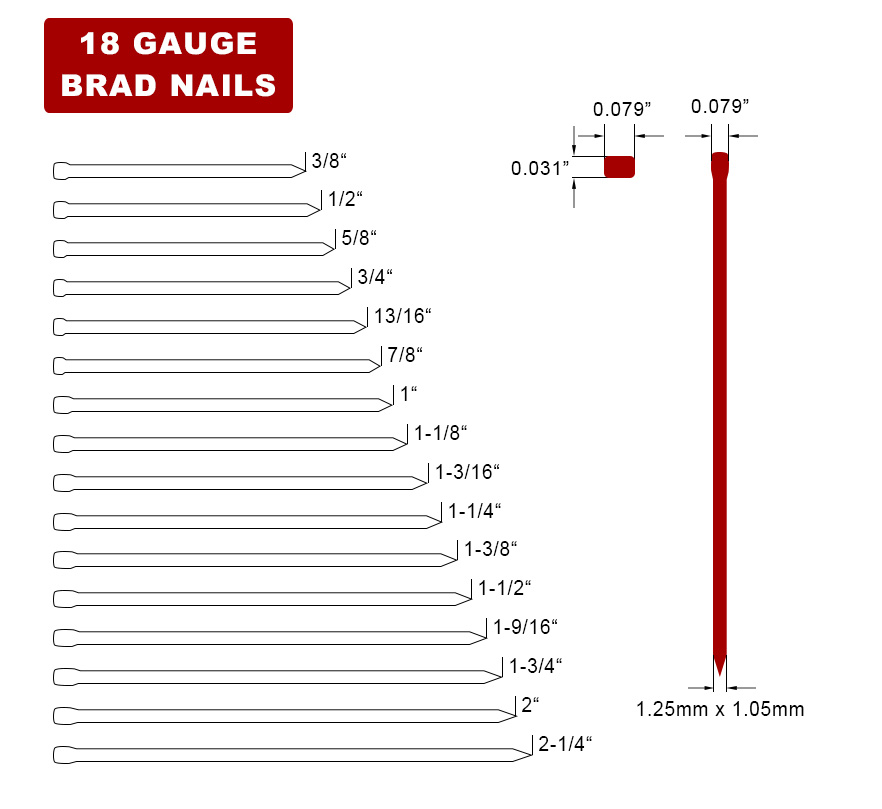
Using the wrong nail size is one of the most frequent causes of shallow driving. Brad nailers are precision tools designed for specific nail lengths and gauges, typically 18-gauge nails between 5/8″ and 2″. If the nails are too long for the tool or material, they won’t fully seat. If they’re too short, the driver blade may not engage them fully, reducing driving force.
Confirm Correct Nail Gauge and Length
Always match the nail gauge and length to your brad nailer’s specifications. Refer to your user manual for approved fastener ranges. For example, a nail labeled “18G x 1” should only be used in a tool rated for that size. Using off-spec nails, even slightly, can cause misfires or weak drives.
Avoid Mixed or Off-Brand Nails
Stick to one brand and batch of nails. Mixing brands or using generic staples can lead to inconsistent feeding and driving depth. Cheap nails may have uneven shanks or heads that don’t align properly in the magazine, causing resistance and weak strikes.
Pro Tip: Test with a fresh strip of manufacturer-recommended nails before troubleshooting further.
Adjust Depth Setting Correctly
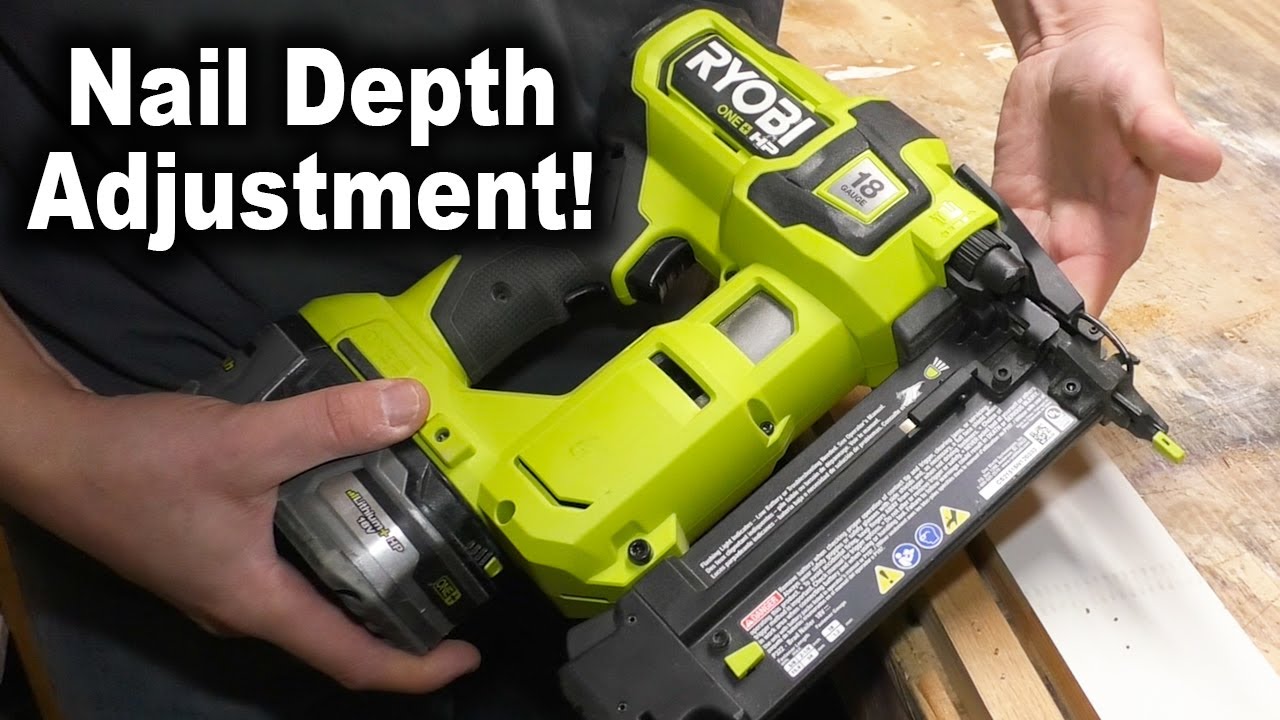
Many brad nailers include a depth adjustment dial or collar that controls how far the nail drives into the material. If this setting is too shallow, the nail won’t sink flush, even with perfect pressure and nails.
Locate the Depth Adjustment
Find the depth control, usually a rotating collar near the nose or a screw on the side of the tool. Turn it clockwise to increase driving force (drive deeper), counterclockwise to reduce it (shallow drive). Make small adjustments, 1/4 turn at a time.
Test on Scrap Material
After adjusting, fire several test nails into the same wood you’re working with. Softwoods like pine need less force; hardwoods like oak require more. Aim for a slight dimple or flush finish, depending on your project.
Warning: Over-tightening the depth setting can damage the tool or split wood.
Verify Air Pressure Levels
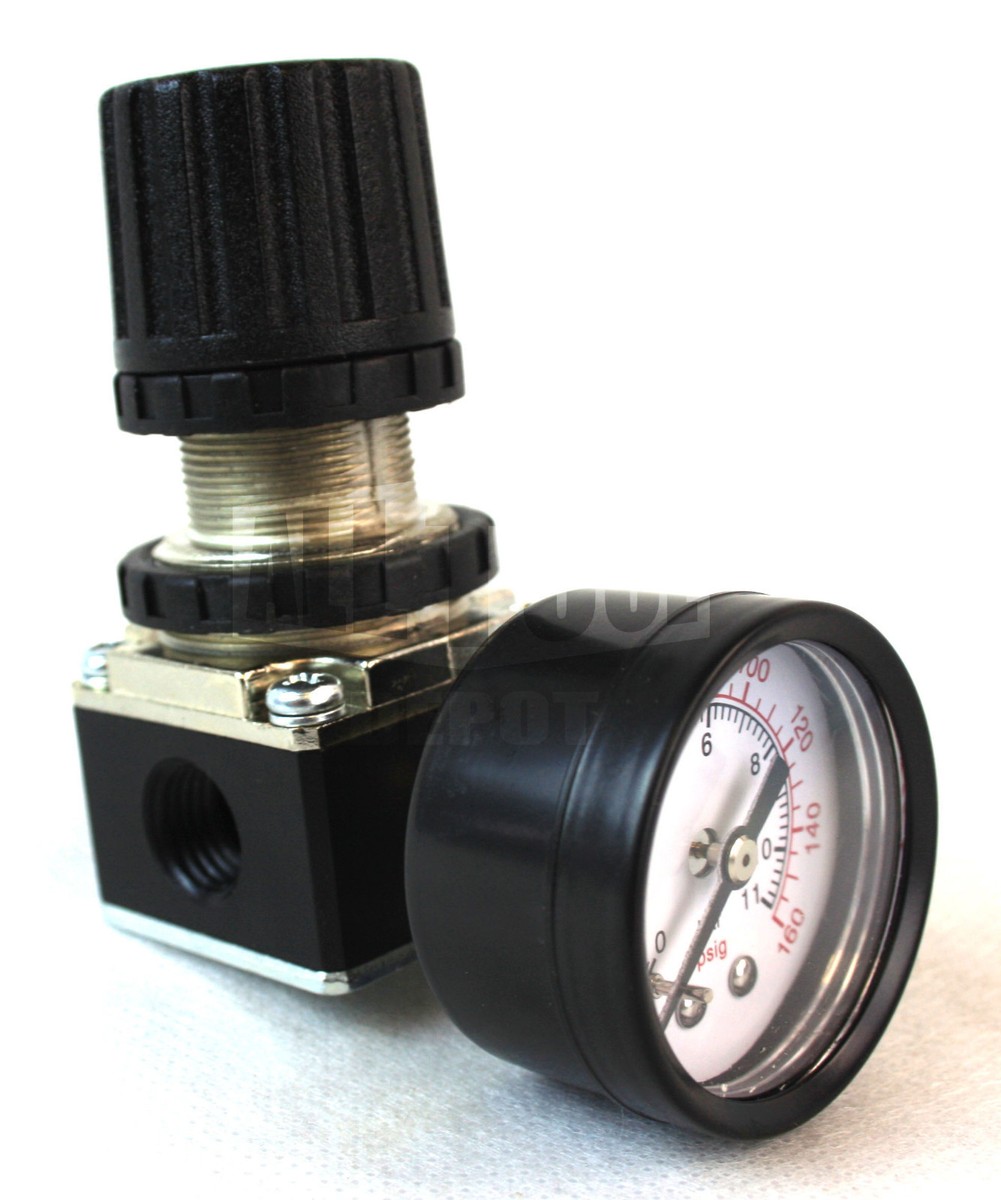
Brad nailers rely on consistent air pressure to deliver full-power strikes. Low pressure is a leading cause of under-driven nails, while high pressure can damage materials and shorten tool life.
Use the Recommended PSI Range
Most 18-gauge brad nailers operate best between 70 and 120 PSI. Check your manual for the exact range. Use an inline pressure gauge (not just the compressor’s gauge) for accuracy. If pressure is below 70 PSI, the driver may not fully cycle.
Test Air Supply Performance
Plug in the hose and check for leaks at connections, kinks in the hose, moisture in the line, and compressor recovery time. If the compressor can’t keep up, the tool loses power on rapid fire. Drain the tank regularly and use a filter-regulator-lubricator (FRL) unit for clean, steady airflow.
Quick Fix: Increase PSI by 5 to 10 increments until nails seat properly, but never exceed the tool’s max rating.
Inspect for Worn O-Rings and Bumpers
Internal wear in the piston assembly, especially damaged O-rings or bumpers, can drastically reduce driving force. These rubber components cushion the air piston’s movement and maintain air seal. When they degrade, air leaks occur, reducing power.
Identify Common Wear Signs
Look for nails that drive inconsistently (some deep, some shallow), a weak hammer sound instead of a sharp crack, and air leaking from the nose or exhaust. Disassemble the nose cap and inspect the bumper (a small rubber plug) and O-rings on the driver blade. Replace if cracked, flattened, or brittle.
Replace Worn Seals Promptly
Buy an OEM replacement kit for your model. Reassembly is usually simple: slide on new O-rings, insert a fresh bumper, and reattach the nose. Lubricate lightly with pneumatic tool oil before reassembly.
Expert Note: Replace O-rings and bumpers every 6 to 12 months with heavy use to prevent performance drops.
Ensure Proper Tool Lubrication
A dry brad nailer suffers from increased friction, leading to sluggish operation and weak nail drives. Pneumatic tools need regular oiling to keep internal parts moving smoothly.
Oil the Tool Daily
Add 3 to 5 drops of pneumatic tool oil into the air inlet before each use. Fire 10 to 15 dry shots into scrap wood to distribute oil through the cylinder. In humid or high-use environments, oil twice daily.
Use the Right Oil Type
Never use motor oil or WD-40. These break down seals or evaporate too quickly. Use only high-quality air tool oil designed for nailers. It resists heat and maintains viscosity under pressure.
Warning: Over-oiling can attract dust and gum up the mechanism. Stick to the recommended amount.
Examine Driver Blade and Muzzle Condition
The driver blade is the metal rod that strikes the nail. If it’s bent, chipped, or worn, it won’t transfer full force. Likewise, a damaged muzzle (nose housing) can misalign the nail or restrict blade movement.
Inspect the Driver Blade
Remove the nose cap and visually check the driver blade. Look for a flattened or mushroomed tip, bending or warping, and deep scoring or pitting. A damaged blade won’t push the nail flush. Replace it with a manufacturer-approved part. Never file or reshape it, as this can throw off balance.
Check Muzzle for Debris and Damage
Clean the muzzle with a brush or compressed air. Remove built-up wood dust, glue, or nail fragments. If the muzzle is dented or cracked, it may misalign the nail or restrict the driver’s travel.
Pro Tip: Keep the muzzle clean after each job to prevent clogs and wear.
Match Nailer to Material Hardness
Even a perfectly tuned brad nailer may struggle if the material is too dense. Softwoods like cedar or pine accept nails easily. Hardwoods like maple or pressure-treated lumber require more force, sometimes beyond a brad nailer’s capability.
Know Your Tool’s Limits
Brad nailers are designed for light trim, cabinetry, and molding, not structural framing or dense hardwoods. If you’re nailing into oak or MDF, consider upgrading to a finish nailer (15- or 16-gauge) for deeper penetration.
Pre-Drill for Dense Materials
When working with very hard wood, pre-drill pilot holes slightly smaller than the nail diameter. This reduces resistance and allows the brad to seat fully without splitting.
Alternative: Use adhesive in addition to brad nails for extra holding power in difficult materials.
Prevent Future Depth Issues
Once you’ve fixed the immediate problem, take steps to avoid repeat issues. Regular maintenance keeps your brad nailer performing like new and prevents downtime.
Follow a Weekly Maintenance Routine
A consistent routine includes:
– Cleaning the magazine and nose
– Checking O-rings and bumper
– Oiling the tool
– Inspecting nails for straightness and quality
– Test firing on scrap wood
Store Properly
Keep the nailer in a dry place. Drain the air hose after use to prevent moisture buildup. Use a protective case to avoid drops or dents.
Use Quality Compressed Air
Install an inline filter to remove water and oil from the air supply. Moisture corrodes internal parts and reduces efficiency. Change filters regularly for best performance.
Frequently Asked Questions About Brad Nailer Depth Issues
Why is my brad nailer not sinking nails all the way?
The most common causes are incorrect nail size, low air pressure, a shallow depth setting, or worn internal parts like O-rings and bumpers. Start by checking your nail specifications and air pressure, then adjust the depth dial before inspecting internal components.
What PSI should I use for a brad nailer?
Most 18-gauge brad nailers operate best between 70 and 120 PSI. Always check your tool’s user manual for the exact recommended range. Using an inline pressure gauge gives you a more accurate reading than the compressor’s built-in gauge.
Can I use any 18-gauge nails in my brad nailer?
No. While gauge must match, length also matters. Using nails longer or shorter than your tool’s rated capacity can cause jamming, weak drives, or shallow seating. Stick to manufacturer-approved nail sizes and brands for consistent performance.
How often should I oil my brad nailer?
Add 3 to 5 drops of pneumatic tool oil into the air inlet before each use. In humid environments or with heavy daily use, oil twice daily. Never substitute motor oil or WD-40, as these can damage seals.
When should I replace O-rings and bumpers?
Replace O-rings and bumpers every 6 to 12 months with regular use, or immediately if you notice inconsistent nail depth, weak strikes, or air leaks from the nose. Always use OEM replacement parts for your specific model.
Will a brad nailer work on hardwood?
Brad nailers can handle softwoods and some hardwoods, but dense materials like oak or maple may cause shallow drives or splitting. For dense hardwoods, consider a finish nailer, pre-drill pilot holes, or use adhesive alongside brad nails.
Key Takeaways for Fixing a Brad Nailer Not Driving Deep Enough

A brad nailer not driving nails deep enough is rarely a lost cause. It’s usually a quick fix that starts with the simplest solutions: verify nail size, adjust the depth setting, and confirm air pressure. If those don’t solve it, move to internal inspections of O-rings, the driver blade, and lubrication. Match your tool to the material at hand, and maintain it on a regular schedule.
Your next step is to grab your scrap wood, run a test fire, and work through this checklist one item at a time. Within minutes, you’ll have your brad nailer delivering clean, consistent results, saving time, materials, and frustration on every job.