How to Oil a Finish Nailer
If your finish nailer starts misfiring or cycling sluggishly, the fix is often as simple as a few drops of oil. Oiling a finish nailer is one of the most essential maintenance tasks for any pneumatic tool, yet it’s frequently overlooked. Without proper lubrication, internal O-rings dry out, seals fail, and metal parts wear down faster than they should. Over time, this leads to poor performance, expensive repairs, or complete tool failure. In extreme cases, running a dry tool can even cause internal combustion from friction heat.
The good news? A few drops of the right oil and about 30 seconds of your time can keep your nailer firing reliably for years. This guide covers exactly when to oil, what oil to use, and how to apply it correctly so you avoid downtime and protect your investment.
Lubrication Frequency Guidelines

Oil Before and After Every Use
Make oiling a habit you never skip. Apply oil before and after every use, even for short tasks. Firing the nailer without lubrication accelerates wear on internal rubber seals. Oiling before use ensures smooth operation from the first shot, while oiling afterward coats components before storage to prevent moisture buildup and corrosion.
Daily Oiling for Regular Use
If you use your nailer daily, apply oil twice per day: once at the start of work and again after lunch or midway through heavy use. High-volume airflow burns off oil quickly, and mid-day reapplication prevents dry cycling that leads to misfires and sluggish actuation.
Oil After Storage Periods
Never pick up a stored nailer and start firing. Always oil it first, even if you oiled it before storage. Oil settles or evaporates over time, and firing a dry tool after weeks of inactivity is a leading cause of sudden seal failure.
Choose the Right Pneumatic Tool Oil

Use Only Approved Pneumatic Oils
Only use oils labeled specifically for pneumatic tools. These products have the correct viscosity and chemical balance to protect seals and lubricate moving parts without causing damage. Recommended brands include:
- Senco Pneumatic Tool Oil
- Paslode Lubricating Oil
- LIQUID WRENCH® Lubricating Oil (excellent for moisture displacement)
These oils are engineered to flow into tight internal spaces and resist being blown out by compressed air.
Cold Weather? Switch to Winter Formula
Below 32°F (0°C), standard oil thickens and won’t circulate properly. This starves internal parts of lubrication and slows tool response. Use a cold-weather-specific oil, such as Paslode Cold Weather Tool Oil, which contains anti-freeze agents to remain fluid in freezing temperatures.
Never Use These Substances
Avoid these common but harmful substitutes. They can destroy your tool:
- WD-40 (dries out seals)
- Motor oil (too thick, gumming risk)
- Compressor oil (not formulated for tool internals)
- Transmission fluid (chemically aggressive to rubber)
These products degrade O-rings, cause leaks, and may lead to dangerous internal combustion under pressure.
Correct Oil Application Steps
Step 1: Power Down and Disconnect
Always disconnect the air hose before oiling. Engage the safety lock and confirm the magazine is empty. This prevents accidental firing during lubrication, a critical safety step.
Step 2: Locate the Air Inlet
Find the air inlet, the metal or plastic nipple where the air hose connects. This is the only correct point for oil application. Do not confuse it with the exhaust port or magazine.
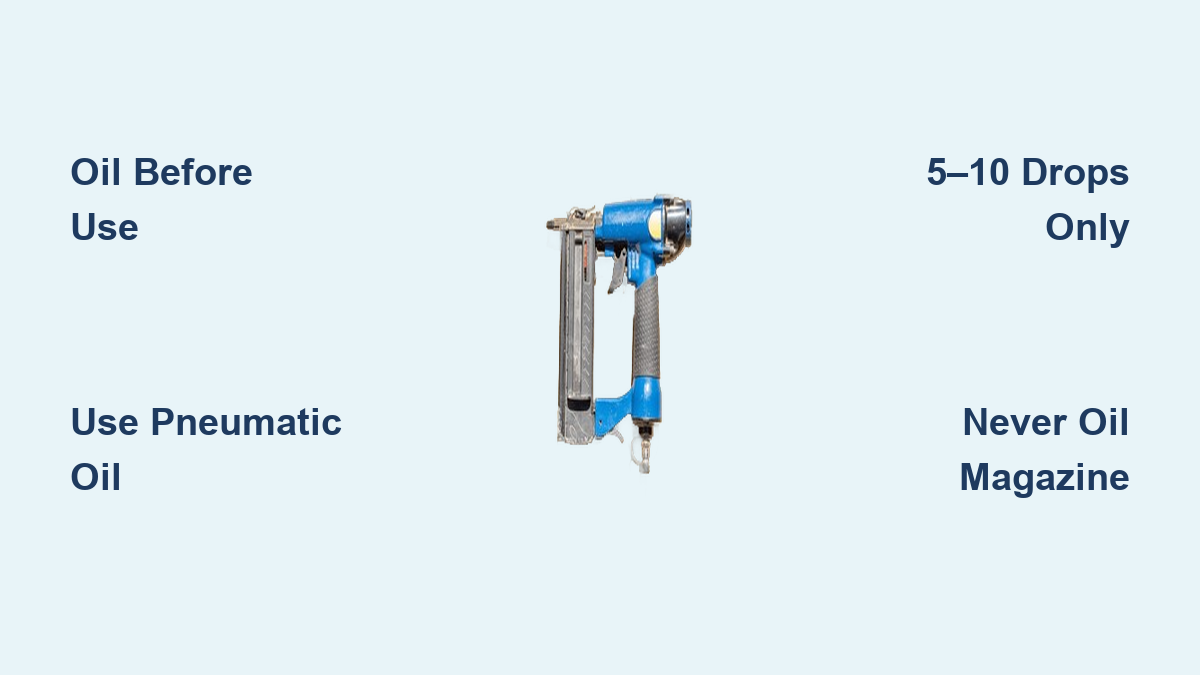
Step 3: Apply 5–10 Drops of Oil
Hold the nailer with the inlet facing up. Using the oil bottle’s precision tip, add 5 to 10 drops directly into the inlet. Too little won’t coat all parts; too much can blow out and create a mess.
Pro Tip: In cold weather or after long storage, use 10 drops. For routine mid-day oiling, 5 drops suffice.
Step 4: Distribute the Oil
Reconnect the air hose. Fire the tool 3 to 5 times into a rag or scrap wood. This cycles the piston and distributes oil throughout the cylinder, seals, and moving parts. You should see a faint mist of oil exit the exhaust, which confirms lubrication is working.
Critical: Never Oil the Magazine
Oil Attracts Dirt and Causes Jams
Applying oil to the nail magazine is a common mistake. Oil collects sawdust, metal shavings, and debris, forming a sticky sludge that blocks nails from feeding properly. This leads to frequent jams and unreliable operation.
Clean the Magazine Instead
If the magazine is dirty, wipe it with a dry cloth or use compressed air to blow out debris. Only lubricate moving external parts (like depth drivers) if specified by the manufacturer, and never with standard pneumatic oil.
Prevent Corrosion and Moisture Damage

Drain the Compressor Daily
Compressed air carries moisture. If not removed, water travels through the hose and into your nailer, mixing with oil and causing rust. Drain your compressor tank every day after use. This simple step protects not just your nailer but all your pneumatic tools.
Use Moisture-Displacing Oil for Storage
Before storing your nailer for more than a few days, apply oil that displaces moisture, such as LIQUID WRENCH®. This forms a protective barrier on internal metal surfaces, preventing corrosion during idle periods.
Install In-Line Filters
Use an in-line air filter or air dryer between the compressor and tool. These trap water and contaminants before they reach the nailer, reducing wear and oil contamination.
Troubleshoot Common Oiling Issues

Nailer Misfiring? Check the Oil First
Misfiring is often the first sign of dry internal components. If nails aren’t driving fully or the trigger feels sluggish, follow these steps:
- Disconnect air.
- Add 10 drops of oil to the inlet.
- Fire the tool 5 times into a safe surface.
- Test again.
If performance improves, poor lubrication was the cause. Make oiling a non-negotiable habit.
Slow Cycling? Likely Low Lubrication
When the piston moves slowly, friction from dry seals is usually to blame. Oil reduces resistance. If oiling doesn’t fix it, check for clogged air passages or worn O-rings.
Air Leaks? Failed Seals from Dry Use
Hissing sounds or weak power often mean O-rings have cracked or shrunk due to lack of oil. Once seals fail, oiling won’t fix it. Rebuilding or replacing the tool may be necessary. Prevention through regular oiling is key.
Tool Won’t Fire After Oiling?
If the nailer stops working right after oiling, you may have used too much oil, causing hydraulic lock. Try disconnecting air, pointing the nose down, and firing a few dry cycles to clear excess. Always use only 5 to 10 drops to avoid this issue.
Maintenance Schedule Summary
| Use Case | Oil Frequency | Drops | Notes |
|---|---|---|---|
| Daily use | Before + after use | 5–10 | Add mid-day if nailing heavily |
| Light use | Before + after | 5 | Even short tasks need oil |
| Cold weather (<32°F) | Before use | 10 | Use cold-weather formula |
| After storage | Before first use | 10 | Always oil after downtime |
| Long-term storage | Before storing | 10 | Use moisture-displacing oil |
Extend Tool Lifespan with Smart Habits
Track Oil Usage and Performance
Professionals should log:
- Hours between oiling
- Misfires per 1,000 nails
- Cold-weather response time
This data reveals which tools need more frequent maintenance and helps compare brand reliability.
Inspect O-Rings During Cleaning
When cleaning your nailer, visually inspect O-rings for cracks, swelling, or brittleness. Healthy seals are pliable and intact. Replace any that show wear before they fail during a job.
Store Properly
Keep your nailer in a dry, temperature-controlled space. Avoid leaving it in vans or sheds where condensation builds. A simple plastic case with a silica gel pack helps prevent moisture damage.
Frequently Asked Questions About Oiling a Finish Nailer
How often should I oil my finish nailer?
Oil your finish nailer before and after every use as the standard rule. For daily professional use, apply oil twice per day: once at the start of work and once mid-day. Always oil after any storage period, even if it was oiled previously.
Can I use WD-40 on my finish nailer?
No. WD-40 is not safe for pneumatic finish nailers. Standard WD-40 dries out rubber seals and O-rings, leading to cracks, leaks, and eventual tool failure. Use only oils specifically labeled for pneumatic tools.
What happens if I don’t oil my finish nailer?
Without oil, internal O-rings dry out and crack, seals fail, and metal components wear prematurely. Symptoms include misfiring, slow cycling, air leaks, and reduced power. In severe cases, friction heat can cause internal combustion.
How many drops of oil should I use?
Apply 5 to 10 drops of pneumatic tool oil directly into the air inlet. Use 5 drops for routine mid-day oiling and 10 drops for cold weather, after storage, or before heavy use. Too much oil can cause hydraulic lock.
Do I need special oil for cold weather?
Yes. Below 32°F (0°C), standard oil thickens and won’t circulate properly. Use a cold-weather formula like Paslode Cold Weather Tool Oil, which contains anti-freeze agents to remain fluid in freezing temperatures.
Should I oil the nail magazine?
Never oil the magazine. Oil attracts sawdust, metal shavings, and debris, creating a sticky sludge that causes nail jams. Clean the magazine with a dry cloth or compressed air instead.
Key Takeaways for Oiling Your Finish Nailer
Oiling a finish nailer takes less time than loading a new strip of nails, but it makes all the difference in performance and longevity. Use only approved pneumatic tool oils, apply 5 to 10 drops to the air inlet (never the magazine), and stick to a consistent before-and-after-use schedule. Drain your compressor daily and use moisture-displacing oil before storage to prevent rust.
Your next step: Grab your pneumatic tool oil, head to your nailer, and make oiling part of your routine starting today. Your tool will fire reliably for thousands of nails to come.