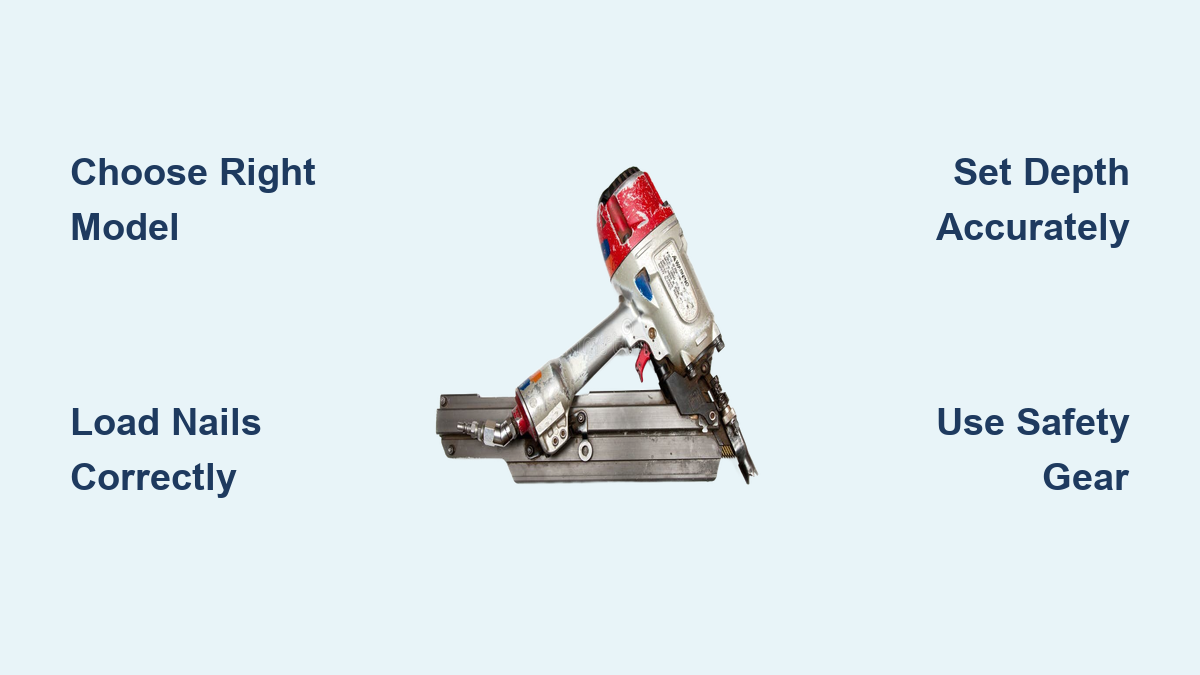
How to Use a Framing Nailer: Quick Steps
A framing nailer can drive nails into lumber faster than any hammer swing, turning hours of wall framing into minutes. But that speed comes with real danger. A framing nailer fires nails with bullet-like force, and one careless moment can cause serious injury. Learning how to use a framing nailer the right way protects both your project and your body.
This guide walks you through everything from choosing the right model to clearing jams and storing your tool safely. You’ll learn which nails to buy, how to set depth accurately, when to use sequential versus bump-fire mode, and the safety habits that keep pros accident-free on the job site.
Choose the Right Framing Nailer for Your Project

Pneumatic vs. Cordless Power Options
Pneumatic framing nailers run on compressed air from a hose-connected compressor. They deliver consistent, high-volume power and remain the top choice for full-day framing jobs. The trade-off is mobility, since the hose limits where you can roam.
Cordless models split into two types. Gas-battery hybrids use a disposable fuel canister plus a rechargeable battery to build pressure before each shot. All-electric cordless nailers run purely on battery power. Both free you from hoses and compressors, making them perfect for roof work, tight corners, or remote decks. Expect a brief delay between shots compared to pneumatic tools.
Stick vs. Coil Magazine Styles
Stick magazines hold straight strips of nails, usually up to 100 per load. They are lighter, simpler to reload, and ideal for standard wall framing.
Coil magazines use a continuous loop of nails wound in a round canister. They hold more fasteners per load, reducing reload stops during sheathing or decking work. Coil nailers are bulkier and cost more, but serious users appreciate the efficiency on big jobs.
Match Magazine Angle to Your Workspace
Framing nailers come in 21°, 28° to 30°, and 34° to 35° angles. Higher angles fit better into tight stud bays and corners common in modern framing. A 21° nailer is bulkier but often pairs with full-round head nails required by code. Always match the magazine angle to your nail type and job access. The wrong angle causes jams and loading problems.
Pick the Correct Nails for Strong, Code-Compliant Builds

Match Nail Length to Lumber Size
Use 3-inch nails for standard 2×4 framing connections. For deeper pockets like 2×6 walls, step up to 3-1/2-inch nails. Nails that are too short won’t penetrate far enough for structural strength. Nails that are too long can punch through the back of the wood. Always check local building codes, since some areas require specific lengths for load-bearing walls.
Choose Shank Diameter Wisely
A 0.120-inch shank drives easily and reduces splitting, making it the best pick for beginners and dry lumber. A 0.131-inch shank offers stronger hold with fewer nails per joint but raises the risk of splitting, especially near board edges. For heavy timber where shear strength matters most, the thicker shank delivers.
Use Ring-Shank Nails for High-Stress Connections
Smooth-shank nails handle basic framing fine. For subfloors, decking, or any high-stress application, ring- or spiral-shank nails grip wood tighter and resist pull-out. Never use smooth nails where code specifies ring-shank. Doing so compromises safety and may fail inspection.
Never Skip Corrosion Protection
Use hot-dipped galvanized nails with pressure-treated lumber. Standard steel nails corrode quickly when exposed to treatment chemicals, causing rust stains and structural failure. In coastal areas, upgrade to stainless steel for maximum protection. Brite (uncoated) nails are only for dry, interior use. Skipping proper coating risks long-term damage even if the build looks solid today.
Set Up the Nailer Safely Before Firing
Load Nails Correctly
Open the magazine latch and insert the nail strip or coil, feeding it into the drive track. Make sure nails face the right direction, usually with heads toward the back. Close the latch securely. A loose or misloaded magazine causes jams. For stick nailers, don’t overfill. For coil models, wind the strip properly to avoid tangles.
Connect Your Power Source
For pneumatic models, attach the air hose to the compressor and tool. Set the regulator to the manufacturer’s recommended PSI, usually 80–120 psi. Low pressure causes misfires. Too high damages the tool. For cordless models, insert a fully charged battery and fresh fuel cell if required. Test fire on scrap wood to confirm power delivery before starting your project.
Start in Sequential Firing Mode
Always begin in sequential mode. Press the safety tip against the wood, then pull the trigger for one nail. This prevents accidental discharges and is safer for learning. Switch to contact (bump-fire) mode only after you gain confidence. Bump-firing speeds up work but increases the risk of double-fires and injuries. Never disable the safety tip to make bump-firing easier. It’s illegal on many job sites and extremely dangerous.
Adjust Depth and Test Fire on Scrap Wood
:max_bytes(150000):strip_icc()/NailingTips-Depth-Guide-5d392aeaaf9d472ea6b8af1eb284f26c.jpg)
Set Nail Depth Properly
Nails should sit about 1/8-inch below the wood surface. This depth avoids interference with sheathing or trim while preserving holding power. Locate the depth adjustment dial, usually on the nose or cylinder. Turn it incrementally and test on scrap wood. If nails stick up proud, increase depth. If they sink too far, reduce it. Recheck depth whenever you switch wood types or nail sizes.
Always Test Before Building
Never start framing on your actual project without testing. Fire 3 to 5 nails into a scrap piece of the same lumber. Check for consistent depth, no splitting, and clean entry with no bending. If nails bend, check alignment or air pressure. If wood splits, reduce depth, switch to smaller-diameter nails, or move fasteners farther from edges.
Fire Nails with Precision and Control
Use Through-Nailing for Straight Joints
For most wall and floor framing, use through-nailing by driving the nail straight into the joint. Position the nailer so the nose is flat against the wood. Press the safety tip firmly, then pull the trigger or bump the tool. Keep the tool square to the surface to avoid angled drives that weaken the connection.
Master Toe-Nailing for Tight Spots
When you can’t access a joint head-on, use toe-nailing by driving nails at an angle. Position the nailer at 30° to 45°. Press the tip down and fire. Stagger nails on opposite sides to prevent splitting. Practice on scrap first. Too steep an angle can cause the nail to exit the back or split the wood. Use thinner shank nails to reduce splitting risk.
Avoid Edge Splitting
Never place nails within 1 inch of a board end or 3/4 inch from an edge unless using engineered connectors. To prevent splitting, stagger nails in a zig-zag pattern when making double-fastener connections. Pre-drill holes in very dry or hardwood if splitting persists. Ring-shank nails require fewer fasteners per joint, which reduces nail density and split risk.
Prevent and Clear Jams the Right Way
Stop Immediately on a Misfire
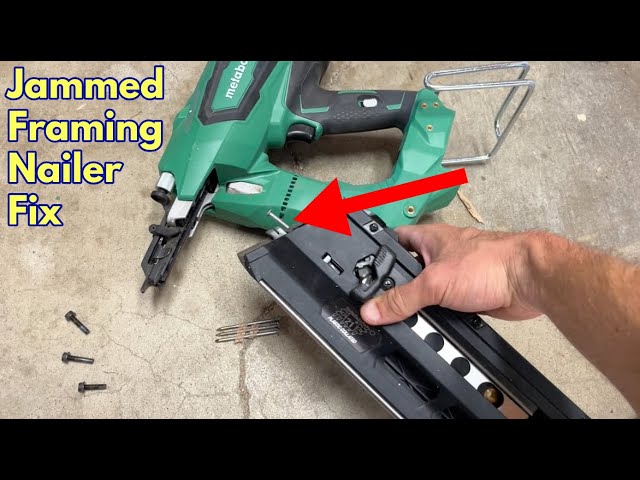
If the nail doesn’t fire or only partially drives, disconnect power right away. Unplug the air hose, remove the battery, or detach the fuel cell. Never try to clear a jam while the tool is powered. A live tool can fire unexpectedly during clearing and cause serious injury.
Follow Jam-Clearing Steps Carefully
Open the magazine or head cover per the manual. Remove any stuck nails with needle-nose pliers. Inspect the driver blade for damage. If bent, replace it. Reassemble and reconnect power only after the jam is fully cleared. Common causes include wrong nail size, dirty magazine, low air pressure, or damaged O-rings.
Reduce Jam Frequency with Simple Habits
Keep the magazine clean by blowing out dust daily. Use only nails specified for your model. Store the tool in a dry place. For pneumatic models, oil the tool as recommended with a few drops into the air inlet. For cordless models, ensure batteries are charged and fuel cells are fresh.
Follow Critical Safety Rules Every Time
Wear Full Protective Gear
Always wear the following PPE:
- ANSI Z87.1 safety glasses to protect against ricochets
- Hearing protection since nailers are loud
- Hard hat on active sites
- Steel-toed boots
- Fitted clothing with no loose sleeves near the trigger
Gloves can help with grip, but avoid bulky ones that reduce control or risk getting caught.
Never Bypass the Safety Tip
The nose safety prevents accidental firing. Never tape it down, remove it, or disable it. Doing so turns the tool into a loaded weapon. Most job sites ban modified tools. If your nailer fires without pressing the tip, stop using it and repair it immediately.
Keep Hands Clear of the Nail Path
Never hold wood with one hand while firing with the other. Use clamps or a second person to stabilize pieces. Keep all body parts away from the nail path. Treat every nailer as loaded, even when you think it’s empty.
Store Safely When Not in Use
Disconnect power and place the tool on a workbench or rack. Never leave it on the ground where it can be kicked or stepped on. Use a safety lock if available. Keep it out of reach of untrained users, especially children.
Maintain Your Framing Nailer for Long Life
Clean After Each Use
Wipe down the tool and blow out dust from the magazine and nose. Sawdust buildup causes jams and wear. For outdoor jobs, clean more frequently, especially after exposure to moisture or treated wood residue.
Oil Pneumatic Models Regularly
Add 2 to 3 drops of pneumatic tool oil into the air inlet daily or every 4 hours of use. This lubricates internal parts and prevents rust. Never use motor oil. It’s too thick and can gum up the mechanism.
Inspect Worn Parts Monthly
Check the driver blade, O-rings, and seals every month. A worn blade causes misfires. Cracked seals reduce power. Replace parts as needed using OEM components. Keeping the tool in good repair ensures reliability and safety over the long haul.
Frequently Asked Questions About Framing Nailers
What PSI should I set my air compressor for a framing nailer?
Set your regulator to the manufacturer’s recommended PSI, typically 80 to 120 psi. Low pressure causes misfires and weak drives. Too high pressure damages internal seals and shortens tool life. Always check your tool’s manual for the exact range.
Can I use clipped-head nails for framing?
Clipped-head nails hold more per magazine but are prohibited by many local building codes due to reduced structural holding power. Verify your local regulations before purchasing or using them. Full-round head nails are code-compliant in most jurisdictions.
How do I stop my framing nailer from splitting wood?
Switch to a smaller diameter shank (0.120″ instead of 0.131″), move nails farther from edges, and stagger fasteners in a zig-zag pattern. Pre-drill holes in very dry or hardwood if splitting persists. Ring-shank nails also reduce the number of fasteners needed per joint.
What should I do if a nail penetrates my skin?
Do not remove the nail in the field. Removal can cause severe bleeding or further tissue damage. Stabilize the area around the nail, call emergency services, and seek immediate medical attention. Keep first aid supplies and emergency contacts on-site at all times.
How often should I oil my pneumatic framing nailer?
Add 2 to 3 drops of pneumatic tool oil into the air inlet daily or every 4 hours of use, depending on your manual’s specifications. Regular oiling lubricates internal parts and prevents rust. Never substitute motor oil, which is too thick and can damage the mechanism.
Is bump-fire mode safe for beginners?
Bump-fire mode is not recommended for beginners. It increases the risk of misfires, double-fires, and accidental injuries. Start with sequential mode to build confidence and control. Switch to bump-fire only after you’ve mastered safe handling and trigger discipline.
Key Takeaways for Using a Framing Nailer Safely
Mastering a framing nailer comes down to three core habits: choose the right tool and nails, set depth accurately on scrap wood first, and never skip safety gear. Start in sequential mode, keep the nose safety engaged, and disconnect power before clearing any jam. These habits build speed without sacrificing control.
Your next step is simple. Pull out your tool’s manual, confirm the recommended PSI or battery specs, and run a test on scrap lumber before your next project. A few minutes of preparation prevents hours of rework and keeps you safe on the job.