How Pneumatic Nailers Work: Quick Guide
You press the nose against a board, pull the trigger, and a nail disappears into the wood with a sharp pop. No battery, no fuel cell, no recoil. That burst of controlled power comes entirely from compressed air, channeled through a precision valve system that cycles in milliseconds. If you have ever wondered how does a pneumatic nailer work, the answer lies in a clever dance of pressure differentials, a sliding piston, and a series of valves that redirect air faster than you can blink.
This guide walks you through every part of the system, the four-phase firing cycle, the air specs your compressor must meet, and the maintenance habits that keep your tool firing thousands of nails without a hiccup. Whether you are a framer, trim carpenter, or DIY enthusiast, understanding the mechanics helps you work faster, troubleshoot smarter, and avoid costly downtime.
The Core Principle: Air Pressure as a Driving Force
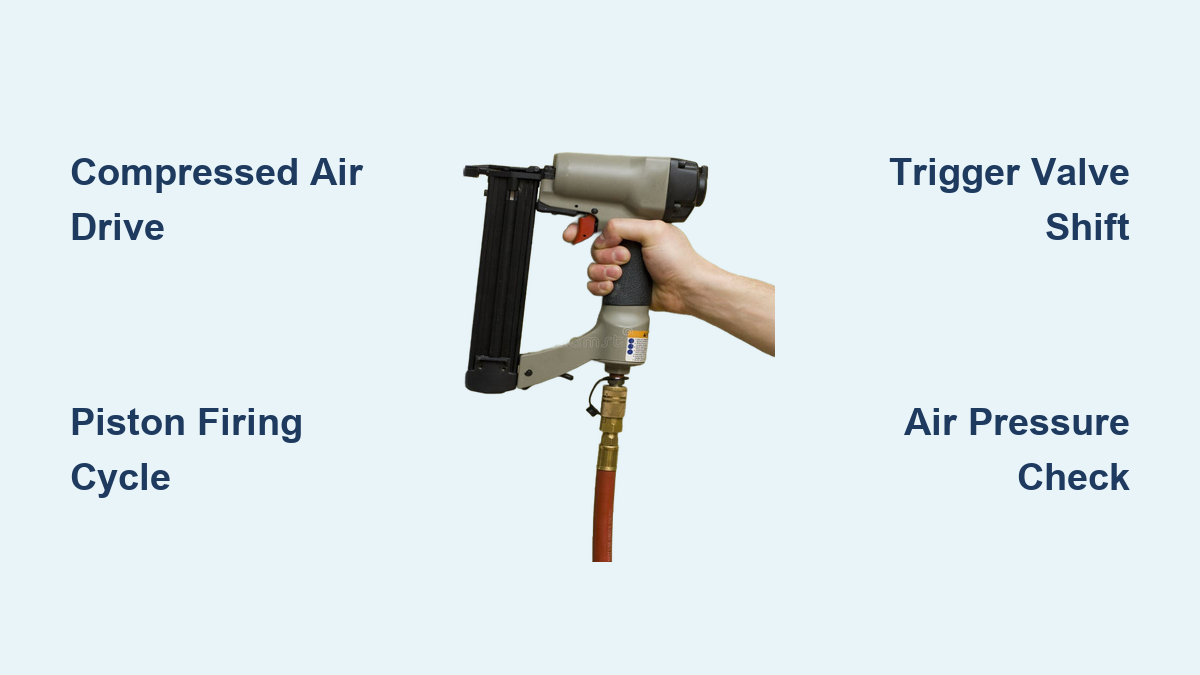
A pneumatic nailer converts stored compressed air into mechanical force. Unlike battery tools that rely on electric motors or gas-powered nailers that burn fuel, pneumatic models use a constant supply of high-pressure air delivered through a hose. The compressor (powered by electricity or gasoline) generates this air and stores it in a tank, typically pressurizing it between 60 and 120 PSI.
Inside the tool, that air is routed through chambers and valves to create pressure imbalances. When pressure above a piston suddenly exceeds pressure below it, the piston slams downward, driving a nail into your workpiece. The cycle reverses when you release the trigger, and the tool resets in a fraction of a second.
Why Compressed Air Wins on the Job Site
Air-powered tools offer several practical advantages over their battery and gas counterparts:
- Lighter weight since there is no internal motor or battery pack
- Higher firing rates, with some models cycling up to 20 times per second
- Simpler mechanics with fewer parts that can break
- Lower heat buildup because air dissipates thermal energy efficiently
- Consistent performance as long as the compressor delivers steady pressure
The trade-off is portability. You are tethered to a compressor and hose, which makes pneumatic nailers less convenient for remote work or quick repairs far from a power source.
Key Components Inside a Pneumatic Nailer
Every pneumatic nailer contains a set of external and internal parts that work together to convert air pressure into nail-driving force.
External Power Delivery
The nailer itself does not generate power. It receives it from outside.
- Air Compressor: Produces compressed air using pistons or rotary pumps, then stores it in a tank under pressure.
- Air Hose: Carries high-pressure air from the compressor to the nailer’s inlet fitting.
- Air Reservoir (Internal): Some nailers include a small chamber that buffers airflow, ensuring consistent pressure during rapid firing.
Internal Driving Mechanism
Inside the tool’s cylindrical body, a precision assembly channels air to drive the piston.
- Piston: A heavy sliding mass that moves up and down inside the cylinder. Its weight delivers the striking force.
- Driver Blade: A long metal shaft attached to the piston. Its tip strikes the nail head directly.
- Head Valve (Valve Plunger): Controls when high-pressure air enters the top of the cylinder. It acts as the gatekeeper for the firing cycle.
- Trigger Valve: Activates the head valve by venting pressure from above it when you pull the trigger.
- Return Air Chamber: Captures air displaced during the downward stroke and stores pressure to power the reset.
- Exhaust Ports: Release spent air after each cycle, producing the characteristic “pop” sound.
- Seals and O-Rings: Prevent air leaks around the piston and valves. Most use metric-sized rubber rings rated at 60 to 70 durometer hardness.
- Spring Mechanism: In some models, a coil spring assists in resetting the head valve or returning the piston, though most modern designs rely on air pressure alone.
Every component must seal and time correctly. A clogged passage or worn O-ring can stop the tool cold.
The Four-Phase Firing Cycle Explained
The entire firing sequence happens in less than 0.05 seconds. Here is how each phase unfolds.
Phase 1: Resting State (Ready to Fire)
Before you pull the trigger, the tool sits in a balanced, pressurized state.
- High-pressure air flows continuously into the nailer.
- It surrounds the bottom of the head valve and also feeds the area above it through the trigger valve.
- A small spring pushes the head valve downward, sealing it shut.
- This blocks air from entering the top of the main cylinder.
- Pressure below the piston remains higher, keeping the piston and driver raised at the top.
The tool is cocked and ready, like a spring held under tension.
Phase 2: Trigger Pull (Valve Shift)
Pulling the trigger disrupts the pressure balance instantly.
- The trigger valve closes the air supply to the top of the head valve.
- It simultaneously vents that chamber to the atmosphere.
- Pressure above the head valve drops to near zero.
- High-pressure air still pushes upward from below the head valve.
- The pressure differential forces the head valve to rise, unsealing the main air passage.
The gate is now open, and compressed air rushes toward the piston.
Phase 3: Downward Stroke (Nail Fired)
With the head valve lifted, high-pressure air floods the top of the cylinder.
- Air pressure above the piston now exceeds pressure below it.
- The piston is forced downward at high velocity.
- The driver blade moves with it, striking the nail head.
- The nail launches into the material at speeds up to 1,400 feet per second.
As the piston descends, it compresses air beneath it. That air escapes through small holes in the cylinder wall and flows into the return air chamber, building pressure for the reset.
Phase 4: Return Stroke (Reset)
After firing, the tool resets automatically when you release the trigger.
- The trigger valve reopens the air supply to the top of the head valve.
- Pressure rebuilds above the head valve, pushing it back down with spring assistance.
- This cuts off the air supply to the top of the piston.
- Trapped air above the piston exhausts through vents.
- High pressure in the return air chamber now dominates, pushing the piston back up to its starting position.
The cycle is complete, and the tool is ready for the next shot.
Air Requirements: PSI and CFM Specifications
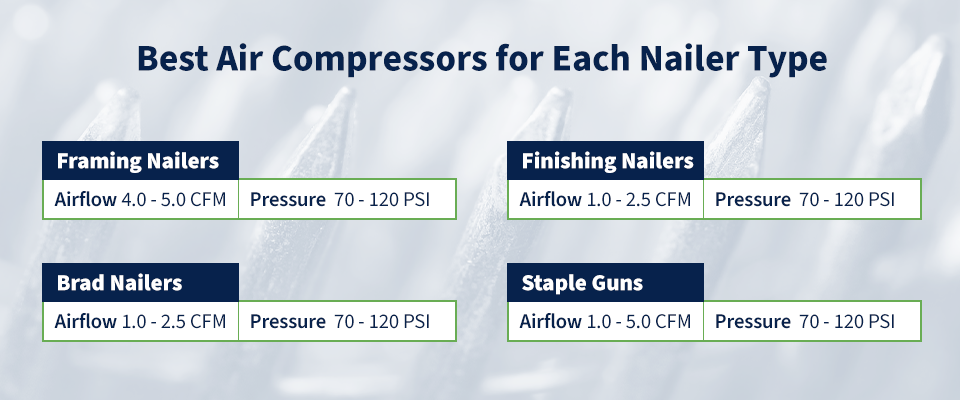
Your compressor must deliver enough pressure (PSI) and airflow (CFM) to keep the nailer cycling smoothly. Mismatched specs cause weak strikes, stalled resets, and inconsistent depth.
| Nailer Type | CFM Requirement | Operating PSI | Best For |
|---|---|---|---|
| Finish Nailer | 0.5 to 1.0 CFM | 60 to 90 PSI | Trim, molding, cabinetry |
| Palm Nailer | 1.0 to 2.0 CFM | 70 to 90 PSI | Tight spaces, framing connectors |
| Flooring Nailer | ~2.0 CFM | 90 PSI | Hardwood installation |
| Roofing Nailer | 2.2 to 2.5 CFM | 90 PSI | Shingles, sheathing |
What Happens with Insufficient Air?
- Low PSI results in weak strikes and nails that do not fully seat.
- Low CFM causes the tool to stall during rapid firing or reset slowly.
- Undersized compressor tanks deplete too fast, creating pressure drops mid-job.
Pro Tip: Choose a compressor with a tank of at least 6 gallons and a CFM rating higher than your nailer’s requirement for continuous, uninterrupted use.
Maintenance Habits That Extend Tool Life

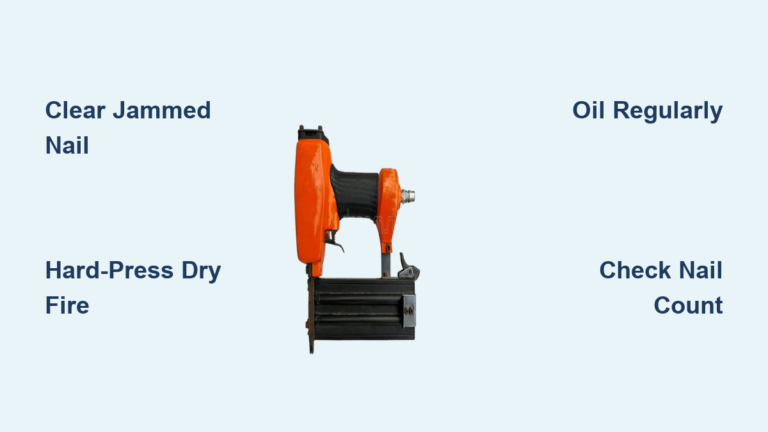
Even the best pneumatic nailer fails without routine care. Most breakdowns trace back to poor lubrication, clogged passages, or worn seals.
Lubrication Schedule
- Frequency: Every 8 hours of continuous use, or daily on active job sites.
- Oil Type: Use air tool oil (silicone-based) or 3-in-1 oil. Never substitute motor oil.
- Method: Add 3 drops into the air inlet before connecting the hose.
- Oil-Free Tools: Even “oilless” models benefit from occasional lubrication to protect seals and reduce friction.
Skipping oil leads to increased wear, heat buildup, and premature seal failure.
Cleaning and Inspection
- Disassemble the tool periodically to clear internal debris.
- Pay special attention to small vent holes, since a blocked return-air passage is a leading cause of piston failure.
- Inspect O-rings and seals for cracks, swelling, or hardening.
- Check the driver blade for bending or mushrooming at the tip.
Warning: Always disconnect the air hose and depressurize the tool before servicing.
Common Problems and Fixes
Piston Will Not Return
- Cause: Clogged return-air hole, worn piston seal, or damaged head valve.
- Fix: Disassemble, clean the return chamber, and replace worn seals.
Weak or Inconsistent Firing
- Cause: Low compressor PSI, leaking seals, or insufficient lubrication.
- Fix: Verify compressor output, oil the tool, and inspect for air leaks.
Continuous Air Leak from Exhaust
- Cause: Damaged head valve seal or debris preventing the valve from seating.
- Fix: Clean or replace the head valve and associated O-rings.
Pneumatic vs. Battery Nailers: Which Should You Choose?

Both technologies have their place, and neither has fully replaced the other.
Pneumatic Strengths
- Faster firing rates and more consistent depth control
- Lighter tool weight with no battery attached
- Lower upfront cost per tool
- Longer runtime when paired with an adequate compressor
Battery-Powered Strengths
- No hose or compressor required
- Greater mobility for remote work or elevated tasks
- Faster setup on small jobs
Bottom Line: Pneumatic nailers dominate high-volume, stationary work where speed and consistency matter most. Battery models fill the gap when portability outweighs raw performance.
Safety and Environmental Notes
Protect Yourself on the Job
- Always wear safety glasses and hearing protection.
- The exhaust pop can exceed 90 decibels, loud enough to cause hearing damage over time.
- Nails travel at 1,400 feet per second, so treat every nailer as if it is loaded.
- Use sequential triggers on framing nailers to prevent accidental double-fires.
Environmental Impact
- The tool itself produces zero emissions since it only uses compressed air.
- Compressor emissions depend on the power source, with electric models being the cleanest option.
- There are no batteries to dispose of, reducing long-term waste.
Frequently Asked Questions About Pneumatic Nailers
What PSI Should I Run My Pneumatic Nailer At?
Most pneumatic nailers operate between 60 and 90 PSI. Check your tool’s manual for the exact range, and set your regulator to the middle of that window for optimal performance. Running too low causes weak drives; running too high accelerates wear on seals.
Can I Use a Pneumatic Nailer Without a Compressor?
No. Pneumatic nailers require a constant supply of compressed air from an external compressor. If you need cordless convenience, consider a battery-powered nailer instead, though it will not match the firing speed or consistency of a pneumatic model.
How Often Should I Oil My Pneumatic Nailer?
Apply 3 drops of air tool oil into the air inlet every 8 hours of continuous use, or once per workday on active job sites. Even “oilless” tools benefit from occasional lubrication to extend seal life and reduce internal friction.
Why Does My Nailer Leak Air from the Exhaust?
Continuous air leaking from the exhaust usually points to a damaged head valve seal or debris preventing the valve from seating fully. Disassemble the head valve area, clean out any contamination, and replace worn O-rings to restore a proper seal.
How Fast Can a Pneumatic Nailer Fire?
High-performance pneumatic nailers can complete up to 20 firing cycles per second in rapid-fire mode. Sequential-trigger models fire one nail per trigger pull, which is slower but safer for precision work.
What Size Compressor Do I Need for a Framing Nailer?
A framing nailer typically requires 2.0 to 2.5 CFM at 90 PSI. Choose a compressor with a tank of at least 6 gallons and a CFM rating slightly above your tool’s requirement to avoid pressure drops during continuous use.
Key Takeaways for Mastering Pneumatic Nailer Mechanics
:max_bytes(150000):strip_icc()/BradNailercutaway20copy-2e052d67201e4700bd0670e8496907c1.jpg)
Understanding how a pneumatic nailer works transforms you from a casual user into a confident troubleshooter. At its core, the tool is a brilliant application of pressure differentials, using controlled air imbalances to drive a piston at incredible speeds. Every component, from the head valve to the return air chamber, plays a precise role in that four-phase cycle.
To keep your nailer firing reliably for years:
– Oil it daily with air tool oil.
– Match your compressor’s PSI and CFM to the tool’s requirements.
– Clean air passages and replace worn seals before they cause failures.
– Wear hearing and eye protection every time you pull the trigger.
Now that you know the mechanics behind the burst of compressed air, you will work smarter, diagnose problems faster, and get more life out of your tool.