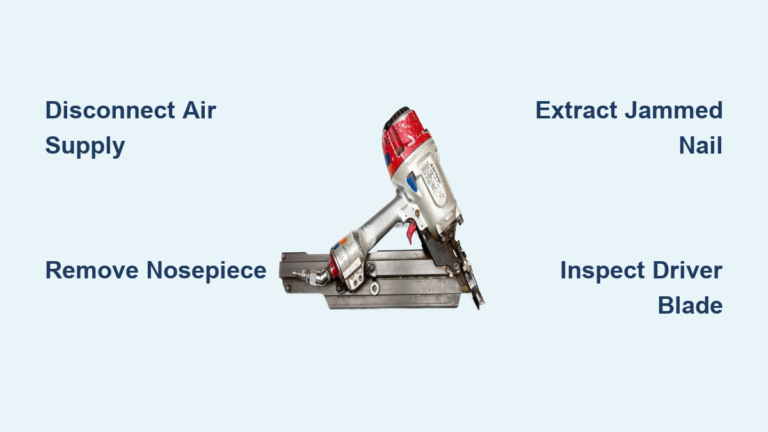
Fix Porter Cable Framing Nailer Leaking Air
Your Porter Cable framing nailer hisses nonstop from the exhaust, even when you’re not pulling the trigger. The compressor runs fine, pressure builds normally, but no nails drive. Instead, a steady stream of air escapes and renders the tool useless. This frustrating issue is one of the most common problems Porter Cable framing nailer owners face, and it almost always points to a single failed component: the top cover seal. The repair is simple, costs under $20, and requires only a screwdriver. You can restore full function without special tools or advanced mechanical skills.
This guide walks you through diagnosing the exact cause of your Porter Cable framing nailer leaking air, replacing the faulty seal step by step, and preventing future leaks. You’ll learn what to look for, what to avoid, and how to keep your nailer firing reliably for years.
Identify the Air Leak Source
Confirm Continuous Exhaust Leak
When your Porter Cable framing nailer leaks air constantly from the exhaust, even while sitting idle, the problem is internal. Normal operation only vents air during the firing cycle. A continuous flow means compressed air is bypassing the main valve through a failed seal. This is not a trigger issue, a lubrication problem, or a clogged port. It is a mechanical failure inside the valve chamber.
The leak persists whether you pull the trigger, press the nose against wood, or leave the tool untouched. This steady exhaust flow eliminates external hose leaks or trigger valve issues and points directly to the top cover seal or, in older models, the diaphragm.
Rule Out Compressor and Hose Issues
Before opening the tool, verify your air supply is sound:
– Check the compressor pressure gauge for proper output (typically 70–120 PSI)
– Inspect hose connections for hissing sounds or loose fittings
– Disconnect the hose and listen for leaks at the coupler
If the compressor holds pressure and the hose is tight, the problem lives inside the nailer. A working compressor paired with a dead tool and constant exhaust leak confirms internal air bypass, most likely through the top seal.
Distinguish From Intermittent Leaks
Not all leaks indicate the same problem:
– Intermittent leak: Air escapes only during firing, which is normal
– No fire, no leak: Likely a mechanical jam or driver issue
– Constant exhaust leak: Failed top seal or diaphragm
Only continuous airflow without firing points to seal degradation. This symptom appears across multiple Porter Cable framing nailer models and is almost always resolved by replacing internal seals.
Inspect the Top Cover Seal

Remove the Top Cover
The top cover hides the main failure point. To access it safely:
1. Disconnect the nailer from the air supply
2. Press the trigger to release any residual pressure
3. Use a screwdriver to remove the four screws securing the top cover
4. Carefully lift the cover straight off to avoid damaging internal parts
Place screws on a magnetic tray or small container so nothing gets lost. Work in a clean, well-lit area where you can easily spot small debris.
Locate the Circular Seal (Collar)
Under the top cover, you will see a circular rubber gasket (often called a collar) seated in a groove. This seal isolates the main valve chamber. Over time, it dries out, cracks, and crumbles, especially if the tool sat unused for months.
Inspect it closely:
– Look for visible cracks or missing chunks
– Check if it feels brittle or powdery
– Note any debris sitting in the sealing groove
A degraded seal cannot maintain pressure, allowing air to escape directly through the exhaust port.
Check for Gasket Debris
Broken pieces of the old seal often remain lodged in the housing. Use a flashlight and tweezers or a small plastic pick to remove every fragment. Even tiny bits can prevent the new seal from seating properly. Wipe the groove with a clean cloth to ensure a smooth, debris-free surface. This step is critical. Incomplete cleaning is a common reason repairs fail and leaks return.
Replace the Failed Seal
Use a Rebuild Kit
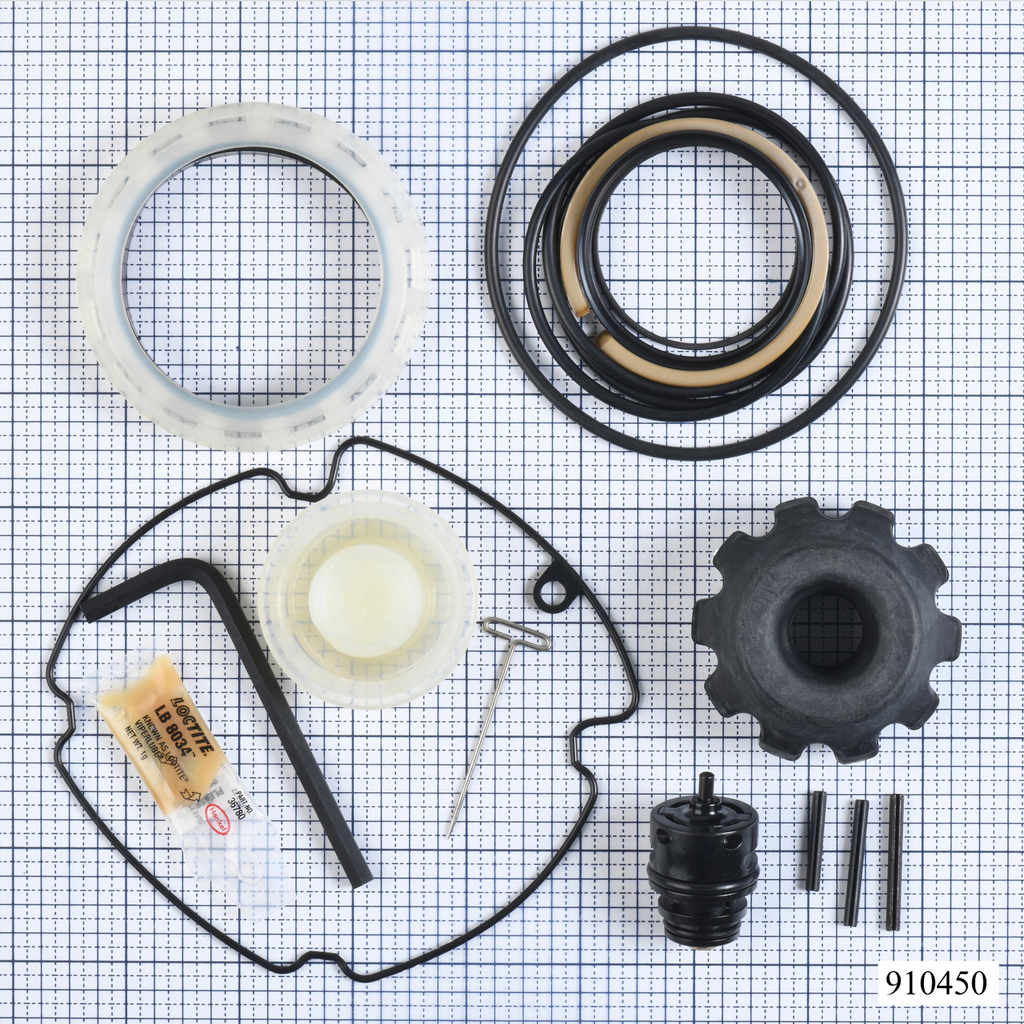
Purchase a Porter Cable-specific rebuild kit. A typical kit includes:
– New top cover gasket (the key fix)
– Additional O-rings and seals
– Replacement trigger (optional)
– Plastic diaphragm (for older models)
You don’t need every part. If your trigger works properly, reuse it. Focus on the circular collar, as it is the most likely culprit. Kits cost under $20 and are available from hardware stores or online retailers.
Install the New Gasket
- Take the new circular seal from the kit
- Align it with the groove in the top cover housing
- Press it in evenly, ensuring full contact around the entire ring
- Avoid stretching or twisting the rubber
The seal should sit flush without gaps. Misalignment allows air to still leak past. Apply a small amount of air tool oil to lubricate the seal before closing. This helps it seat properly and extends its life.
Lubricate Moving Parts
Apply 2–3 drops of air tool oil to:
– The driver blade
– Valve surfaces
– Any O-rings or sliding components
Use only pneumatic tool oil. Never substitute motor oil, WD-40, or silicone spray, as these will damage rubber seals. Over-oiling attracts dust and can cause clogs, so a light coat is all you need to keep seals flexible and reduce wear.
Reassemble and Test

Reattach the Top Cover
- Position the cover carefully over the housing
- Insert the four screws by hand first to avoid cross-threading
- Tighten them evenly in a crisscross pattern
- Do not over-tighten, as this can warp the housing or crush the new seal
Snug is enough. Your goal is even pressure across the seal, not maximum torque.
Test for Air Leaks
Reconnect the hose and power on the compressor:
1. Set pressure to 90–100 PSI
2. Let the tool sit idle for 30 seconds. No air should escape
3. Press the nose against a board and pull the trigger
4. Listen for sharp firing sounds and check for brief exhaust pulses
If air still leaks continuously, disassemble and verify:
– The new seal is fully seated in its groove
– No debris remains in the housing
– Screws are tight but not stripped
A properly sealed tool vents air only during firing.
Verify Nail Driving Function
Load a strip of nails and fire into scrap wood:
– Each trigger pull should drive a nail cleanly
– The tool should reset smoothly between shots
– No hesitation or weak strikes should occur
If it fires correctly with no leak, the repair is complete.
Address Diaphragm Failure in Older Models

Identify the Plastic Diaphragm
Some older Porter Cable models use a plastic diaphragm instead of a metal valve. It sits beneath the top cover and controls airflow. Even with regular oiling, this part can crack over time. If replacing the top seal doesn’t stop the leak, inspect the diaphragm:
– Look for hairline cracks
– Check for warping or stiffness
– Replace it if any damage is visible
The rebuild kit usually includes a new diaphragm, which you can swap in the same way as the seal.
Replace and Re-Test
Install the new diaphragm following the kit instructions. Reassemble, lubricate, and test again. If both seal and diaphragm are fresh, the leak should stop. This dual failure is rare but possible in tools stored for long periods.
Prevent Future Air Leaks
Oil After Every Use
Apply 2–3 drops of air tool oil into the air inlet after each use. This keeps internal seals supple and prevents drying. Never skip oiling, even if the tool seems to work fine. Lack of lubrication is the fastest path to seal failure.
Use the Nailer Regularly
Tools that sit idle for months are far more prone to seal failure. Use your nailer at least once a month, even briefly. Firing a few nails circulates oil and keeps seals conditioned. For long-term storage, apply extra oil and store the tool in a dry place.
Inspect Seals Periodically
Every 3–6 months, remove the top cover and check:
– Seal flexibility
– Presence of cracks
– Debris in the housing
Catching wear early saves you from a complete failure mid-project. Replacing a slightly worn seal is far easier than troubleshooting a dead tool on the jobsite.
Store Properly
Keep the nailer in a climate-controlled area. Avoid damp garages or hot sheds where temperature swings degrade rubber faster. Hang the tool or store it upright in a case to prevent dents or warping.
Avoid Common Repair Mistakes
Don’t Skip Cleaning
Failing to remove all old gasket debris is the top reason repairs fail. Leftover fragments create gaps that allow air to bypass the new seal. Use a toothbrush or plastic pick. Never use metal tools on the sealing groove, as they can scratch the surface. Wipe with isopropyl alcohol if needed.
Don’t Over-Tighten Screws
Stripped screws and warped covers are common repair mistakes. Tighten just until resistance increases. Use a Phillips #2 screwdriver with good tip contact. If screws spin freely, the threads are damaged. Replace the housing or use thread locker to secure them.
Don’t Use the Wrong Oil
WD-40, motor oil, and silicone spray will damage seals. Only use pneumatic tool oil formulated for air tools. It won’t gum up or degrade rubber components.
Don’t Reuse Worn Seals
Even if the old seal looks “mostly okay,” replace it. Once rubber starts to crumble, it will fail again soon. Rebuild kits are inexpensive, so always install fresh seals for a reliable repair.
Frequently Asked Questions About Porter Cable Framing Nailer Air Leaks
Why is my Porter Cable framing nailer leaking air but not firing?
A constant air leak with no firing almost always means the top cover seal has failed. This seal isolates the main valve chamber, and when it deteriorates, compressed air bypasses the valve and escapes through the exhaust before pressure can build to drive a nail.
How do I know if the leak is from the seal or the trigger?
If air leaks continuously whether or not you pull the trigger, the seal is the problem. Trigger issues typically cause different symptoms, like the tool not firing at all or firing only intermittently. A steady exhaust leak with a functional trigger points to internal seal failure.
Can I fix a leaking Porter Cable nailer without a rebuild kit?
You can try, but finding the exact replacement seal without a kit is difficult. Rebuild kits are inexpensive, widely available, and include all the parts you need. Trying to improvise with generic O-rings rarely provides a lasting fix.
How often should I oil my framing nailer to prevent leaks?
Add 2–3 drops of air tool oil after every use or at minimum before each day of operation. Regular oiling keeps seals flexible and is the single best way to prevent the drying and cracking that leads to leaks.
What pressure should I run my Porter Cable framing nailer at?
Most Porter Cable framing nailers operate best between 70 and 120 PSI, with 90–100 PSI being ideal for most applications. Running too low can cause misfires, while excessive pressure accelerates seal wear.
Key Takeaways for Fixing Your Porter Cable Framing Nailer Air Leak
A Porter Cable framing nailer leaking air is almost always fixed by replacing the top cover seal. The repair takes 15–20 minutes, costs under $20, and requires only a basic screwdriver. Start by confirming the leak is constant (not just during firing) and that your compressor and hose are functioning properly. Remove the top cover, clean out all old gasket debris, install a new seal from a rebuild kit, lubricate with air tool oil, and reassemble.
If the leak persists after seal replacement, check the plastic diaphragm on older models. Regular oiling after each use and periodic operation prevent future seal failure. Don’t replace the entire tool when a $15 rebuild kit can restore it to like-new performance. Pick up a rebuild kit today and get your nailer back on the job.