Fix Senco Framing Nailer Leaking Air
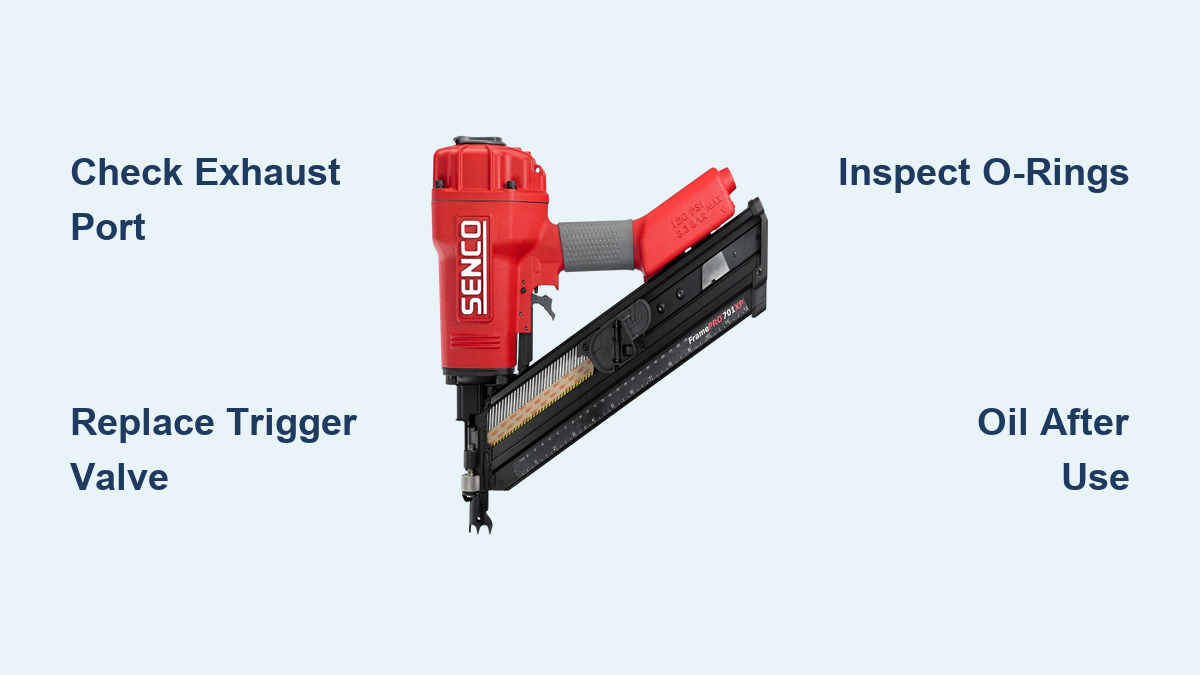
A Senco framing nailer leaking air can bring any project to a grinding halt. Whether you own an SN60, FramePro, or older SN325 series, air leaks reduce driving power, cause misfires, and drain your compressor. The most common culprits are dried-out O-rings, a worn trigger valve, or internal component displacement, especially in tools stored for months without oiling. The encouraging news is that nearly every leak is fixable with the right diagnosis and a few replacement parts.
This guide walks you through pinpointing the leak source, replacing the faulty component, and performing a full rebuild if needed. You’ll also learn the maintenance habits that keep your Senco running reliably for decades. By the end, you’ll know exactly how to restore full performance and prevent future breakdowns.
Pinpoint the Leak Location Before Disassembly
Before opening your nailer, locate exactly where air is escaping. Different leak points point to specific failures, and accurate diagnosis saves hours of wasted teardown. Always start with a live pressure test at normal operating pressure (80–120 PSI), then listen systematically near key zones. Your ears and a methodical approach are the best diagnostic tools available.
Listen for Hissing at Three Critical Zones
Focus your attention on these primary areas:
- Exhaust port hiss when the tool is pressurized but not firing almost always indicates a leaking trigger valve assembly. This is one of the most frequent failure points on Senco nailers.
- Air leaking from the top of the cylinder suggests degraded O-rings or a damaged piston bumper. In older tools stored for long periods, these rubber seals often harden or turn to goo.
- Hissing near the trigger may point to a cracked housing or worn internal seals within the valve body.
For silent confirmation, apply a drop of soapy water to suspected areas. Bubbles will reveal even small leaks. Never disassemble the entire tool until you’ve isolated the zone.
Check the Driver Pin for Overtravel
If your nailer fires two to three times then stops, inspect the driver pin. A pin stuck in the down position means the piston isn’t retracting, often due to piston overtravel or bumper erosion.
- Manually push the driver blade down. If it protrudes more than 0.3 inches from the nose, overtravel is likely.
- This condition prevents the internal air circuit from resetting, causing the tool to lock up and leak air continuously.
- The root cause is usually a worn two-piece bumper or incorrect reassembly after a prior repair.
This symptom often appears in tools stored without oiling. Ask yourself whether the nailer sat unused for months before the problem started.
Rule Out Air Supply Problems First
Before tearing down the nailer, verify your compressor and hose setup.
- Test with another pneumatic tool. If it also underperforms, the issue may be low pressure or moisture contamination.
- Install a water separator on your air line. Wet air corrodes internal seals and accelerates O-ring failure.
- Check fittings and hoses for cracks. A leak here mimics tool failure.
Dry, clean, stable air is essential. Even a perfectly rebuilt Senco will fail prematurely without it.
Replace the Faulty Trigger Valve Assembly

The trigger valve is the most frequent source of exhaust port leaks. When its internal seals degrade, air escapes continuously instead of being directed to fire the piston. This causes weak strikes, failure to reset, and wasted compressor output. Replacing the entire assembly or rebuilding it with a seal kit is usually faster and more reliable than patching old seals. The job takes 20 to 30 minutes and doesn’t require a full teardown.
Remove and Inspect the Valve Safely
Always unplug the air hose and release pressure before starting.
- Locate the trigger valve, which is typically a cylindrical unit behind the trigger.
- Remove the retaining pin or screw securing it.
- Pull the assembly out carefully.
Inspect the rubber seals and internal piston for these warning signs:
- Cracks, swelling, or mushy texture
- Discoloration from using ATF instead of air tool oil
- Sticking when pressed manually
If any seal looks compromised, replacement is necessary. Don’t attempt to re-lubricate old seals; they’ve lost elasticity permanently.
Install New Seals or a Complete Assembly
You have two repair options:
- Replace just the seals using a Senco trigger valve repair kit. This is cost-effective if the housing is intact.
- Swap the entire unit with an OEM or compatible replacement. This works best for recurring leaks or damaged housings.
Reassembly tip: Lubricate new seals with Senco air tool oil only. Never use silicone or ATF, as incorrect lubricants cause swelling and early failure. Once installed, reconnect air and test for exhaust leaks before full use.
Fix Air Leaks at the Top of the Tool

Air escaping from the top cap area almost always means failed O-rings or piston bumper issues. These components seal the cylinder head and ensure proper piston return. When they degrade, especially after long storage, the piston loses its air cushion and leaks under pressure. The fix requires removing the top cap but is straightforward. Ignoring this leak leads to power loss and eventual piston damage.
Replace Degraded Cylinder O-Rings
Remove the top cap by unscrewing the retaining ring.
- Inspect the large O-ring around the cylinder bore. If it’s cracked, flattened, or gooey, replace it immediately.
- Check smaller seals near the valve stem. These are often overlooked but can leak.
- Use only OEM-spec O-rings. Generic hardware store rings fail quickly under high pressure.
Apply a light coat of air tool oil before reassembly. Over-tightening the cap can pinch seals, so snug is sufficient.
Upgrade to a Single-Piece Piston Bumper
Early Senco models like the SN325 and SN60 used a two-piece green rubber bumper. These wear fast and are prone to misalignment.
- Replace both pieces with a modern single-piece bumper compatible with your model.
- If keeping the two-piece design, ensure both sections are present and seated correctly. Missing one causes overtravel.
- A worn bumper allows the piston to hit metal-to-metal, damaging the cylinder and reducing retraction force.
After replacement, manually push the piston down. It should retract fully and smoothly.
Perform a Full Rebuild for Chronic Leaks
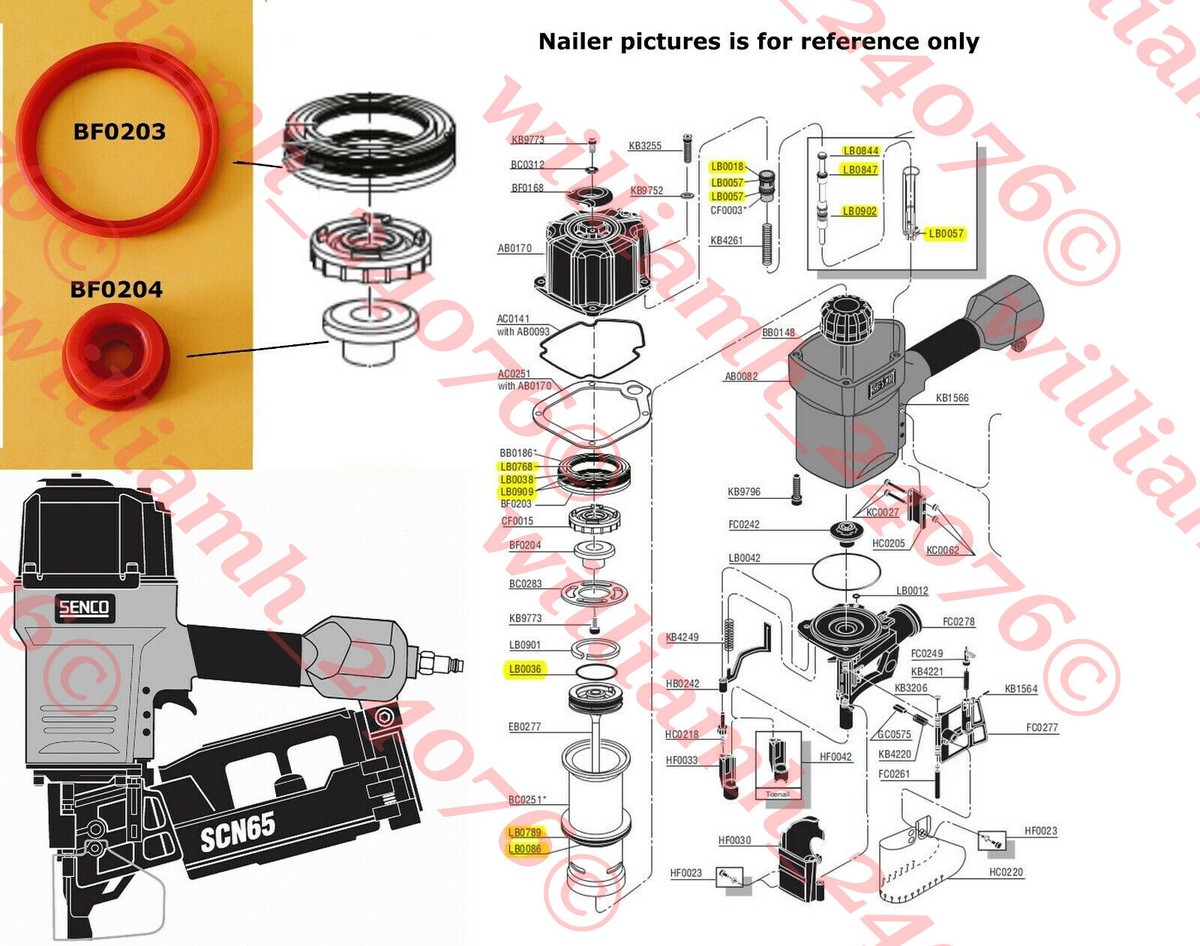
If leaks persist after targeted fixes, a complete teardown and rebuild is essential. Chronic leaks usually mean multiple seals have failed or a prior repair was done incorrectly. A full rebuild replaces every O-ring, Teflon washer, and rubber seal, restoring factory-level performance. It also lets you inspect for dislodged parts or incorrect assembly that sabotage function.
Disassemble and Clean All Components
- Remove the magazine, nose cap, and driver blade.
- Take off the cylinder head and piston assembly.
- Extract the trigger valve and interlock components.
Use mineral spirits or brake cleaner to remove old oil, debris, and gummed residue, especially around the interlock and valve areas.
- Critical: Clean the air passages thoroughly. Clogged ports disrupt airflow and mimic seal failure.
- Use compressed air to dry all parts. Never reassemble a damp tool.
Replace All Seals with a Complete Rebuild Kit
Buy a complete Senco rebuild kit for your specific model. These include all O-rings, Teflon washers, the piston bumper, and valve seals.
Replace every rubber and Teflon part, even if some look fine. Some components like BF0205 are only available from one supplier, so verify fit before assembly. Avoid substituting hardware store parts because precision matters at these tolerances.
Follow the Exploded Diagram Exactly
Senco tools are sensitive to assembly order. Download the official exploded diagram for your model and compare your parts to it.
- Watch for extra components not shown in the diagram, such as added bumpers below specific part numbers.
- Look for square rings replaced with O-rings, which is a sign of a prior improper rebuild.
- A former Senco factory technician warns that no parts should be below certain reference components. Adding spacers in these areas causes leaks and jams.
Reassembly errors are a top cause of tools that seem fixed but still don’t work properly.
Prevent Future Leaks with Proper Maintenance
Prevention beats repair every time. Most Senco air leaks stem from neglect, not design flaws. Tools that fail after six years of light use often simply lacked post-job oiling. High-quality pneumatic nailers can last 25 years or more with proper care. The key habits are regular lubrication, dry air, and smart storage.
Oil Before and After Every Use
- Before use: Add three to five drops of Senco air tool oil into the air inlet.
- After use: Repeat this step. It’s critical for tools stored for weeks or months.
- During long jobs: Oil again after four hours of continuous use.
Run one or two nails through the tool after oiling to distribute oil internally. Never use ATF or motor oil. These degrade rubber seals and cause swelling.
Install a Water Separator
Moisture in the air line causes rust, seal swelling, and internal corrosion.
- Buy a water separator and install it between your hose and nailer.
- Drain it daily if you use the tool frequently.
- This simple add-on prevents the majority of premature failures.
Dry air is non-negotiable for tool longevity.
Store Your Nailer with Oiled Seals
For occasional users, follow these storage tips:
- Always oil the tool before storing.
- Store in a dry, temperature-stable place.
- Fire a nail every few months to keep seals conditioned.
Tools that sit dry for a year often develop multiple leaks on restart. Oil prevents this entirely.
Frequently Asked Questions About Senco Framing Nailer Air Leaks
Why is my Senco framing nailer leaking air from the exhaust port?
Exhaust port leaks almost always point to a failing trigger valve assembly. The internal seals degrade over time, allowing air to escape continuously instead of firing the piston. Replacing the trigger valve seals or the entire assembly typically resolves this issue.
Can I use ATF instead of air tool oil in my Senco nailer?
No. ATF and motor oil cause rubber seals to swell, discolor, and fail prematurely. Always use manufacturer-recommended air tool oil. Incorrect lubrication is one of the fastest ways to destroy a pneumatic tool.
How often should I oil my framing nailer?
Oil before and after every use. During extended jobs, apply more oil every four hours. If you store the tool for any length of time, always oil before putting it away to prevent seals from drying out.
What causes the driver pin to stick in the down position?
A stuck driver pin usually indicates piston overtravel caused by a worn or missing bumper. Early Senco models used a two-piece rubber bumper that erodes over time. Replacing it with a modern single-piece bumper usually solves the problem.
Is it worth rebuilding an older Senco nailer?
If parts are still available, rebuilding is often worthwhile. Older models like the SN70, M1, and SN325 were built to last decades. However, if key parts like certain discontinued components are unavailable, upgrading to a newer model may save time and frustration.
Should I install a water separator on my air line?
Yes. A water separator costs around $20 and prevents moisture-related damage like rust, seal corrosion, and internal contamination. This single device prevents the majority of premature pneumatic tool failures.
Key Takeaways for Fixing Your Senco Framing Nailer Leak
A Senco framing nailer leaking air is almost always repairable with the right approach. Start by identifying the leak source, whether it’s the exhaust, top cap, or trigger area, then replace the faulty seals or valve assembly. For recurring issues, invest in a complete rebuild kit and follow the exploded diagram exactly during reassembly.
Prevention is equally important. Oil before and after every use, install a water separator on your air line, and store the tool with conditioned seals. These simple habits take seconds but prevent hours of downtime and costly repairs.
Your next step: Gather your air tool oil, connect your nailer to the compressor, and perform the pressure test described above. Once you’ve located the leak, you’ll know exactly which section of this guide to follow. With proper diagnosis and care, your Senco can deliver reliable framing performance for decades to come.