Fix Framing Nailer Jammed Issue
A framing nailer jammed mid-project can stop your entire workflow. Whether you are framing walls, installing subflooring, or building roof trusses, a stuck nail or frozen trigger brings progress to a halt. Even brand-new nailers can fail on the first use due to debris, bent nails, or incorrect air pressure. The good news is that most jams clear in under 10 minutes with basic tools and the right technique.
This guide shows you exactly how to safely clear a jammed framing nailer, inspect internal parts for damage, and prevent future jams. You will learn the correct order of steps, what to look for during inspection, and when it makes more sense to call the manufacturer rather than dig deeper into the tool yourself.
Disconnect the Air Supply Before Doing Anything Else
Disconnect the nailer from your air compressor before touching the tool. This is the single most important step in the entire repair process. Pneumatic tools store energy in compressed air, and residual pressure in the chamber can fire the driver blade unexpectedly. Even if the tool appears dead, the firing mechanism may still hold tension behind a jammed nail.
Confirm the Tool Is Fully Depressurized
After pulling the hose off the inlet, take a few extra seconds to verify safety:
– Squeeze the trigger to bleed off any trapped air
– Gently shake the tool and listen for loose movement
– Check that the hose is fully detached and not still supplying pressure
Never skip this step, even for a quick glance inside the nosepiece. A single accidental discharge can cause serious injury.
Remove the Nosepiece to Access the Jam

With the air supply disconnected, your next move is exposing the jammed nail. The nosepiece (also called the nose cap) is the front housing that guides nails into the workpiece. Most framing nailers secure this piece with either screws or a quick-release latch.
Identify Your Fastener Type
Check the side or front of the nose for:
– Two or more screws (typically 3/16″ or 1/4″ hex head)
– A sliding latch or lever that releases the nose
Use the correct screwdriver or hex wrench for your model. Place the screws in a small container so they do not get lost during the repair.
Slide the Nose Assembly Off
Once the fasteners are loose, gently pull or slide the nosepiece forward off the magazine channel. Note the orientation of any seals, alignment pins, or springs so reassembly goes smoothly. Some models require a slight twist to release internal fittings.
Extract the Jammed Nail
With the nose open, you can now see and reach the stuck nail. Take your time here and avoid forcing anything.
Pull the Nail Out with Needle-Nose Pliers
Grab the nail near the head with needle-nose pliers and pull straight out along the path it traveled. If the nail feels wedged tight:
– Rock it slightly side to side to break it loose
– Avoid twisting, which can damage the magazine rails or driver blade channel
Handle Deeply Lodged Nails Carefully
If the nail sits too deep for pliers to grip, try one of these methods:
– Slide a small flathead screwdriver behind the nail and gently push forward from the driver blade area
– Use a wooden dowel to push the nail out without scratching metal surfaces
Never strike a metal tool with a hammer to drive out a nail. This can deform the driver blade or damage the cylinder, turning a simple jam into a costly repair.
Inspect the Driver Blade, Magazine, and Firing Path
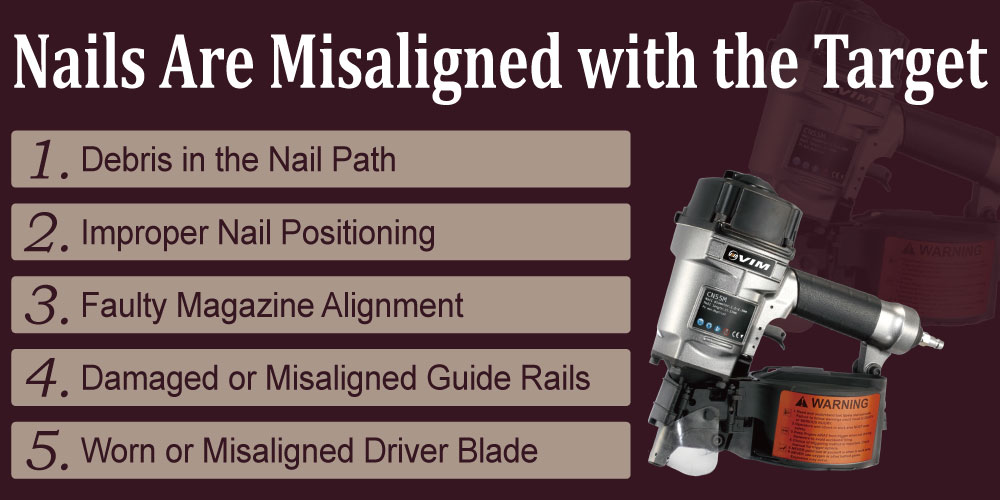
Pulling out the jammed nail solves the immediate problem, but skipping inspection often leads to repeat jams on the next strip of nails. Take a few minutes to check the critical components.
Check the Driver Blade for Damage
The driver blade is the metal rod that drives nails into wood. Look for:
– Visible bends, warping, or dull edges
– Pitting, scoring, or rust on the shaft
– Smooth, free movement inside its channel
A bent blade will not retract fully between shots, which causes nails to jam against the driver tip. Replace the blade if you spot any bending or heavy wear.
Examine the Magazine and Nail Strip
Slide the nail strip out and inspect it closely. Look for bent nails, broken collation, or strips that no longer sit flat in the channel. Wipe the magazine rails with a lint-free cloth to remove sawdust and metal shavings. Reload a fresh strip and confirm the nails feed forward smoothly when you cycle the tool by hand.
Verify the Firing Mechanism Path
Look into the chamber where the driver blade travels. No debris should block the path, and the blade should drop slightly under its own weight when released. Check for cracked seals, loose fittings, or any signs of air leakage around the cylinder head. Misalignment at this point will stop the tool from cycling properly even after the jam is cleared.
Clean and Lubricate All Moving Parts
Dirt buildup and dry seals cause a large percentage of framing nailer jams. A quick clean and oil session restores smooth operation and helps prevent the next jam.
Wipe Down Every Accessible Surface
Use a lint-free cloth to remove dust, sawdust, and grime from:
– The nosepiece cavity
– Magazine rails and feed pawl
– Driver blade shaft
– Trigger linkage and pivot points
Avoid using solvents, brake cleaner, or WD-40 inside the tool unless your manufacturer specifically approves them.
Apply Pneumatic Tool Oil the Right Way
Add 2 to 3 drops of non-detergent pneumatic tool oil to:
– The driver blade shaft
– The magazine feed mechanism
– The trigger pivot point
Pneumatic tool oil is formulated to keep seals supple without attracting dust. Motor oil, household lubricants, and WD-40 leave residue that gums up internal parts. A small amount goes a long way; over-oiling creates sludge and attracts debris.
Reassemble the Nailer and Run a Test Sequence

Once the inspection and lubrication are done, put the tool back together carefully and test it before loading any nails.
Reattach the Nosepiece Securely
Align the nosepiece with the magazine channel and slide it back into place. Tighten screws evenly and do not overtighten, since this can crack plastic housings. For latch-style models, confirm the lock clicks firmly into position.
Perform a Dry Fire Test First
Before loading nails:
– Reconnect the air supply and set the regulator to the correct PSI
– Point the nose at a safe, sacrificial surface (scrap wood)
– Pull the trigger without any nails loaded
The driver blade should snap forward crisply and retract smoothly. Listen for any hissing sounds that indicate air leaks.
Load Fresh Nails and Fire Into Scrap Wood
Insert a new strip of nails and fire several shots into scrap lumber. Watch for full nail depth, consistent air discharge with each shot, and reliable cycling. If the tool jams again immediately, repeat the inspection or contact the manufacturer, especially if the nailer is still under warranty.
Diagnose Why the Jam Keeps Happening
If you cleared a jam and another one appears shortly after, the root cause has not been addressed. Work through these common culprits before assuming the tool is broken.
Rule Out Dry Firing Damage
Firing without nails in the chamber (called dry firing) can bend the driver blade, crack the piston seal, or damage O-rings. Even a single dry fire can cause lasting harm. If you have dry-fired the tool recently, internal damage is a likely cause of repeated jams.
Check the Air Pressure Setting
Most framing nailers require between 70 and 120 PSI. Too little pressure results in incomplete firing cycles and nails that hang up in the nose. Too much pressure accelerates wear on seals and can cause misfires. Use an in-line regulator and check your compressor gauge before each work session.
Confirm You Are Using the Right Nails
Mismatched nails are a leading cause of recurring jams. Verify:
– Gauge: Typically .113″ or .131″
– Angle: 16°, 21°, or 34° depending on your model
– Length: Within the tool’s specified range (usually 2″ to 3.5″)
– Collation type: Plastic, wire, or paper compatible with your nailer
A 21° nailer will not reliably feed 34° strips, even if the nails are similar in size. The strip geometry is different, and the nails bind in the magazine.
Know When to Stop and Call the Manufacturer
Some problems go beyond a quick DIY fix. Continuing to disassemble or forcing repairs can void your warranty or cause additional damage.
Seek Professional Service for These Issues
Stop troubleshooting and contact the manufacturer or a qualified repair shop if:
– The driver blade is visibly bent or cracked
– Air leaks from the body, handle, or trigger
– The piston will not cycle after cleaning
– The trigger feels loose, stuck, or broken
– The tool jams repeatedly even after thorough cleaning
Internal repairs often require specialized tools, replacement parts, and experience with pneumatic systems.
Use Warranty Coverage Whenever Possible
If your nailer is new and the jam appeared without heavy use, the tool may be defective. Most major brands cover framing nailers with a limited warranty that includes free repair or replacement. Contact the manufacturer with your model number, serial number, and proof of purchase. Avoid advanced disassembly before reaching out, since opening the tool further can void coverage.
Prevent Future Framing Nailer Jams
A few smart habits will keep your nailer running smoothly and reduce downtime on every job.
Use Quality Nails from Trusted Brands
Cheap collated nails often have inconsistent head sizes, bent shafts, and weak glue that breaks apart inside the magazine. Stick with reputable brands such as Simpson Strong-Tie, DeWalt, Bostitch, or Paslode. Inspect each strip before loading and discard any strips with bent or damaged nails.
Oil the Tool Before Every Use
Add 2 to 3 drops of pneumatic tool oil into the air inlet before each work session, then fire 5 to 10 dry shots to distribute the oil through the internal channels. Wipe away any excess oil that drips from the nose. Daily lubrication keeps seals supple and dramatically reduces friction-related jams.
Store and Handle the Nailer Properly
Avoid dropping the tool or banging it against hard surfaces, since impacts can knock internal parts out of alignment. Store the nailer in a dry location to prevent rust on the driver blade and magazine rails. A padded case protects the tool during transport between job sites.
Tools to Keep in Your Nailer Repair Kit
Having the right tools on hand turns a jammed nailer into a 10-minute interruption rather than a trip back to the shop.
Essentials for Every Kit
- Needle-nose pliers for nail extraction
- Screwdriver set or hex wrench set for nosepiece screws
- Small flathead screwdriver for prying stubborn nails
- Wooden dowel for pushing nails without scratching metal
- Lint-free shop cloth for cleaning internal parts
- Non-detergent pneumatic tool oil
Helpful Extras
- Bright LED work light for inspecting dark cavities
- Compressed air to blow dust out of the magazine
- Phone camera to photograph disassembly steps
- Magnetic tray to keep screws from getting lost
Frequently Asked Questions About Framing Nailer Jams
Why does my brand new framing nailer keep jamming?
New nailers can jam from manufacturing debris, a bent nail in the first strip, or incorrect air pressure settings. If the tool jams repeatedly right out of the box, contact the manufacturer for warranty service. The tool may be defective and eligible for free repair or replacement.
Can I fix a jammed framing nailer without disconnecting the air?
No. Always disconnect the air supply before inspecting or repairing a framing nailer. Working on a pressurized pneumatic tool risks accidental firing and serious injury. Squeeze the trigger after disconnecting to bleed off any residual pressure.
What PSI should I set my framing nailer to?
Most framing nailers operate between 70 and 120 PSI. Check your owner’s manual for the exact range. Too low causes incomplete firing and jams; too high accelerates wear and can damage seals. Use an in-line regulator for consistent pressure.
How do I remove a nail that is stuck deep inside the nose?
Use a small flathead screwdriver to gently push the nail forward from behind the driver blade, or use a wooden dowel to avoid scratching metal surfaces. Never hammer on a metal tool to drive out a nail, since this can bend the driver blade or damage the cylinder.
How often should I oil my framing nailer?
Add 2 to 3 drops of pneumatic tool oil into the air inlet before each use, then fire several dry shots to distribute the oil. Daily lubrication keeps seals supple and significantly reduces jam frequency. Avoid motor oil or WD-40, which leave residue that attracts debris.
When should I take my framing nailer to a professional?
Seek professional service if the driver blade is bent, air leaks from the body, the piston will not cycle, or the tool jams repeatedly after thorough cleaning. Also contact the manufacturer if the tool is under warranty, since DIY disassembly can void coverage.
Key Takeaways for Clearing a Jammed Framing Nailer
A jammed framing nailer is one of the most common frustrations on a framing job, but it is rarely a serious problem when you follow the correct steps. Disconnect the air supply, remove the nosepiece, and extract the stuck nail with needle-nose pliers or a wooden dowel. Inspect the driver blade, magazine, and firing path for damage, then clean and lubricate every moving part before reassembly. Test the tool with a dry fire and a few shots into scrap wood before returning to your project.
If jams keep returning, check your air pressure, nail compatibility, and lubrication habits. Most repeat jams trace back to one of those three causes. For new tools with persistent problems, contact the manufacturer right away. Your next step is to assemble the basic repair kit listed above so you can clear the next jam in minutes and keep your project moving forward.