
How to Oil a Framing Nailer
A dry framing nailer won’t last. Skip the lubrication, and you’ll watch your piston, O-rings, and cylinder wear down fast, leading to sluggish cycling, air leaks, or total tool failure. The fix? Three seconds and one drop of oil. The correct spot to oil a framing nailer is the air inlet port, where your air hose screws in. This guide covers exactly where, when, and how to oil your nailer, plus the best oils, ideal frequency, and pro tricks to avoid messy oil spray and frustrating jams.
Oil at the Air Inlet Port (Not Anywhere Else)
Why the Inlet Matters
Every pneumatic framing nailer is designed to be oiled through the air inlet connection, the threaded fitting where your air hose attaches. Oil enters here, mixes with compressed air, and travels deep into the tool’s internal passages. As air cycles, it spreads the oil across the piston, cylinder walls, seals, and O-rings, the parts that take the most punishment.
Never oil the exhaust, magazine, or trigger. Those areas aren’t built to receive lubricant, and adding oil there invites dust, gumming, and mechanical problems.
Finding the Inlet on Your Nailer
On most framing nailers, the air inlet sits at the base of the handle or near the rear of the tool. It’s a threaded metal port, often covered by a small dust cap. Before you oil, disconnect the air hose to release any pressure. Pop off the cap and look inside to confirm the opening is clean and clear.
Visual cue: A small brass or chrome threaded fitting marks the inlet. Many models include a recessed hole inside where oil drops go.
Best Oils for Framing Nailers (And What to Avoid)

Top Lubricant Picks
Not all oils are equal. Stick with lightweight, low-viscosity formulas that flow easily through tight air passages.
| Oil Type | Why It Works |
|---|---|
| Air tool oil | Purpose-built for pneumatic tools; resists gumming and evaporation |
| 3-in-1 oil | Easy to find and effective for occasional use |
| Marvel Mystery Oil | Penetrates well and protects against moisture |
| Sewing machine oil | Very light viscosity; great for precision tools |
| Light machine oil | Solid alternative if labeled for small engines |
Oils to Skip
- WD-40 – Acts as a water displacer, not a lasting lubricant. It dries out quickly and leaves parts unprotected.
- Motor oil or grease – Far too thick. It clogs narrow air passages and traps dirt.
- Hydraulic oil – Built for high-pressure systems, not fast-cycling nailers.
Pro Tip: A single 4-oz bottle of air tool oil from Home Depot, Ace Hardware, or Harbor Freight costs pennies and lasts for years with normal use. Keep the cap tight and store it in a cool, dry spot.
How Much Oil Your Framing Nailer Actually Needs
Stick to 1–2 Drops
Use only 1–2 drops per session. That tiny amount is enough to coat every internal moving part, even during all-day use. More oil doesn’t mean better performance. Excess lubricant gets blown out the exhaust, leaving oily mist on your hands, workpiece, or floor.
Myth Alert: Some users think you need to flood the tool with oil. That’s wrong. Over-oiling causes:
– Oil spotting on lumber, trim, or drywall
– Carbon buildup inside the exhaust port
– Reduced efficiency from excess air resistance
When to Oil Your Framing Nailer
- Before each work session – Even if you used it yesterday
- When cycling feels sluggish – Slow firing or weak driving force
- After long storage – Prevents dry starts and internal corrosion
DIY vs. Pro Schedule:
– Weekend warriors: Oil once per project
– Full-time framers: Oil at the start of each day or every few hours during heavy use
Expert Note: “The ‘one or two drops’ is if you use it all day long.” This guidance keeps your nailer lubricated without flooding it.
Step-by-Step: How to Oil a Framing Nailer
Step 1: Disconnect the Air Hose
Always shut off and disconnect the air supply before oiling. This prevents accidental firing and releases trapped pressure. Hang the hose or lay it flat to avoid kinks.
Step 2: Drop in 1–2 Drops of Oil
Hold the oil bottle upright and squeeze gently. Let 1–2 drops fall straight into the inlet port. Keep the bottle tip away from the metal to prevent contamination.
Never pour. Use a dropper or precision spout. If your oil bottle lacks one, transfer oil to a small container with a dropper.
Step 3: Reconnect the Air Hose
Screw the air hose back into the inlet snugly. A tight connection prevents air leaks during use.
Step 4: Fire 5–10 Test Shots
Aim the nailer at a scrap wood block or safe surface. Pull the trigger 5–10 times to cycle the piston and distribute oil throughout the internal system.
Why this matters: Without firing, oil pools at the inlet and never reaches the cylinder. Cycling pushes oil into the critical wear areas.
Step 5: Wipe Down the Tool
Grab a clean rag and wipe the exterior, especially around the exhaust and inlet. This removes excess oil and keeps dust from sticking.
Pro Tip: Wipe down your nailer after every use, not just after oiling. A clean tool runs cooler and lasts longer.
How to Keep Oil Off Your Work Surface
Why Oil Sprays Out the Exhaust
Every pneumatic tool releases excess air and oil through the exhaust port. On many framing nailers, this port sits near the top of the tool, sometimes directly above the air inlet. The moment you fire after oiling, unabsorbed oil gets blasted out with the exhaust air.
Result: Oily mist on your hands, lumber, or finished walls.
Quick Ways to Reduce Spray
- Point the exhaust away from your body and workpiece before firing
- Test-fire into a rag or cardboard box placed behind the tool
- Drape a shop towel over the exhaust during the first few shots (remove before full use)
- Oil in a designated area like a workbench, away from clean materials
Warning: Don’t block the exhaust completely. It must vent to prevent pressure lock and internal damage.
Set Up an Inline Oiler for Automatic Lubrication
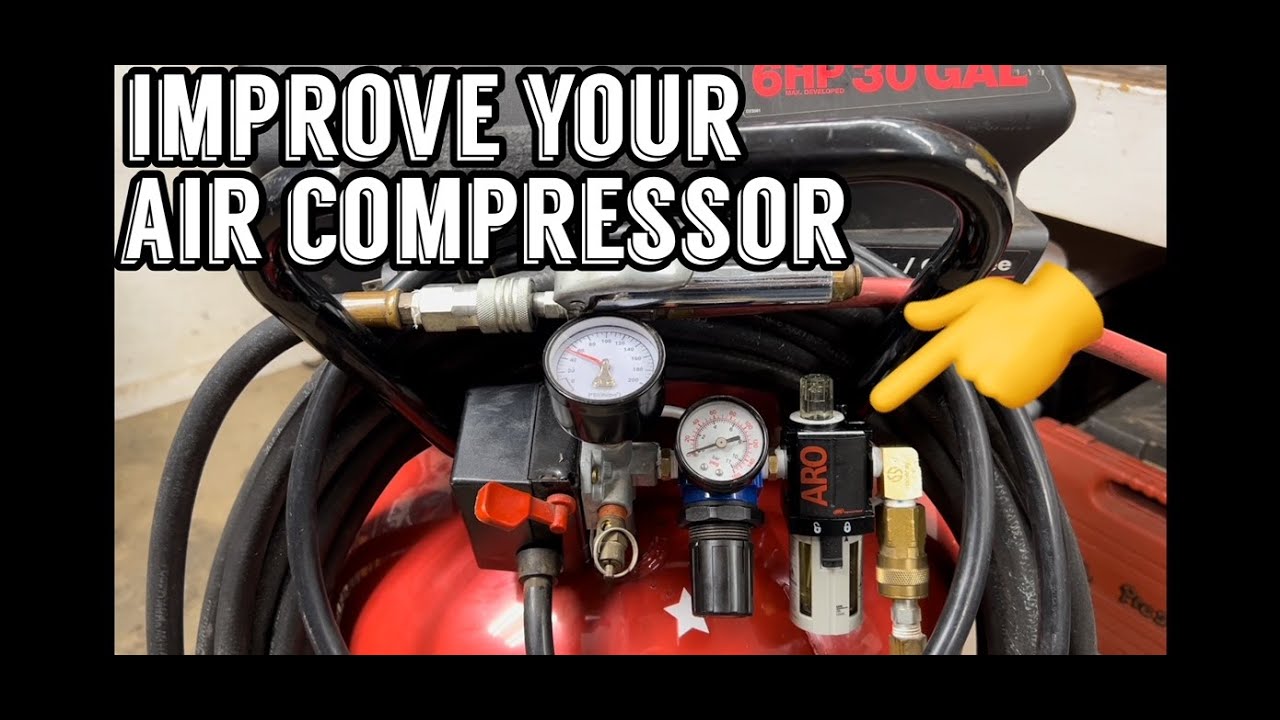
How Inline Oilers Work
An inline oiler injects a controlled, tiny amount of oil into the air stream every time you pull the trigger. No more guessing when or how much to oil, your nailer stays lubricated automatically.
5-Step Inline Oiler Setup
- Buy a 4-foot “cheater hose” from any hardware store
- Attach an inline oiler to one end of the hose
- Connect the other end to your air compressor
- Fill the oiler with air tool oil, following the manufacturer’s fill line
- Attach your framing nailer to the oiler’s outlet
Now every trigger pull delivers fresh lubrication.
Why Pros Prefer This System
- No more forgotten oiling – Lubrication happens with every shot
- Consistent performance – Tool runs smoother for longer
- Protects other tools – Remove the cheater hose when using spray guns or sanders that don’t need oil
Real-World Feedback: “This short hose has served me well for many years.” Users report inline oilers lasting over a decade with basic care.
Inline Oiler Maintenance Tips
- Check oil level weekly and refill when low
- Drain moisture from the oiler’s base regularly
- Clean the filter screen if airflow drops
- Store upright to prevent leaks
Load Nails Correctly to Prevent Jams

Nail Direction Makes or Breaks Performance
Even flawless oiling won’t stop jams if nails are loaded backward. Most framing nailers use coil or stick nails with arrows molded into the plastic strip or angled nail heads showing the correct direction.
Rule: The arrow or slanted head must face forward, toward the nose of the tool.
What Happens with Backward Nails?
- Nail strip jams inside the magazine
- Driver blade strikes the strip instead of the nail
- Bent blades or damaged pistons can result
Pro Tip: “If you get the arrows on the pins facing the wrong direction, the gun will jam.”
Color-Code Your Nails for Fast Loading
Use a Sharpie or colored marker to darken the top of the nail heads. This makes orientation instantly visible, especially in low light or with small-gauge pins.
- Best colors: Black, dark brown, or red
- Apply to every nail head on the strip
- Reapply after rain or moisture if color fades
User Feedback: “Color the tops! So simple it should have been evident.”
Long-Term Maintenance Tips for Framing Nailers
Wipe Down After Every Use
Sawdust, resin, and jobsite grime build up on the surface and creep into moving parts. A quick wipe with a dry or slightly oily rag keeps the exterior clean and stops debris from entering internal areas.
Store Your Nailer the Right Way
- Keep it in a dry, dust-free area
- Remove nails and depressurize before storing
- Cover with a cloth or store in a hard case
Never leave a nailer on a jobsite overnight. Moisture and temperature swings cause rust and seal breakdown.
Listen for Air Leaks
After oiling, check for hissing sounds near the cylinder or head. Leaks signal worn O-rings or seals, which means it’s time for a rebuild kit.
Replace Worn Parts Early
- O-rings and seals degrade over time
- Driver blades can bend or chip
- Stick with OEM or high-quality replacement parts
Quick Reference: Framing Nailer Oiling Do’s and Don’ts
| Do ✅ | Don’t ❌ |
|---|---|
| Oil at the air inlet port | Oil the exhaust or magazine |
| Use 1–2 drops per session | Pour or overfill |
| Fire 5–10 test shots after oiling | Skip test firing |
| Use air tool oil or 3-in-1 oil | Use WD-40 or motor oil |
| Point exhaust away during test shots | Fire toward finished surfaces |
| Use an inline oiler for consistency | Rely only on memory |
| Color-code nail heads | Load nails without checking direction |
| Wipe and store clean | Leave dirty or damp |
Frequently Asked Questions About Oiling a Framing Nailer
Where exactly do you put oil in a framing nailer?
You put oil in the air inlet port, the threaded fitting where your air hose connects. This is the only designed lubrication point. Oil enters here, mixes with compressed air, and travels to the piston, cylinder, and O-rings. Never oil the exhaust, magazine, or trigger mechanism.
How often should you oil a framing nailer?
Oil your nailer at the start of each work session, or whenever cycling feels sluggish. DIY users can oil once per project. Professionals using the tool all day should oil at the start of each shift or every few hours during heavy use. After long storage, always oil before the first shot.
What kind of oil should I use in my framing nailer?
Use air tool oil for best results. It’s specifically formulated for pneumatic tools and resists gumming. Good alternatives include 3-in-1 oil, Marvel Mystery Oil, sewing machine oil, or light machine oil. Avoid WD-40, motor oil, grease, and hydraulic oil, all of which are too thick or designed for other purposes.
Can you over-oil a framing nailer?
Yes, over-oiling is a common mistake. Excess oil gets blown out the exhaust port, creating oily mist on your workpiece and hands. It also causes carbon buildup inside the tool. Stick to 1–2 drops per session, even for all-day use. More oil does not improve performance.
Will oil from my nailer damage wood or drywall?
It can. Excess oil exits through the exhaust port and may spray onto nearby surfaces. To minimize mess, point the exhaust away from your workpiece, test-fire into scrap material after oiling, and wipe down the tool regularly. Using an inline oiler with controlled output also helps reduce overspray.
What is an inline oiler and should I use one?
An inline oiler is a small device installed between your air compressor and nailer that automatically injects oil into the air stream. It’s ideal for professionals who use pneumatic tools daily because it ensures consistent lubrication without manual effort. DIY users can get by with manual oiling at the start of each project.
Key Takeaways for Oiling Your Framing Nailer
Oiling a framing nailer takes just seconds and costs almost nothing, but it makes the difference between a tool that lasts decades and one that fails early. Drop 1–2 drops of air tool oil into the air inlet port at the start of each session, reconnect the hose, and fire 5–10 test shots to distribute the lubricant. Avoid over-oiling, and never apply oil to the exhaust, magazine, or trigger.
For maximum convenience, install an inline oiler on a 4-foot cheater hose so your nailer self-lubricates with every trigger pull. Combine proper oiling with correct nail loading (arrows facing forward), color-coded nail heads, and clean storage, and your framing nailer will fire strong for thousands of cycles. Pick up a bottle of air tool oil today, give your nailer a few drops before your next project, and keep it running like new.