How to Load Arrow T50 Stapler – Quick Guide
If your Arrow T50 stapler isn’t loading properly, you’re not alone. Many users struggle with the initial loading process, but once you know the correct sequence, loading becomes fast, reliable, and almost automatic. This heavy-duty staple gun is designed for high-volume jobs in construction, upholstery, and insulation, and proper loading is key to avoiding jams and ensuring smooth operation. In this guide, you’ll learn exactly how to load an Arrow T50 stapler step by step, troubleshoot common issues, and keep your tool running like new.
Whether you’re a contractor, DIYer, or tradesperson, mastering the loading process will save time, prevent frustration, and extend the life of your tool. Let’s break down the correct method with no guesswork and no confusion.
Open the Magazine Correctly
The first step in loading your Arrow T50 is accessing the rear-loading magazine. There are two common model types, so identifying yours is crucial before proceeding.
Identify Your Model Type
Check the back of the stapler to determine which mechanism you have. This determines how you’ll open the magazine for loading.
• If the stapler has a metal pusher with a spring, you have the pusher/spring release model
• If there’s a latch and guide rod at the back, you have the back-load latch model
• Both types use the same loading principles but differ slightly in operation
Release the Pusher on Spring Models
Flip the stapler so the handle faces upward. Locate the pusher at the rear of the magazine.
• Push the pusher forward into the tool
• Pull it straight up and out to remove it
• Some models require slight downward pressure before disengagement
• Do not force it if it resists—check alignment first
Unlock the Latch on Back-Load Models
Find the release tab at the rear of the tool. This mechanism secures the guide rod and staple chamber.
• Pull the release tab down and outward to disengage the guide rod
• Lift the rod to expose the full guide rail
• The guide rail should be completely visible and free of obstructions before inserting staples
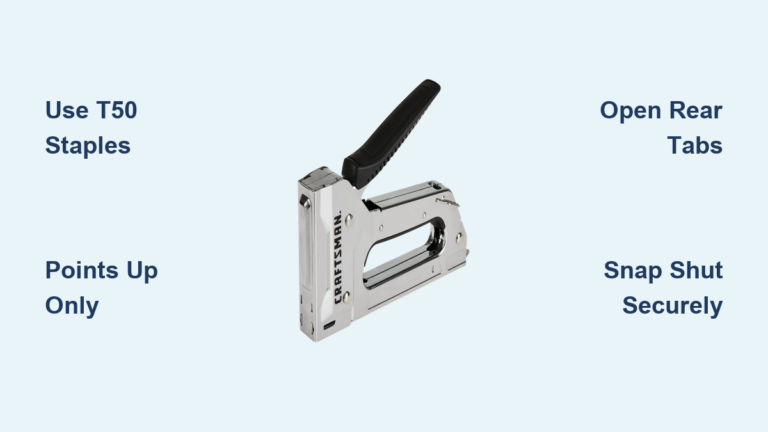
Insert T50 Staples Properly

With the magazine open, it’s time to load the staples. This step is where most errors occur, so precision matters here.
Choose the Right Staples
The Arrow T50 accepts only T50-series staples. Using the wrong type causes jams and potential damage.
• Use only T50-compatible staples in 1/4″, 3/8″, 1/2″, or 9/16″ leg lengths
• Both steel and stainless steel varieties are compatible
• Never use staples from other brands unless labeled T50-compatible
Align Staples Correctly
Staple orientation is critical. Wrong alignment leads to jams and misfires.
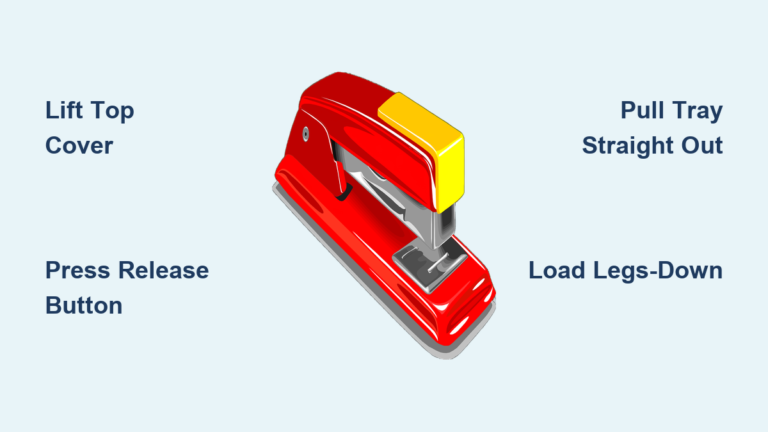
• Place the staple strip with the crown (top) facing forward
• The legs should point downward toward the rail
• The strip should slide in smoothly without resistance
• Tilt the stapler slightly downward to use gravity for easier insertion
Slide to Front Position
Push the entire staple strip forward until the first staple seats at the nose.
• Push until the first staple engages with the driver mechanism
• Stop when you feel resistance—do not over-insert
• The leading staple must be fully seated and aligned with the nose
Pro Tip: If the staples don’t slide easily, check for debris or bent legs. Forcing them can damage the rail or cause jams.
Reassemble the Pusher or Latch
Now that staples are loaded, reassemble the mechanism to lock everything in place and activate spring tension.
Reinsert the Pusher on Spring Models
Align the pusher with the rear of the guide rail. The locking motion requires a specific sequence.
• Slide the pusher forward along the rail until it reaches the front
• You should hear a distinct click when it locks into place
• Some models require pressing the spring down, then moving it right and up to lock
• If it feels loose, remove and retry—partial engagement causes misfeeds
Reattach Guide Rod and Latch on Latch Models
The guide rod must be seated properly before closing the latch.
• Slide the guide rod back into the upper channel above the staples
• Swing the latch upward until it clicks into place
• Ensure it’s fully seated with no gaps or wobble
• Gently tug on the latch to verify it’s locked
Verification Step: If the pusher or latch moves when tugged, it’s not locked. Re-engage until secure.
Check Loading Readiness
Before firing, verify the stapler is correctly loaded and ready for use. This step prevents dry-firing and damage.
Use the Viewing Window
The staple viewing window shows remaining staples in real time.
• Check the window on the side or top of the tool
• You should clearly see staples aligned in the rail
• If empty or misaligned, recheck the loading depth
Inspect the Nose
Look at the front of the tool to confirm proper staple positioning.
• The first staple should be visible at the nose
• It must be aligned with the driver blade
• Misalignment means the strip isn’t fully seated
Test-Fire Safely
Point the stapler at a scrap piece of wood and squeeze the trigger.
• You should hear a sharp “click-click” sound
• The staple should drive cleanly into the wood
• If it jams or misfires, unload and recheck the entire process
Safety First: Always keep fingers clear of the nose and point the tool away from people during testing.
Prevent Common Loading Mistakes
Even experienced users make avoidable errors. Knowing these pitfalls keeps your T50 running smoothly.
Don’t Force the Pusher
Forcing the pusher leads to damage and misfeeds.
• If the pusher won’t lock, do not force it
• Common causes include staples not fully forward, debris in the rail, or pusher inserted backward
• Remove everything, clean the rail, and restart the process
Avoid Wrong Staple Orientation
Staples must go in crown forward, legs down. This is the leading cause of jams.
• Installing staples backward guarantees malfunctions
• If you hear grinding or resistance, stop immediately
• Remove and reinsert with correct orientation
Use Quality Staples Only
Low-grade or corroded staples jam easily and damage the mechanism.
• Stick to genuine Arrow T50 staples or high-quality equivalents
• Discard bent or damaged strips
• Cheap staples cost more in repairs than they’re worth
Don’t Overtighten the Latch
Slamming the latch shut bends the guide rod.
• Close firmly but gently until it clicks
• Overtightening causes mechanical problems
• The motion should feel secure, not forceful
Expert Note: The push, slide, load sequence feels unnatural at first. Practice dry runs until it becomes muscle memory.
Troubleshoot Loading Failures
Even with correct technique, issues can arise. Here’s how to fix them fast.
Pusher Won’t Stay Locked
This issue prevents staple advancement and causes misfeeds.
• Cause: Misaligned pusher, debris in rail, or staple obstruction
• Fix: Remove pusher, clean the rail, ensure no staples are stuck, and reinsert with correct motion
Staples Don’t Advance
Weak spring tension or empty chamber causes this problem.
• Cause: Weak spring, empty strip, or damaged pusher
• Fix: Replace staple strip. If problem persists, inspect the spring for cracks or fatigue
Jam at the Nose
Over-insertion or wrong orientation causes front-end jams.
• Cause: Incorrect staple orientation or over-insertion
• Fix: Clear jam with needle-nose pliers. Reload with first staple fully forward and legs down
Latch Won’t Close
The guide rod must be properly seated before closing.
• Cause: Guide rod not seated properly in its channel
• Fix: Realign the rod and slide it fully into the upper channel before closing the latch
Clicking But No Staple
Dry-firing damages the driver mechanism.
• Cause: Empty chamber or dry-fire
• Fix: Check viewing window. Reload if needed. Never fire without staples
Pro Tip: Keep a small brush handy to clean the rail after insulation or outdoor jobs where debris accumulates.
Maintain Your T50 for Long Life
The Arrow T50 is built to last, but proper care ensures peak performance for years.
Clean After Each Use
Debris accumulation causes jams and mechanism wear.
• Wipe the guide rail, pusher, and chamber with a dry cloth
• Remove dust, adhesive residue, or insulation fibers that clog the mechanism
• Pay special attention after insulation or outdoor work
Store Properly
Improper storage leads to rust and component degradation.
• Keep the T50 in a dry, temperature-controlled environment
• Avoid damp garages or job-site exposure to rain or snow
• The chrome-plated finish resists rust but benefits from proper storage
Relieve Spring Tension
Long-term storage with compressed spring causes fatigue.
• Remove the pusher if storing for extended periods
• This reduces stress on the internal spring
• May extend the spring’s operational life significantly
No Lubrication Needed
The T50 is self-cleaning and jam-resistant.
• Do not oil the rail or mechanism
• Lubrication attracts dirt and creates gumming agents
• The design works best when dry and clean
Warranty Tip: Modifying the tool or forcing non-T50 staples can void the manufacturer’s warranty.
Optimize for Real-World Use
The Arrow T50 shines in high-demand environments. Use these tips to maximize efficiency.
Speed Up Reloads
With practice, reloading takes under 30 seconds.
• Master the push, slide, load rhythm
• Keep spare staple strips within reach
• The rear-loading design allows quick reloads without repositioning
Match Staple to Task
Use the color-coded guide on the tool body to pick the right staple length.
• 1/4 inch: House wrap, fabric, insulation
• 3/8 inch: Baseboards, cabinetry
• 1/2 inch: Sheathing, subfloors
• 9/16 inch: Roofing, structural fastening
Switch Lengths On the Fly
Changing staple sizes mid-job is straightforward.
• Simply unload, wipe the rail, and reload with the new size
• The T50 handles transitions effortlessly
• Contractors often carry two T50s loaded with different lengths for rapid switching
Field Insight: Professional contractors maximize workflow by pre-loading staple sizes for their most common tasks.
Why the T50 Remains the Top Choice
The Arrow T50 has been the best-selling heavy-duty stapler in the U.S. since 1929—and for good reason.
• 100% steel, chrome-plated body resists rust and impact
• Jam-resistant design handles high-volume use without failure
• Rear-loading system allows quick reloads without repositioning
• Made in the USA with hardened steel parts forged at 1,500°F
• Integrated viewing window monitors staple levels in real time
• Powerful coil spring ensures consistent staple advancement
Its blend of durability, simplicity, and reliability makes it a staple on job sites and workshops nationwide. The distinctive “click-click” sound confirms successful staple ejection every time.
Key Takeaways for Loading Your Arrow T50
Loading the Arrow T50 stapler correctly is simple once you know the steps. First, open the magazine by releasing the pusher or unlatching the guide rod depending on your model type. Second, insert staples crown-forward and legs-down into the guide rail, pushing them to the frontmost position. Third, re-lock the pusher or latch until you hear a distinct click, then verify with the viewing window. Finally, test-fire into scrap material before starting your project.
Avoid forcing any components, use only genuine T50 staples, and clean the rail regularly to prevent debris-related jams. Store the tool in a dry environment and remove the pusher during long-term storage to extend spring life. With proper technique and maintenance, your T50 will deliver years of trouble-free performance—whether you’re building a deck, installing insulation, or reupholstering a chair.
Frequently Asked Questions About Loading an Arrow T50 Stapler
How do I know which model of Arrow T50 I have?
Check the back of your stapler. If you see a metal pusher with an integrated spring, you have the pusher/spring release model. If you see a latch and guide rod, you have the back-load latch model. Both load the same way but open differently.
Why won’t my pusher lock back into place?
The pusher won’t lock if staples aren’t fully forward, there’s debris in the rail, or the pusher is inserted backward. Remove everything, clean the rail thoroughly, and reinsert the pusher with the correct orientation and motion.
Can I use other brands of staples in my Arrow T50?
Only use T50-series staples or those explicitly labeled as T50-compatible. Using other staple types causes jams, misfires, and may damage the internal mechanism. Genuine Arrow T50 staples are recommended for best performance.
How do I clear a staple jam at the nose?
Turn off the tool and use needle-nose pliers to carefully remove the jammed staple. Check for bent legs or debris in the rail. Reload with correct orientation—crown forward, legs down—and ensure the first staple is fully seated at the front.
Does the Arrow T50 need lubrication?
No. The T50 is designed as a self-cleaning, jam-resistant mechanism and does not require oil or lubrication. Applying lubricant attracts dirt and creates gumming agents that cause problems.
How often should I clean my Arrow T50?
Clean the guide rail, pusher, and chamber after each use, especially after jobs involving insulation, adhesives, or outdoor debris. Regular cleaning prevents jam-causing buildup and extends the tool’s operational life.