How to Refill a Stapler: Quick Steps
You’re in the middle of organizing documents when your stapler jams or runs out of staples. Don’t toss it. Refilling a stapler takes less than a minute once you know the correct steps. This guide covers standard desk staplers, mini staplers, staple guns, and cartridge-based systems, with troubleshooting tips to keep your tool working smoothly.
The key to successful refilling lies in understanding your stapler type, loading staples in the correct orientation, and ensuring the mechanism resets properly. Using the wrong staples or incorrect loading can lead to jams, misfires, or even injury. This article walks you through every step with precision and safety in mind.
Identify Your Stapler Type Before Refilling

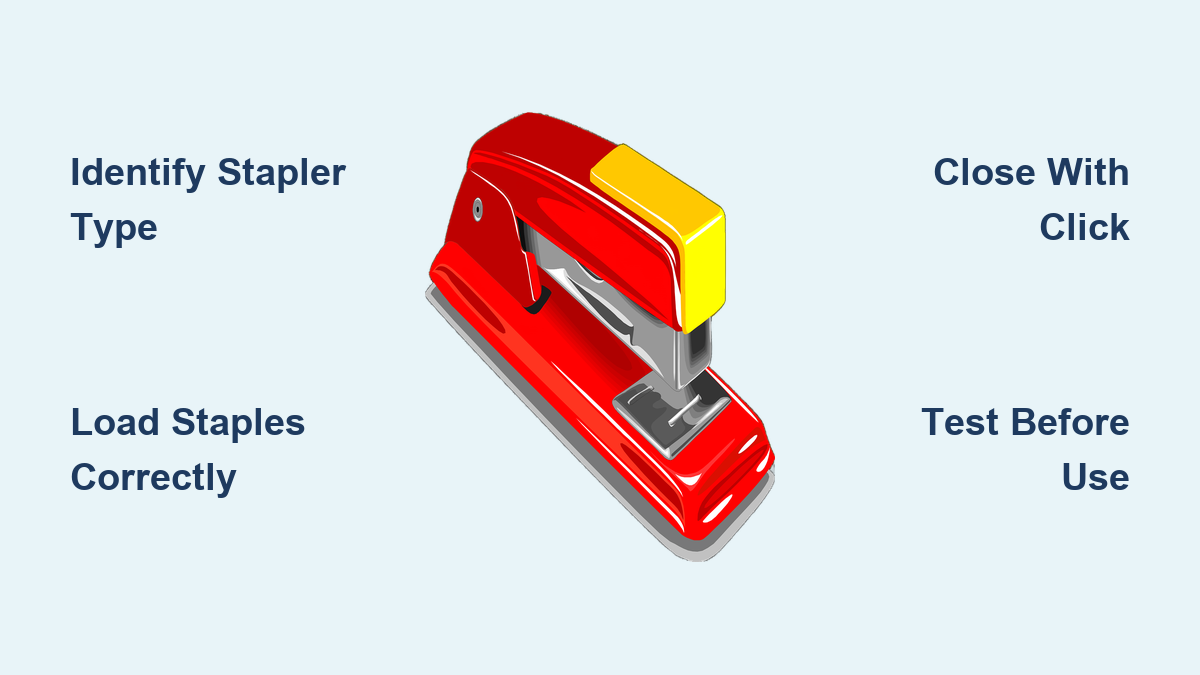
Before opening any stapler, determine which kind you have. The loading method, staple orientation, and safety steps vary significantly.
Standard Desk Stapler
Most common in offices, this stapler has a hinged top or rear-loading mechanism. It uses No. 26/6 or 24/6 staples, with the legs facing down during loading. Look for a hinge at the back or a release button near the base.
Mini Stapler
Compact and portable, but follows the same loading rules as a standard model. Requires mini staples. Never substitute full-size staples, as they won’t fit and can damage the mechanism.
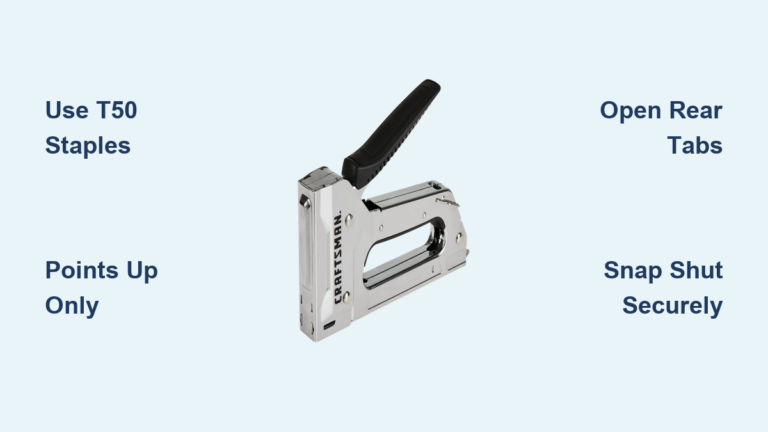
Staple Gun (Manual, Electric, Pneumatic)
Used for upholstery, carpentry, or insulation. Loads from the rear or bottom. Staples go in flat side first, points up. Always unplug or disconnect air before servicing.
Cartridge-Based Stapler (Printer Finisher)
Found in office printers and copiers with auto-stapling features. No manual loading is required. Simply swap out the entire cartridge when empty. The device alerts you when replacement is needed.
Pro Tip: If unsure, check the manufacturer’s label on the bottom for model number and compatible staple size.
Open the Stapler Without Damaging It
How you open the stapler depends on its design. Forcing it can damage internal parts.
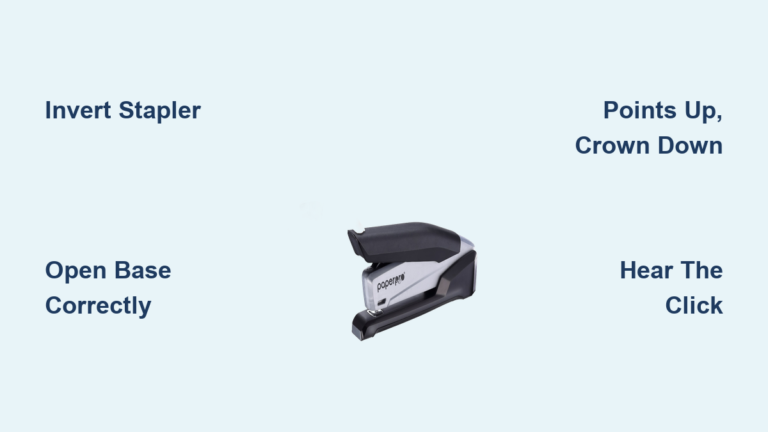
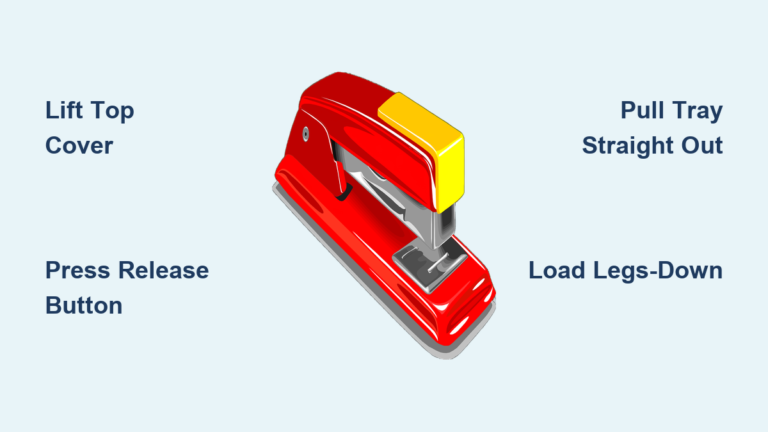
Lift the Top Cover on Hinged Models
Hold the base firmly with one hand. With the other, lift the top cover upward until it locks open. Some models require pressing a small tab or squeezing the sides first. Look for a hinge at the back or side guides that slide upward.
Release the Magazine on Slide or Push-Button Models
On many modern staplers, press a button at the rear to eject the magazine forward. Others have a sliding latch that releases a spring-loaded tray from the back or front. Never pry open a stapler with tools. If it won’t open, check for hidden latches or consult the manual.
Unlock the Staple Gun Safely
Locate the release button or slide on the handle, often under a rubber grip. Press or slide it to unlock the magazine. Turn the gun upside down to access the loading slot safely.
Warning: Always disconnect power or air supply before opening any electric or pneumatic staple gun.
Load Staples in the Correct Orientation
Staple direction is critical. One wrong move and your stapler won’t work or will jam mid-use.
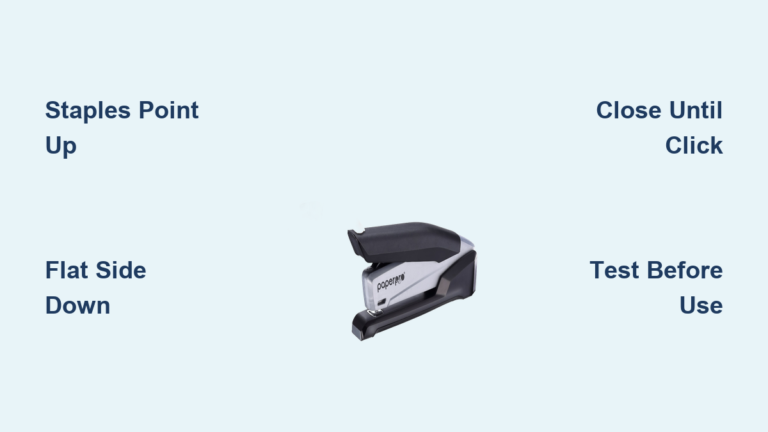
Standard and Mini Staplers: Legs Down
Insert staples with the sharp legs pointing down into the side grooves. The curved crown should face up. This allows the anvil to bend the legs inward after stapling. If you see a marking like “this side up” inside the chamber, align the flat side of the crown with it.
Staple Guns: Points Up
Load with the flat side of the staple strip going in first, and the sharp points facing upward. This ensures the driver pushes the staple out correctly through the nose. Never force staples. They should slide in smoothly. If resistance occurs, check for debris or wrong staple size.
Cartridge Systems: No User Adjustment
Just replace the entire cartridge. The staples are pre-aligned. Slide the new one in until it clicks. The printer may auto-detect it or display a ready status.
Sustainability note: Recycle used cartridges at stores like Staples or Office Depot.
Fill the Magazine to Proper Capacity
Maximize efficiency by loading the chamber completely without overfilling.
Use Compatible Staples Only
Check the size stamped on your stapler or in the manual. Common sizes include 26/6 for most desktop staplers, 24/6 for thicker wire and heavier stacks, and 1/4″ to 5/16″ for 2 to 20 sheets. Using incorrect staples causes jams and premature wear.
Break Off Excess Staples to Fit
If the strip is too long, snap off extra staples to fit the tray. Save leftovers in a labeled container for future use. Store spare staples in a sealed bag to prevent rust or bending.
Avoid Overfilling the Magazine
Push the strip all the way forward, but don’t cram in extra staples beyond capacity. Overfilling prevents the spring from compressing properly and can cause misfeeds. The stapler should close smoothly without forcing.
Close and Lock the Stapler Securely
A poorly closed stapler won’t fire or worse, fires unexpectedly.
Lower the Cover Gently
For hinged models, lower the top cover until it meets the base. Apply firm pressure along the hinge or edge to re-engage the latch. On some models, after loading, you must slide the top portion forward until it aligns flush with the base. This resets the spring mechanism.
Listen for the Confirmation Click
A distinct click confirms the stapler is locked and ready to use. Apply light pressure with a finger along the edge or hinge to ensure full closure. If no click is heard, reopen and reseat the top until it locks properly.
Expert Warning: Be careful not to place your finger beneath the staple dispenser as you close it. Accidental stapling injuries are common when fingers are near the staple exit.
Test Your Stapler After Refilling
Always verify function before relying on your stapler.
Perform a Test Staple
Use 2 to 5 sheets of scrap paper. Press down firmly. Check for clean penetration, even leg bend with both sides folded inward, and no double-firing or partial ejection.
Verify Through Side Viewing Windows
Look through the side viewing hole if your stapler has one. Staples should be visible and aligned in the feed path. No gaps or bulges should appear in the staple strip.
Troubleshoot Common Refill Problems
Even with proper technique, issues can arise.
No Staples Firing
The cause is often incomplete closure or an empty magazine. Reopen the stapler, check the staple count, and close until you hear the click. Make sure the top is fully locked.
Staple Jams During Use
Misaligned staples or debris in the chamber cause jams. Open the stapler and use tweezers to remove the jammed staple. Clean the chamber with a dry cloth and check for paper fragments.
Legs Not Bending Properly
A worn anvil or wrong staple size causes improper bending. Adjust the anvil position if your model allows, or switch to the correct staple size.
Staple Gun Won’t Fire
For staple guns, check that the safety lock is disengaged, the magazine is not empty, and power or air is properly connected. Reconnect power only after the gun is fully closed and locked.
Quick Fix: If the stapler feels stiff, check for paper fragments or bent metal in the feed path.
Keep Your Stapler Working Longer
Simple maintenance extends the life of your stapler.
Clean After Heavy Use
Remove paper dust and staple fragments weekly if used frequently. Use a dry cloth or compressed air. Keep your stapler in an area clear of excess dust and debris.
Inspect Staples Before Loading
Discard any bent, corroded, or kinked strips. Damaged staples cause jams and can damage the mechanism. Buy staples in bulk but store in sealed containers to prevent moisture damage.
Lubricate Moving Parts Annually
Apply one drop of light machine oil to the hinge and spring mechanism once a year. Avoid this on plastic-bodied staplers, as oil can degrade the material.
Store Properly
Keep in a dry, dust-free area. Don’t leave the stapler open or exposed to moisture. Label spare staples with size and compatible model for quick identification.
Stay Safe While Refilling Your Stapler
Staplers are tools, not toys. Even small ones can cause injury.
Wear Eye Protection for Staple Guns
Flying staples or broken parts can hit your eyes. Always wear safety goggles when servicing or testing heavy-duty models.
Unplug Before Servicing Electric Models
For electric or pneumatic staple guns, always disconnect power or air supply before loading or clearing jams. Don’t plug it back in until it’s fully closed and locked.
Keep Staplers Away from Children
Supervise children around staplers. Teach proper use only under supervision. Store all staplers out of reach when not in use.
Never Disassemble Beyond Refilling
Only open the intended loading mechanism. Internal parts are under spring tension and can snap or injure if mishandled.
Quick Reference Table by Stapler Type
This table summarizes key steps for each stapler type:
| Stapler Type | Opens By | Staple Direction | Confirmation Step |
|---|---|---|---|
| Standard/Mini | Lift top or press rear button | Legs down, crown up | Click when closing; test staple |
| Staple Gun | Slide or press release | Flat side in, points up | Audible click; visual lock |
| Cartridge System | Open finisher drawer | No user control | LED status or auto-detect |
Final Checklist Before Using Your Stapler
After refilling, run through this quick checklist. Staples must be loaded in correct orientation. The magazine should be fully closed and clicked into place. No visible debris or jams should be present. Test the staple on scrap paper. For electric or pneumatic devices, reconnect power only after full closure.
If any step fails, reopen and recheck. A few seconds now prevents frustration later.
Frequently Asked Questions About Refilling a Stapler
How do I know what size staples my stapler uses?
Check the manufacturer’s label on the bottom of the stapler or refer to the product manual. Common sizes include No. 26/6 for standard desktop staplers and No. 24/6 for heavier-duty models.
Why won’t my stapler fire after refilling?
The most common cause is incomplete closure. Reopen the stapler and ensure the top cover is fully locked in place. You should hear a distinct click when it closes properly.
Can I use any staples in my stapler?
No. Using incorrect staple sizes causes jams, misfires, and can damage the mechanism. Always use staples specifically designed for your stapler type.
How often should I refill my stapler?
Refill when the stapler runs out of staples or when you notice reduced stapling power. For heavy-use environments, check the magazine weekly.
Why does my stapler keep jamming after refilling?
Jam issues typically stem from misaligned staples, debris in the chamber, or overfilling the magazine. Open the stapler, clean the chamber, and reload staples in the correct orientation.
Key Takeaways for Refilling Your Stapler
Refilling a stapler is simple when you know your model and follow the right steps. First, identify your stapler type since loading methods vary significantly between standard desk staplers, mini staplers, staple guns, and cartridge systems. Second, always load staples in the correct orientation with legs pointing down for standard models and points up for staple guns. Third, close the stapler fully until you hear a click to ensure proper function.
Keep compatible staples on hand, maintain your tool with regular cleaning, and test every refill before heavy use. Following these practices ensures smooth operation and avoids avoidable jams or injuries. Your stapler will last for years with proper care.