Paslode Framing Nailer Disassembly Guide
If your Paslode framing nailer has stopped firing, jams frequently, or won’t accept fuel cells properly, a thorough disassembly and inspection may be the key to restoring performance. Whether you’re troubleshooting misfires, cleaning carbon buildup, or replacing worn internal components, knowing how to safely take apart your tool is essential for effective repair.
This guide provides a step-by-step breakdown of the disassembly process applicable across multiple Paslode framing nailer models, including the F325R, CF325, IM325, 5325 series, and others listed in the reference document. You will learn how to confidently service your cordless nailer without damage.
Essential Safety Precautions
Remove Power and Fuel Sources
Before touching any screws or housing panels, remove the battery pack from the base and extract the fuel cell from the magazine. Even if the tool appears inactive, residual fuel vapor or electrical charge can pose risks during disassembly. Allow the nailer to sit for 5 to 10 minutes after removal to dissipate any remaining gas.
Work in a Ventilated Area
Fuel cells contain flammable butane and propane. Always disassemble the tool in a well-ventilated, spark-free environment, away from open flames or ignition sources. Do not smoke or operate near electrical equipment that could generate sparks.
Wear Protective Gear
Use safety glasses and work gloves to protect against sharp edges inside the housing and small spring-loaded parts that may pop out unexpectedly. Keep a small container nearby to store screws and tiny components.
Required Tools for Disassembly
Basic Hand Tools
You will need a few standard tools to begin:
- #2 Phillips screwdriver (preferably magnetic)
- T20 Torx bit (for certain CF and F-series models)
- Small flathead screwdriver (for prying clips and releasing wires)
- Needle-nose pliers (for handling wires and springs)
Optional but Helpful
- Parts tray to organize screws by location
- Camera or smartphone to take photos before disconnecting wiring
- Compressed air can for blowing out debris post-disassembly
Avoid using power drills or impact drivers. Paslode housings use plastic threads and soft metal inserts that strip easily under excessive torque.
Step-by-Step Housing Removal
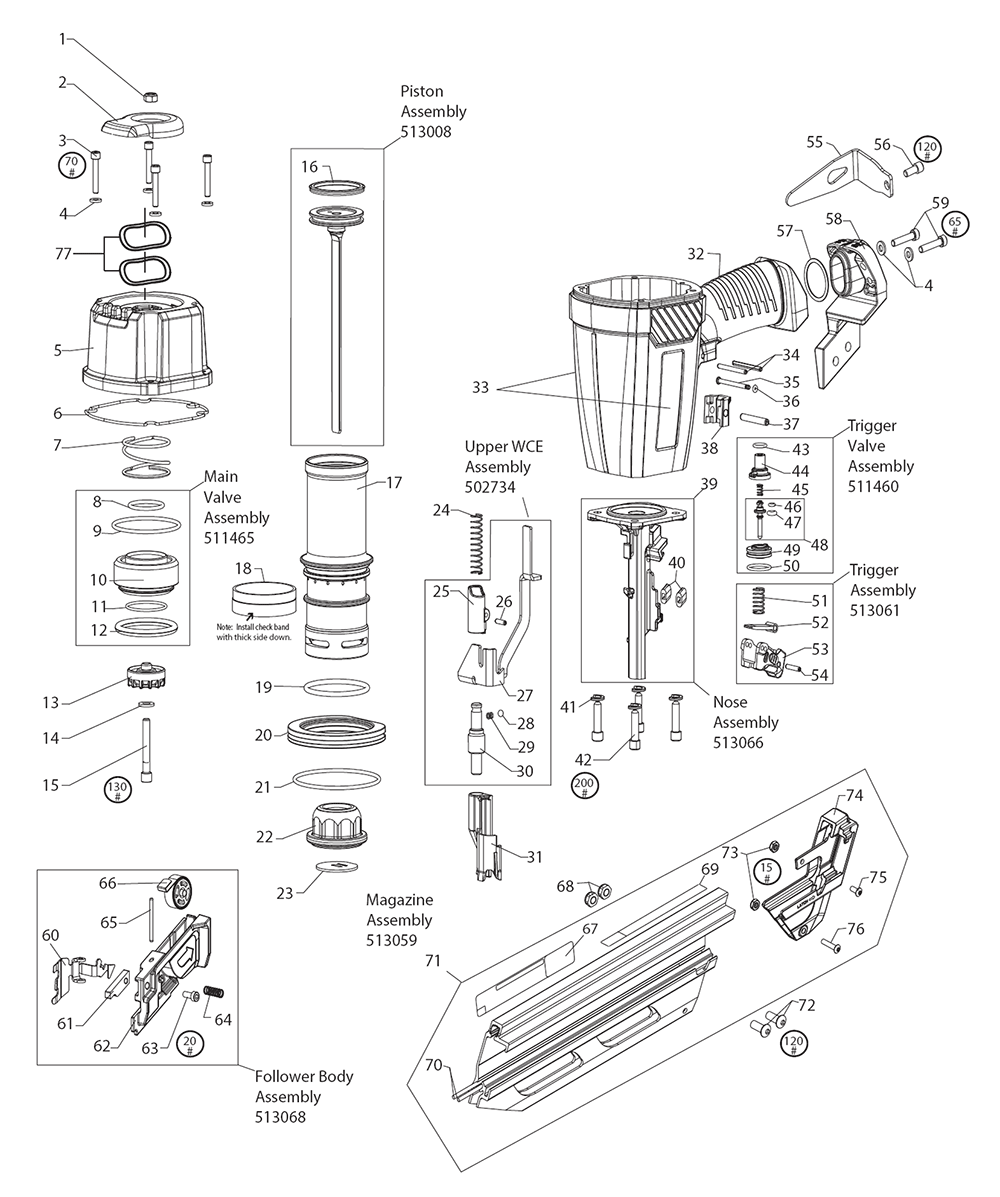
Locate and Remove All External Screws
Begin by placing the nailer on a clean work surface. Inspect the entire body for visible screws. Most Paslode framing nailers have 6 to 8 screws securing the two halves of the outer housing.
- Two screws are typically located in the handle base (where the battery attaches)
- Two more at the top rear of the housing, near the exhaust port
- Additional screws along the side seams of the casing, often hidden under rubber grip pads or labels
Use your Phillips or Torx driver to remove each screw carefully. Place them in a labeled container to avoid loss.
Separate the Housing Halves
Once all screws are removed, gently pry the two housing halves apart using a plastic pry tool or flathead screwdriver wrapped in tape to prevent scratching.
Start at the front magazine end and work toward the rear exhaust cap. Be cautious. Internal wires may still connect the trigger, fan, or ignition module between the halves.
Warning: Never force the casing apart. If resistance is felt, double-check for missed screws or clips.
Disconnect Internal Wiring (If Necessary)
Some models, especially the CF325LI, F325R, and 5325/CN80, have an internal wiring harness connecting the front and rear sections.
Look for a small electrical connector near the middle or top of the tool. Press the release tab with a flathead screwdriver and disconnect it. Take a photo first to ensure correct reconnection later.
Accessing the Combustion Chamber

Remove the Fan and Flywheel
With the housing open, locate the plastic fan at the top of the engine assembly. It sits above the flywheel and spins when the piston moves.
- Hold the flywheel with one hand (or use a flywheel holder tool)
- Unscrew the central fan screw (usually reverse-threaded; turn clockwise to loosen)
- Lift off the fan and set aside
Pro Tip: Mark the fan’s orientation with a pen before removal to simplify reassembly.
Take Off the Combustion Chamber Cover
Behind the fan is the combustion chamber cover, a metal or high-impact plastic dome secured by three or four screws.
Remove these screws and lift the cover carefully. Underneath, you will see:
- The spark plug
- The fuel injector nozzle
- The piston head at top dead center
Inspect for carbon buildup, oil residue, or corrosion. Use compressed air to gently clean the area before proceeding.
Removing the Spark Plug and Injector
Extract the Spark Plug
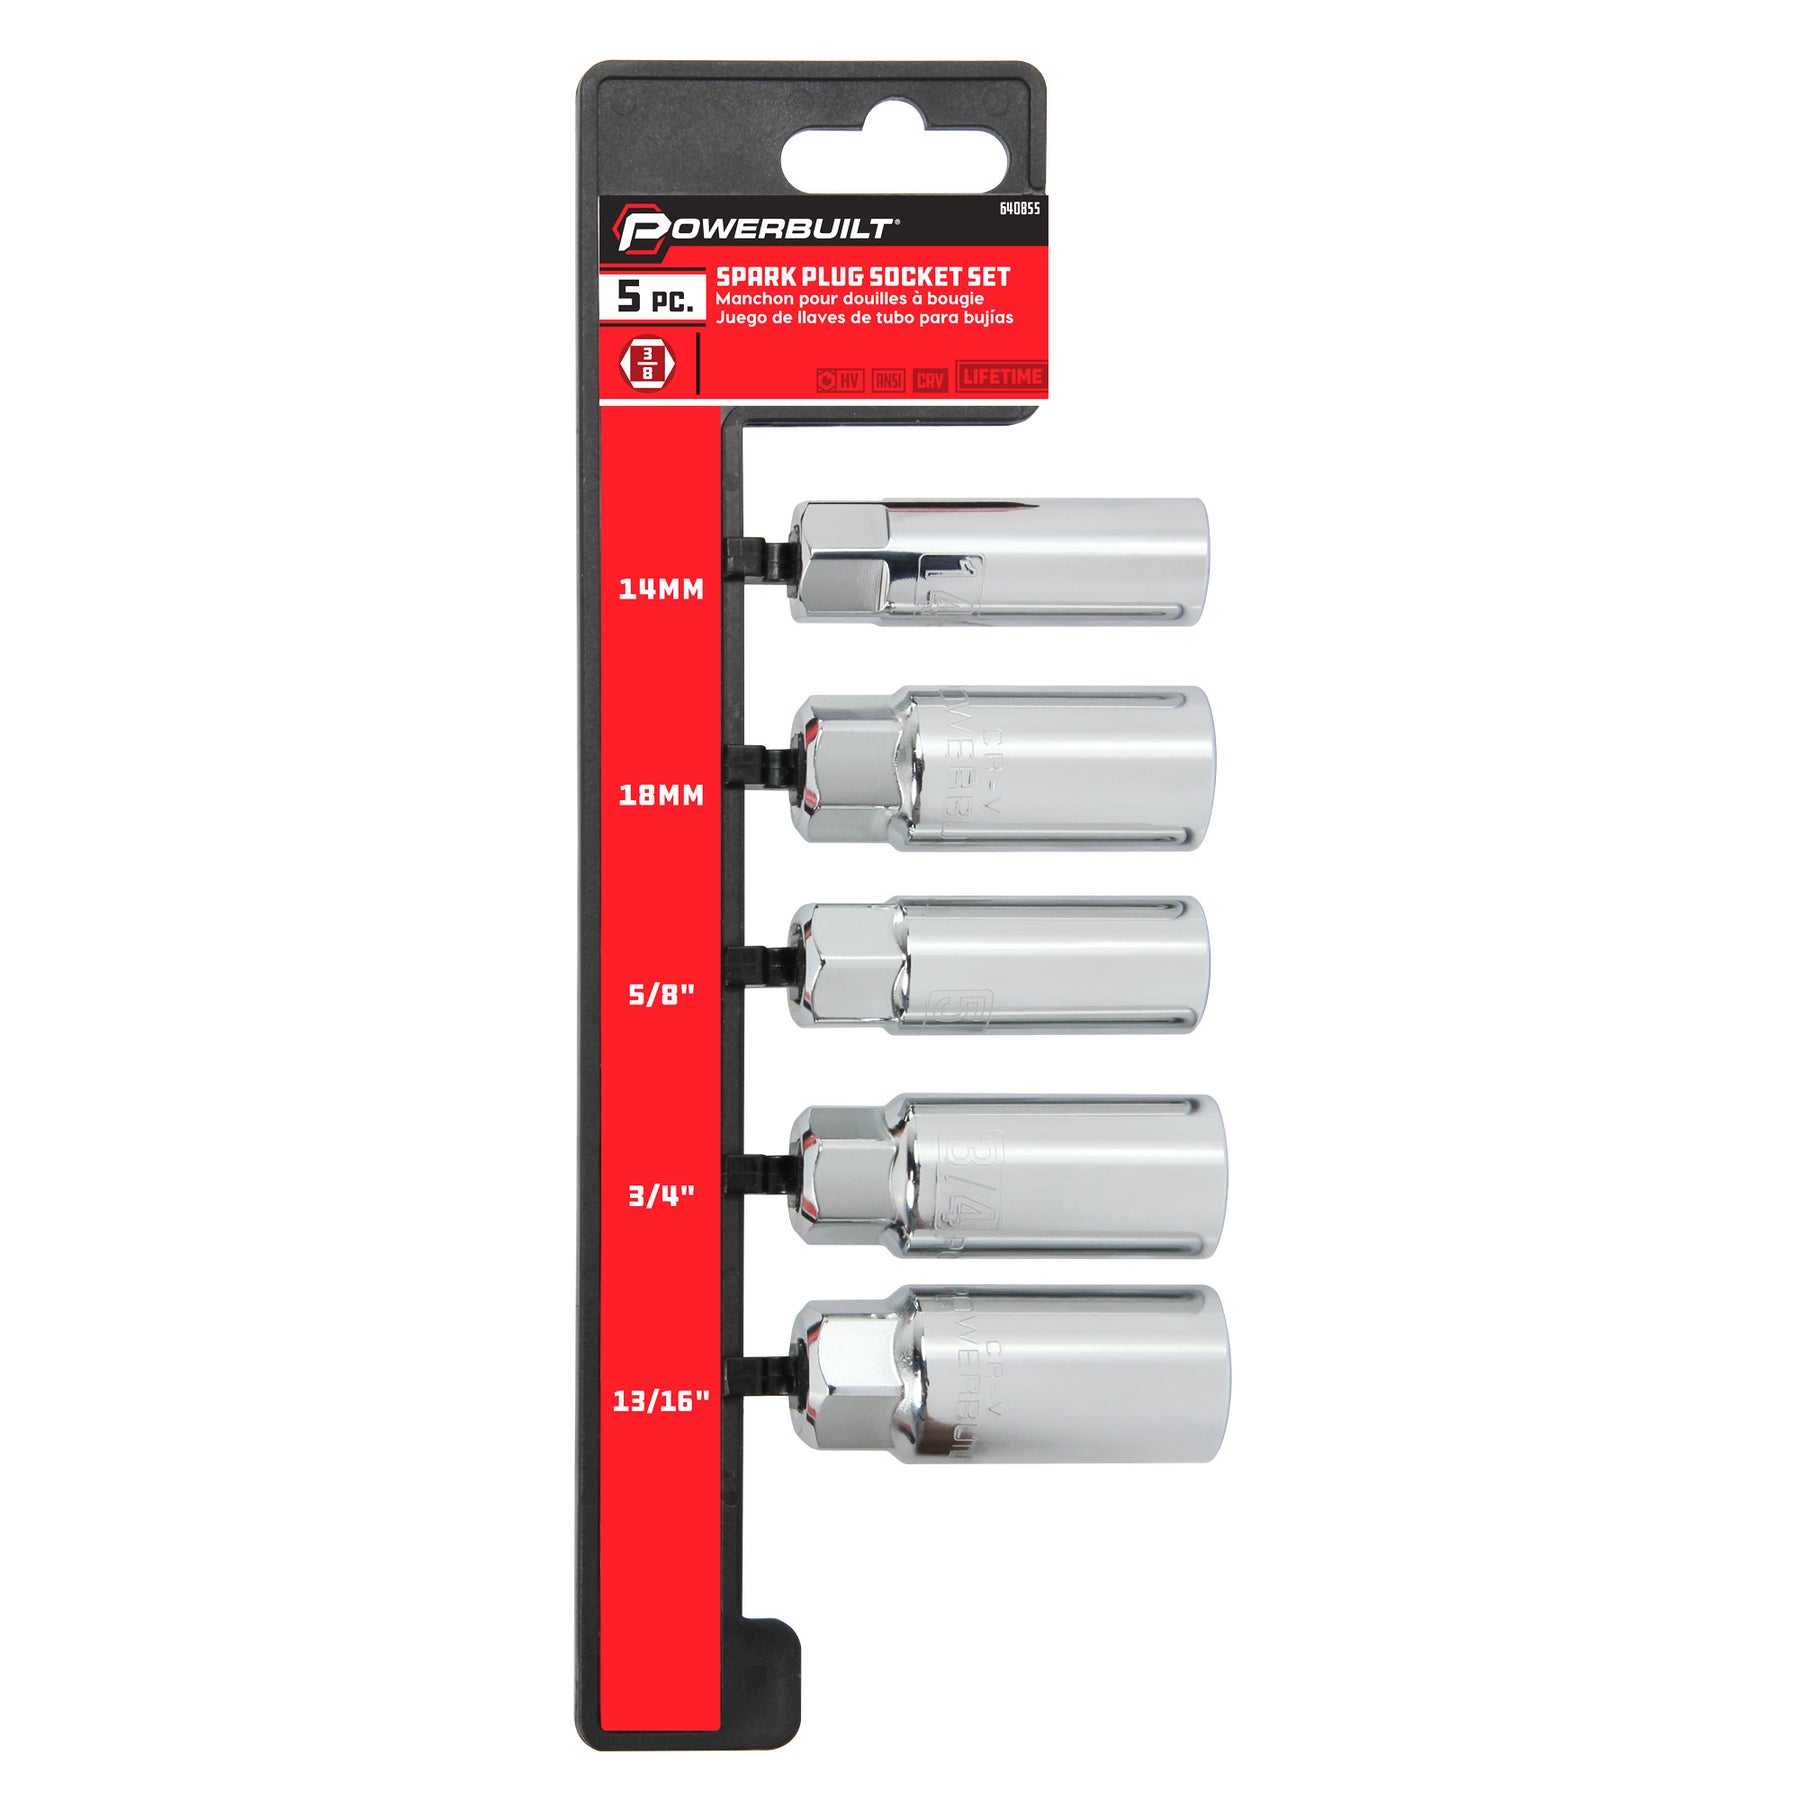
Use a 5/8″ spark plug socket or wrench to remove the spark plug.
- Turn counterclockwise to loosen
- Pull straight out (do not wiggle)
Inspect the electrode for:
- Heavy carbon fouling
- Worn or gapped electrodes
- Cracked porcelain
Replace if damaged. Recommended replacement: Paslode #902100 or NGK CM-5 equivalent.
Remove the Fuel Injector
The fuel injector is a small cylindrical unit mounted beside the spark plug.
- Disconnect the rubber fuel line from its base
- Unscrew the injector body using a wrench or pliers with padded jaws
- Pull it out and inspect the nozzle for clogs
Common Issue: Old fuel leaves varnish deposits that block the injector tip. Soak in carburetor cleaner if clogged.
Piston and Cylinder Inspection
Lower the Piston to Bottom Dead Center
Pull the trigger briefly (with no fuel or battery) or manually rock the fan to rotate the engine and lower the piston into the cylinder.
Once the piston is fully down, you can visually inspect the cylinder walls through the nail exit port at the front.
Look for:
- Scratches or scoring
- Excessive oil or carbon
- Rust or pitting
Minor carbon can be wiped with a lint-free cloth soaked in isopropyl alcohol. Deep scratches may require cylinder replacement.
Check Piston Ring and Head
If accessible, use a pick to gently test the piston ring tension. A broken or stuck ring reduces compression and causes misfires.
The piston head should be flat with no dents. Replace if cracked or warped.
Magazine and Driver Blade Removal

Detach the Magazine Assembly
Unlatch the magazine release lever (if present) or remove 2 to 3 screws securing the magazine to the front.
Slide the entire magazine forward and off the nose cap.
Inspect:
- Nail follower spring for tension
- Driver blade for bending or wear
Inspect the Driver Blade
Remove the driver blade retainer clip using needle-nose pliers.
Slide out the driver blade and check for:
- Bent tip
- Chipped edges
- Excessive wear
Replace if damaged. Worn blades cause double-firing or partial nail drive.
Troubleshooting Common Post-Disassembly Issues
Why Won’t It Reassemble Properly?

Misaligned Wiring or Connectors
Ensure all wiring is routed along original channels. Never pinch wires between housing halves.
Reconnect the internal harness (if equipped) before closing the case. Confirm the trigger switch wires are not loose.
Housing Won’t Close Flush
Check for:
- Trapped wires
- Missing or misaligned O-rings
- Over-tightened screws
Tighten screws gradually in a cross-pattern, like lug nuts, to avoid warping the housing.
Why Does It Misfire After Reassembly?
Incorrect Spark Plug Gapping
The spark plug gap must be 0.020 to 0.025 inches. Use a feeler gauge to verify.
Too wide equals weak spark. Too narrow equals premature ignition.
Clogged Injector or Old Fuel
Even after cleaning, old fuel residues can clog micro-orifices. Use fresh Paslode 2.0 fuel cells and prime with 2 to 3 dry fires before nailing.
Fan Installed Backward
The fan has a specific airflow direction (usually marked with an arrow). Installing it backward reduces combustion efficiency.
Confirm the arrow points upward toward the exhaust when reinstalled.
Reassembly Best Practices
Torque Screws Gently
Paslode housings use plastic threads and metal inserts that strip easily.
- Hand-tighten screws first
- Final tighten with light pressure only
- Never use power tools
Use thread-locker (low-strength) on screws that vibrate loose, like the fan screw.
Test Before Full Use
After reassembly:
- Insert a fresh fuel cell and battery
- Fire 3 to 5 dry shots (no nails) to prime the system
- Load nails and test on scrap wood
Listen for consistent “pop and drive” sounds. A weak pop suggests compression or ignition issues.
Maintenance Tips to Prevent Future Disassembly
Clean After Every 5,000 Nails
Carbon buildup is the leading cause of performance decline. Perform a quick clean of the:
- Spark plug
- Injector tip
- Combustion chamber
This routine extends tool life significantly.
Use Genuine Paslode Fuel and Batteries
Aftermarket fuel cells often contain impurities that leave residue. Paslode 2.0 fuel burns cleaner and reduces carbon.
Rechargeable batteries should be original Paslode Li-ion packs. Third-party versions may not deliver consistent voltage.
Store Properly
- Remove fuel and battery when storing
- Keep in a dry, dust-free case
- Run a dry fire every few weeks to prevent seal drying
Frequently Asked Questions About Paslode Framing Nailer Disassembly
Which Paslode models use the same disassembly steps?
The F325R, CF325, CF325LI, IM325, 5325-80, 5325/CN80, 5325/80S, and 5350-90S-PM share similar housing layouts and internal configurations. Most steps in this guide apply across these models.
How many screws hold the Paslode housing together?
Most Paslode framing nailers use 6 to 8 external screws to secure the housing halves. Some are hidden under rubber grip pads or labels, so inspect the entire body before prying.
What size spark plug does a Paslode framing nailer use?
Paslode framing nailers typically use a 5/8″ hex spark plug, equivalent to Paslode #902100 or NGK CM-5. Always verify the gap is between 0.020 and 0.025 inches before reinstalling.
Is the fan screw reverse-threaded on Paslode nailers?
Yes. On most Paslode framing nailers, the central fan screw is reverse-threaded. Turn it clockwise to loosen and counterclockwise to tighten during reassembly.
Can I use aftermarket fuel cells after disassembly?
You can, but genuine Paslode 2.0 fuel cells are recommended. Aftermarket fuels often leave more residue, which increases the chance of injector clogging and carbon buildup.
How often should I fully disassemble my Paslode nailer?
A full disassembly is not needed for routine care. Plan a deep clean every 5,000 nails, or sooner if you notice misfires, weak drives, or fuel delivery issues.
Key Takeaways for Successful Paslode Framing Nailer Disassembly
Regular disassembly and inspection of your Paslode framing nailer can prevent costly repairs and downtime. Always remove the battery and fuel cell first, use proper hand tools, and document each stage with photos for error-free reassembly. Models like the F325R, CF325, IM325, and 5325 series share similar internal layouts, making this guide broadly useful across the Paslode lineup.
Your next step is to gather your tools, clear a clean workspace, and start with the housing screws. Take your time, label every component, and reassemble in reverse order. With proper care, your Paslode nailer can deliver reliable performance for years to come.