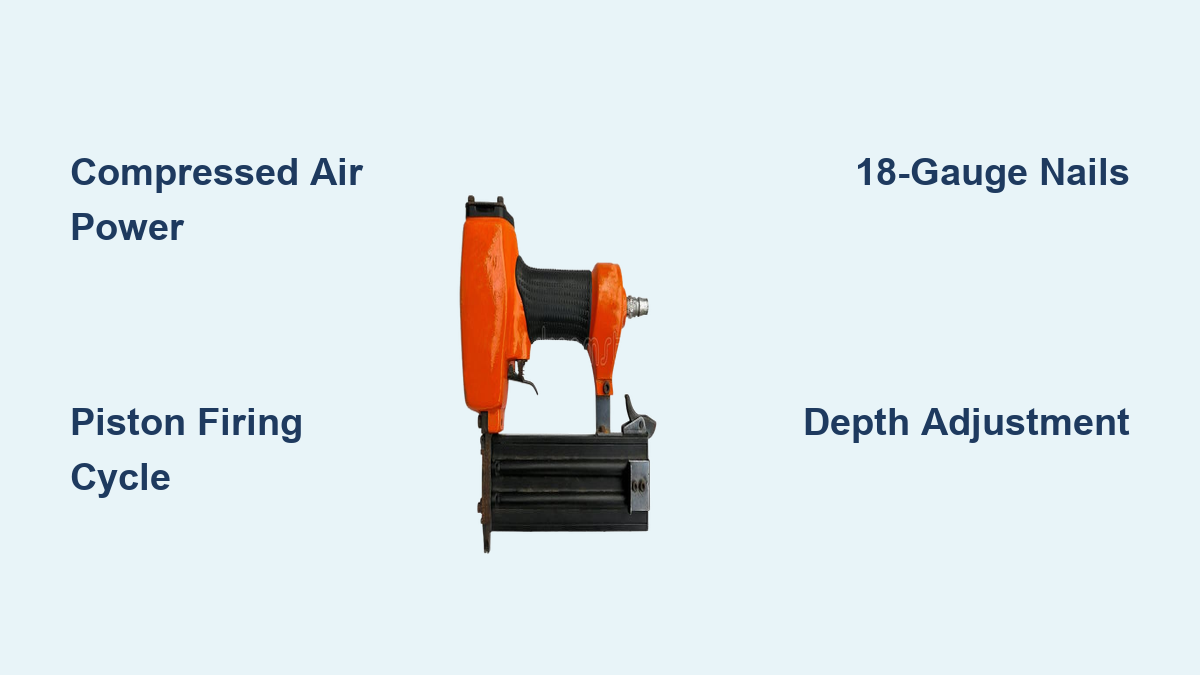
How a Brad Nailer Works: Quick Guide
If you’ve ever watched a carpenter install baseboards or assemble a cabinet in minutes instead of hours, chances are they were using a brad nailer. This compact power tool is a staple in finish carpentry, prized for its speed, precision, and clean results. But how does a brad nailer work under the hood? At its core, a brad nailer uses compressed air or mechanical energy to drive thin 18-gauge nails into wood with minimal splitting and no hammering. Unlike traditional hammers, it automates both the striking force and nail feeding, delivering consistent, flush fastening in a fraction of a second.
Understanding how a brad nailer works goes beyond pulling the trigger. It involves air pressure dynamics, internal valve systems, and precise mechanical timing. Whether you’re using a pneumatic model connected to an air compressor or a spring-loaded alternative, the principle remains the same: store energy, release it instantly, and reset for the next shot. In this guide, you’ll learn the step-by-step mechanics of pneumatic brad nailers, how fasteners are selected and driven, best practices for control and safety, and why these tools outperform manual methods. By the end, you’ll know exactly what happens inside the tool every time it fires and how to use it like a pro.
Pneumatic Power: The Engine Behind the Tool
:max_bytes(150000):strip_icc()/BradNailercutaway20copy-2e052d67201e4700bd0670e8496907c1.jpg)
The vast majority of brad nailers rely on pneumatic power, meaning they’re driven by compressed air from an external compressor. This setup allows for rapid, repeatable nail driving with consistent force, which is critical for professional finish work.
Compressed Air as the Driving Force
A brad nailer connects via a hose to an air compressor that delivers high-pressure air, typically between 70 and 120 PSI. This air flows into the tool’s internal chambers, ready to be directed at a moment’s notice. The key advantage of pneumatic power is its ability to generate a powerful, controlled impact without heavy motors or batteries. As a result, pneumatic brad nailers are lighter, faster, and more durable than many cordless alternatives.
When the trigger is pulled, air pressure shifts instantly within the tool, creating a chain reaction that drives the nail. The entire cycle, from firing to reset, happens in milliseconds, enabling users to drive dozens of nails per minute. This speed is why pneumatic models dominate in trim work, cabinetry, and other high-precision applications where efficiency matters.
Key Internal Components
Inside every pneumatic brad nailer are several critical parts working in harmony:
- Piston: A sliding cylinder that moves up and down inside the main chamber.
- Driver (or Driver Blade): A long metal rod attached to the piston that strikes the nail.
- Head Valve: Controls airflow above and below the piston.
- Trigger Valve: Releases air pressure to initiate the firing sequence.
- Return Air Chamber: Stores air during the downstroke to push the piston back up.
These components form a closed-loop system where air pressure, not electricity or springs, powers each shot.
The Firing Cycle: Step-by-Step Breakdown
The magic of a brad nailer lies in its three-phase firing cycle: rest, fire, and reset. Each phase relies on precise air pressure changes to drive the nail and prepare for the next shot.
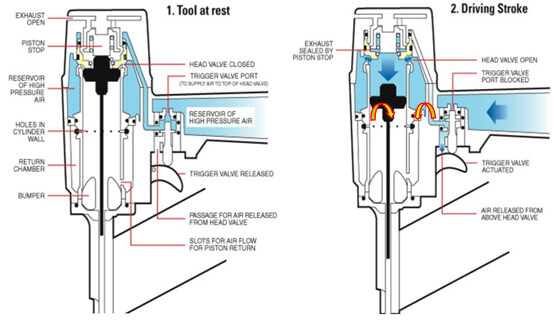
Phase 1: Tool at Rest (Pressure Balanced)
When the tool is idle, compressed air fills the chambers above and below the head valve, balancing the pressure on both sides. A small spring keeps the head valve sealed shut, preventing air from entering the main cylinder. The piston stays in the up position, and the driver is clear of the nail. The system is pressurized and ready, but nothing moves until the trigger is pulled.
This equilibrium state ensures safety and efficiency. No air is wasted, and the tool remains stable until actuated.
Phase 2: Trigger Pulled – Downward Stroke
Pulling the trigger opens the trigger valve, releasing the air pressure above the head valve. Now, the higher pressure beneath the head valve forces it upward, opening a pathway for air to rush into the top of the main cylinder.
With high pressure now above the piston and low pressure below, the piston is forced downward at high speed. The attached driver blade follows, striking the head of the waiting brad nail and launching it through the barrel and into the workpiece, all in less than 50 milliseconds.
High-performance models can complete this stroke up to 20 times per second, making them ideal for long runs of trim or molding.
Phase 3: Release and Reset – Return Stroke
Once the piston reaches the bottom of its stroke, the displaced air from the cylinder is forced through small ports into the return air chamber located beneath the piston.
When the user releases the trigger, air pressure is restored above the head valve, pushing it back down and sealing the system. With the upper chamber now closed off, the pressurized air in the return chamber below the piston becomes the dominant force. This pushes the piston and the driver back to the starting position.
As the piston rises, excess air vents out through an exhaust port. The tool is now re-pressurized and ready to fire again.
This self-resetting cycle eliminates the need for manual cocking and enables rapid, continuous nailing with minimal user effort.
Spring-Loaded Nailers: Mechanical Alternative
While pneumatic models dominate, some brad nailers use spring-loaded mechanisms instead of air pressure. These are less common but useful in portable or low-power situations.
How Spring Mechanisms Generate Force
In a spring-loaded brad nailer, pulling the trigger activates a cam and lever system that lifts and compresses a powerful spring attached to the hammer, which is the equivalent of the driver in pneumatic tools.
- The triangular cam rotates when the trigger is pulled.
- It pushes one end of a lever, which lifts the hammer.
- As the hammer rises, it compresses two springs, storing potential energy.
- A rotating scooper plate catches a knob on the hammer, holding it at full compression.
- Once the scooper plate rotates past the catch point, it releases the hammer.
- The springs snap the hammer down, driving the nail.
This mechanical process mimics the function of compressed air but relies entirely on stored spring energy.
Pros and Cons vs. Pneumatic
| Feature | Spring-Loaded | Pneumatic |
|---|---|---|
| Power Source | Mechanical springs | Compressed air |
| Speed | Slower (1–3 shots/sec) | Faster (up to 20 shots/sec) |
| Portability | No hose or compressor | Requires air supply |
| Maintenance | Fewer seals, simpler | Needs oil, clean air |
| Consistency | Less force control | Highly consistent |
While spring models offer cordless convenience, they lack the speed and precision of pneumatic systems, making them better suited for light-duty projects.
Fastener Compatibility: Nail Gauge and Length
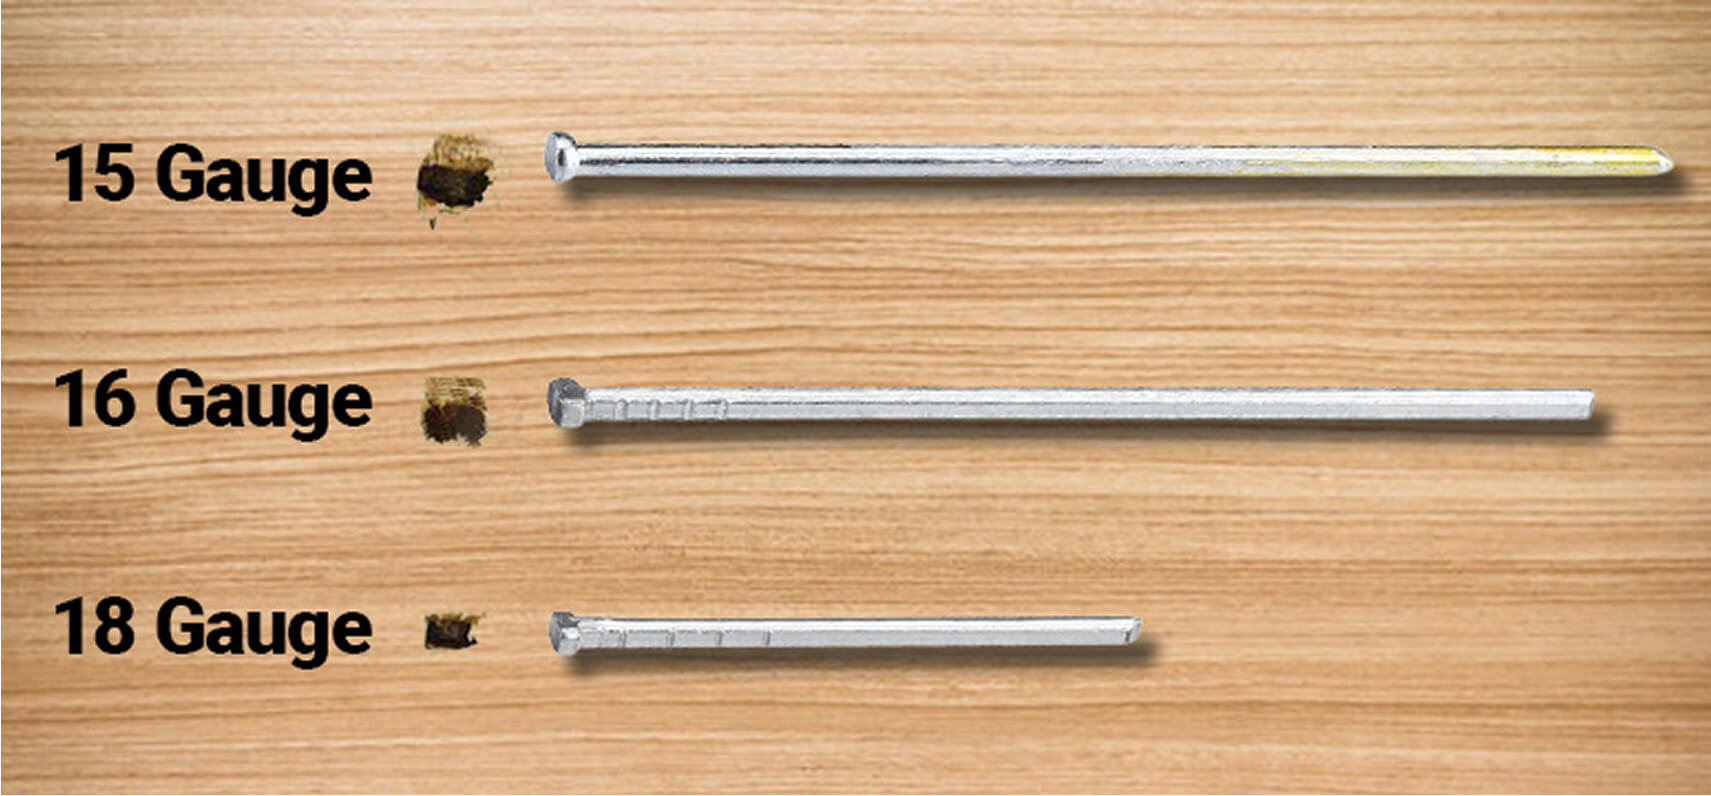
A brad nailer only works well when loaded with the correct fasteners. Using the wrong size can cause jams, weak joints, or material damage.
18-Gauge Nails: Standard for Brad Nailers
Most brad nailers are designed for 18-gauge nails, which have a diameter of about 1.2 mm. These are thinner than 16-gauge nails used in finish nailers, making them ideal for delicate materials like:
- Hardwood flooring underlayment
- Cabinet face frames
- Crown molding
- Picture frames
- Shoe molding
Never substitute 16-gauge nails. They won’t fit in the magazine or driver channel and can damage internal components.
Choosing the Right Nail Length
Brad nails range from ½ inch to 2½ inches in length. The correct length depends on the material thickness.
Use the Quarter-Inch Rule
Ideal nail length = Combined material thickness – ¼ inch
For example:
– Two ¾” boards = 1.5″ total → Use a 1¼” brad
– ½” trim on ¾” baseboard = 1.25″ total → Use a 1″ brad
Consequences of Wrong Length
- Too short: Nail doesn’t penetrate deeply enough → weak hold
- Too long: Nail exits the back → splits wood or damages surfaces
Always test on scrap wood before starting your project.
Depth and Angle Control: Precision Techniques
:max_bytes(150000):strip_icc()/NailingTips-Depth-Guide-5d392aeaaf9d472ea6b8af1eb284f26c.jpg)
Driving nails correctly isn’t just about power. It’s about control. Proper depth, angle, and material stability ensure strong, invisible joints.
Adjusting Depth of Drive
Most brad nailers have two depth controls:
- Air Pressure Dial – Regulates overall force via compressor or tool-mounted regulator
- Depth-of-Drive Adjustment – Fine-tunes how far the driver extends
Best Practice:
– Start with lower pressure
– Test on scrap wood
– Increase pressure gradually until the nail head is flush or slightly below the surface
– Use a nail set to countersink if needed
Over-driving creates large holes that require filler. Under-driving leaves nails exposed.
Maintaining Correct Firing Angle
Brad nailers follow a “point and shoot” principle: the nail follows the barrel’s direction. This is critical when working with angled joints.
- For miter joints like picture frames, hold the tool perpendicular to the joint line
- Avoid tilting the tool, which can cause blow-out or missed hits
- Keep the nose flat against the work surface
Even a slight angle deviation can cause structural weakness or visible damage.
Secure Materials with Clamps
Never hold pieces together by hand while nailing.
- Clamps keep hands safe and prevent movement
- They ensure consistent alignment
- They reduce the risk of misfires or nail deflection
A single misplaced nail can ruin a project or cause injury.
Performance and Efficiency Advantages
Why choose a brad nailer over a hammer or other fastening tools? The answer lies in speed, consistency, and finish quality.
Speed: Up to 20 Nails Per Second
High-end pneumatic brad nailers can fire up to 20 cycles per second, a rate impossible to match manually. This means:
- Baseboards installed in minutes instead of hours
- Cabinet assembly with zero hammer marks
- Seamless trim runs with uniform spacing
The automated loading and reset cycle enables non-stop nailing with minimal fatigue.
Pneumatic vs. Battery-Powered: Which Is Better?
| Factor | Pneumatic | Battery-Powered |
|---|---|---|
| Speed | Faster cycle time | Slower due to motor lag |
| Weight | Lighter (no battery) | Heavier |
| Portability | Tethered to compressor | Fully cordless |
| Cost | Lower tool cost | Higher initial cost |
| Maintenance | Requires air filter, oil | Needs battery care |
Pneumatic models win in performance, but battery-powered versions are gaining ground for fieldwork where compressors aren’t practical.
Ideal Applications
Brad nailers excel in finish carpentry, including:
- Installing baseboards and crown molding
- Assembling furniture and cabinets
- Attaching hardwood flooring starter rows
- Securing window and door trim
- Building picture frames and decorative boxes
Their small nail size minimizes splitting and leaves nearly invisible holes.
Safety and Maintenance Essentials
Even a small brad nailer can cause serious injury if misused. Following safety protocols and basic maintenance ensures long life and safe operation.
Critical Safety Rules
- Always clamp workpieces to keep hands away from the nail path
- Keep your finger off the trigger until the tool is in position
- Wear safety glasses because nails can ricochet or shatter
- Disconnect air when loading or clearing jams
- Point the tool away from your body and others
A brad nail fired at 70+ PSI can penetrate skin and bone. Treat every nailer as a loaded firearm.
Common Mistakes to Avoid
- Using incorrect nail gauge (e.g., 16-gauge in an 18-gauge tool)
- Setting air pressure too high, which causes blow-out
- Firing at an angle, which leads to splitting
- Skipping test shots on scrap wood
- Ignoring air filter and oil maintenance
Routine Maintenance Tips
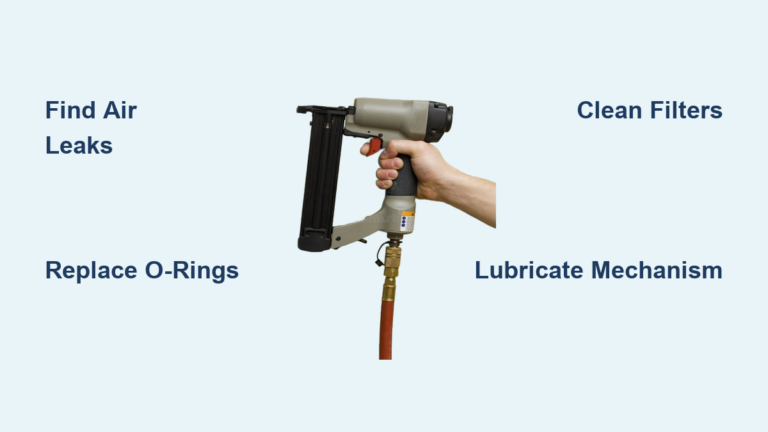
- Lubricate regularly by adding 2–3 drops of pneumatic tool oil into the air inlet daily
- Clean the magazine weekly to remove dust and nail fragments
- Inspect O-rings and seals and replace if cracked or leaking
- Use dry, clean air because moisture damages internal valves
- Store properly in a dry place with the safety guard engaged
Well-maintained brad nailers can last decades.
Frequently Asked Questions About Brad Nailers
What PSI should I use for a brad nailer?
Most brad nailers operate between 70 and 120 PSI. Start at the lower end and increase gradually until nails drive flush without over-penetrating the material.
Can a brad nailer use 16-gauge nails?
No. Brad nailers are designed for 18-gauge nails only. Using 16-gauge nails will cause jams and may damage the magazine and driver channel.
How fast can a pneumatic brad nailer fire?
High-performance pneumatic models can complete up to 20 cycles per second, making them significantly faster than manual hammering or spring-loaded alternatives.
What is the difference between a brad nailer and a finish nailer?
Brad nailers use thinner 18-gauge nails, while finish nailers use thicker 16-gauge nails. Brad nailers are ideal for delicate trim work where minimal splitting matters, while finish nailers provide stronger holding power for heavier trim.
Do I need an air compressor to use a brad nailer?
Pneumatic brad nailers require an external air compressor. If portability is a priority, consider a battery-powered or spring-loaded model, though they offer slower cycle speeds.
How do I prevent brad nails from splitting wood?
Use the correct nail length (¼ inch shorter than combined material thickness), avoid firing too close to edges, and test on scrap wood first. Lower air pressure also reduces splitting in delicate materials.
Final Thoughts on Mastering Your Brad Nailer
A brad nailer works by harnessing compressed air or spring energy to drive 18-gauge nails with speed and precision. The pneumatic version uses a three-phase cycle (rest, fire, reset) controlled by air pressure shifts across a piston and head valve system. This allows for rapid, repeatable nailing essential in finish carpentry. Choosing the right nail length, adjusting depth and angle, and securing materials with clamps ensure professional results. While battery-powered models offer portability, pneumatic nailers remain the gold standard for performance.
By understanding how a brad nailer works, from the internal valve system to the firing sequence, you gain better control, avoid common errors, and extend the life of your tool. Whether you’re a DIYer or a pro, mastering this compact powerhouse will transform the way you build and finish wood projects. Start by practicing on scrap wood, dial in your pressure settings, and always clamp your workpieces for the cleanest, safest results.