How to Use a Floor Nailer: Quick Steps
Installing hardwood flooring can transform any room, and using a floor nailer is the fastest way to secure planks without visible fasteners. Whether you’re a DIYer tackling your first project or a seasoned builder, knowing how to use a floor nailer properly ensures a smooth, squeak-free finish that lasts for decades. This guide walks you through every step, from tool selection and setup to nailing technique and troubleshooting, so you can install your floor with confidence.
Using the wrong fastener, incorrect pressure, or sloppy technique can lead to split boards, loose joints, or annoying squeaks. But with the right preparation and knowledge, you’ll avoid common mistakes and achieve a tight, durable installation. You’ll learn how to match your nailer to the flooring type, set up your compressor correctly, and finish those tricky final rows near the wall.
Let’s get into the details of selecting, setting up, and operating your floor nailer like a pro.
Choose the Right Nailer Type
Manual vs. Pneumatic Nailers
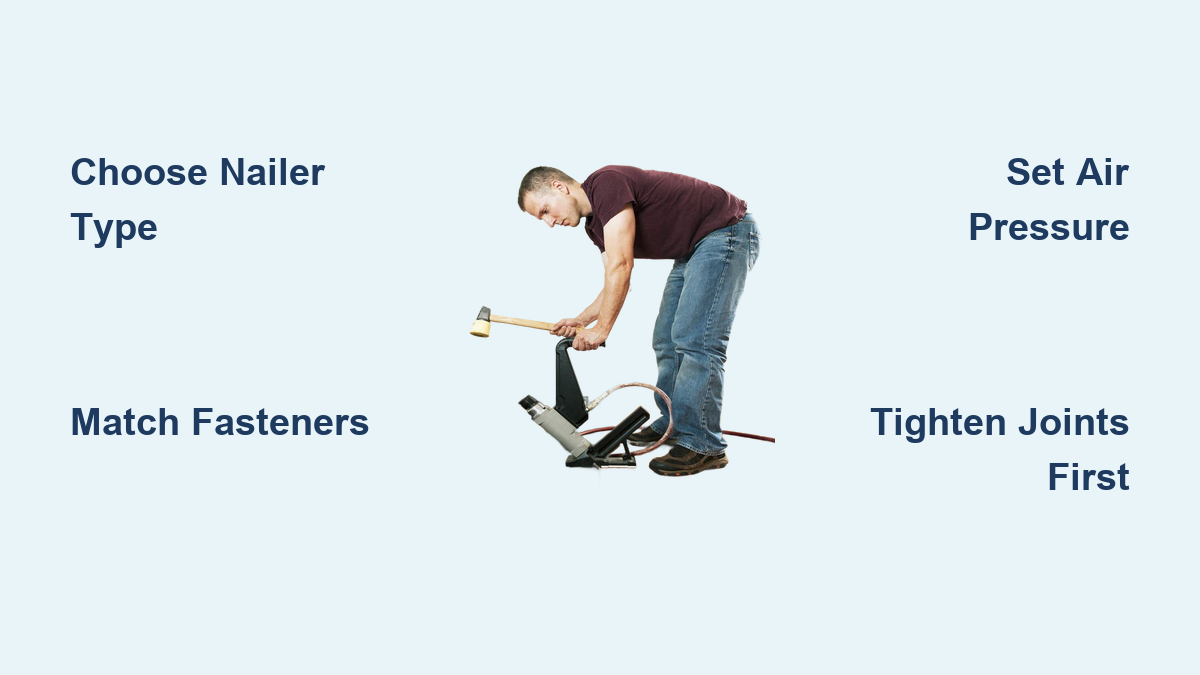
Manual flooring nailers rely on a rubber mallet to drive cleats through the tongue of hardwood planks. They’re lightweight, require no hoses or compressors, and offer excellent control, which makes them ideal for small jobs or tight spaces. However, they demand more physical effort and are slower than powered options.
Pneumatic flooring nailers, powered by compressed air, are the go-to choice for large installations. They fire cleats or staples quickly with consistent force, reducing fatigue. These tools are favored by professionals but require a compatible air compressor and some practice to master timing and alignment.
For most DIYers, a pneumatic nailer offers the best balance of speed and ease, especially for solid or engineered hardwood over 300 square feet.
Match Nailer to Flooring Material
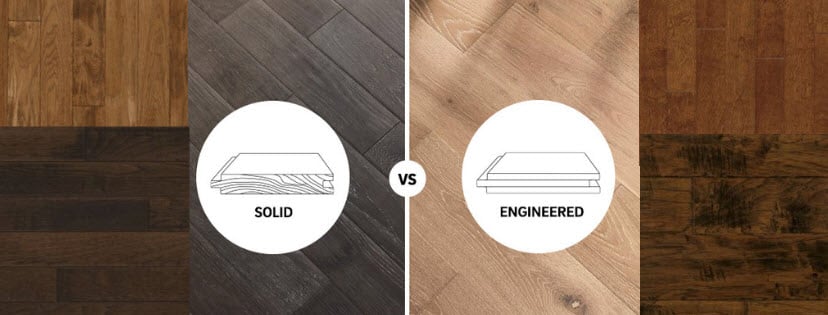
Not all nailers work with all flooring types. Solid hardwood (3/4″) requires a cleat nailer that drives L-shaped nails at a 45-degree angle. Engineered or thinner planks (3/8″ to 5/8″) often use staplers or combo tools that accept both staples and cleats.
Check your flooring manufacturer’s recommendation before buying or renting. Using staples on solid wood can restrict natural expansion and cause splitting or squeaks. Conversely, cleats may not hold thinner engineered boards as securely as staples.
Always verify your nailer’s adapter plate supports the thickness of your flooring.
Select the Correct Fasteners
Cleats vs. Staples: Which to Use
Cleat nails (L-shaped) are designed for solid hardwood. Their ridged shank and flexible design allow wood to expand and contract with humidity changes without cracking. They’re less likely to split the tongue and are the standard for 3/4″ oak, hickory, or walnut.
Staples provide strong, dual-point fastening ideal for engineered hardwood, laminate, or softwoods like pine. They install faster and are common in trigger-actuated tools. But because they grip tightly, they can restrict movement in solid wood, leading to tension and noise over time.
Use cleats for solid wood. Use staples only for engineered or thin planks unless the manufacturer specifies otherwise.
Fastener Gauge and Length Guide

Using the wrong gauge or length risks damaging your floor. Follow this rule: nail length should be about 2x the plank thickness to ensure proper subfloor penetration.
- 3/4″ solid hardwood: 15 or 16-gauge cleat, 2″ long
- 1/2″ solid hardwood: 15-gauge cleat, 2″ long
- 5/8″ engineered: 16-gauge staple or cleat, 1-1/2″ long
- 3/8″ engineered: 18-gauge staple, 1-1/4″ long
Thicker 15-gauge nails offer superior holding power but can split thinner boards. Use 18-gauge for prefinished or delicate veneers to minimize visible holes.
Always check your flooring specs, since some engineered floors require specific fasteners to maintain warranty.
Prepare Tools and Setup
Required Equipment Checklist
Before starting, gather the following:
- Floor nailer (manual or pneumatic)
- Air compressor (min. 4-gallon tank, 90 PSI output)
- Air hose with compression fittings
- Rubber mallet
- Measuring tape
- Tapping block and pull bar
- Wedges (for expansion gaps)
- Finish nails and hammer (starter row)
- Pre-drill bit (for hand-toenailing)
- Safety goggles and ear protection
Renting a combo kit (nailer + compressor) is cost-effective for one-time projects.
Set Air Pressure and Test Fire
Connect the nailer to the compressor and set the regulator to 90 PSI, the standard for most tools. Refer to your nailer’s manual for exact requirements.
Low pressure causes under-driven nails; high pressure can overdrive or damage boards. Always test fire on scrap material first.
Place a scrap board over matching subfloor. Position the nailer foot against the tongue and strike the plunger (or pull the trigger). Check:
- Is the fastener fully seated in the nail pocket?
- Is the tongue damaged?
- Is the top edge of the board marred?
Adjust pressure or adapter plate if needed. Perfecting this test shot prevents costly errors on your actual floor.
Install the Starter Row
Hand-Nail the First Row
A floor nailer can’t reach the first row against the wall. Instead, install it manually.
Lay the first board with the groove facing the room. Leave a 1/4″ expansion gap using spacers. Secure it by driving finish nails at a slight angle through the face of the board into the subfloor.
Use a pre-drill bit to prevent splitting. Space nails every 8 to 10 inches. After installation, fill holes with stainable wood putty (for unfinished floors) or manufacturer-matched filler (for prefinished).
This row acts as your anchor. Ensure it’s perfectly straight, since any misalignment will carry through the entire floor.
Secure and Align with Spacers
Use plastic wedges every 2 to 3 feet along the wall to hold the expansion gap. These keep the row straight and prevent movement during installation.
Check alignment with a long level or laser. A crooked starter row means a crooked floor.
Once secured, remove the spacers before installing the next row. Otherwise, they’ll interfere with plank seating.
Drive Fasteners at 45 Degrees
Position the Nailer Correctly
For all subsequent rows, position the adapter foot of the nailer directly against the tongue of the installed board. The driver should align with the nail pocket just above the groove.
Ensure the nailer base is flat on the floor. Tilting it can cause misfires or damaged tongues.
The fastener must enter the new board’s tongue at a precise 45-degree angle. This hides the nail under the next plank and locks the joint securely.
Do not force the tool if it doesn’t sit flush. Misalignment leads to jams or broken tongues.
Actuate with a Firm Strike or Trigger Pull
Mallet-actuated nailers require a solid, single blow with a rubber mallet to fire. Strike the plunger straight down, since glancing blows may not trigger the tool.
Trigger-actuated staplers require you to press the safety tip against the floor and pull the trigger. These are easier for beginners but often require kneeling.
After each fastener, lift the nailer and move to the next nail pocket. Most tools space nails every 8 to 10 inches automatically.
Always maintain a consistent rhythm and pressure to ensure uniform nailing.
Tighten Joints Before Nailing
Use a Tapping Block to Close Gaps
Even with tight-fitting planks, gaps can form between the tongue and groove. Never nail a loose joint, as it will squeak or shift over time.
After placing a new board, tap it into place using a wooden tapping block and hammer. Place the block against the end or side of the plank and strike it, not the flooring directly, to avoid dents.
For tight spots, use a pull bar to close side joints. Slide it under the groove side and lever the board into position.
Check each joint by running your hand across it. It should feel flush and solid before nailing.
Prevent Squeaks with Snug Seams
Squeaks happen when boards rub due to movement. The best prevention is perfectly tight joints before fastening.
If you hear a click or feel resistance when tapping, disassemble and inspect for debris or warped planks.
Use wedges to maintain alignment across the row. A single loose board can compromise the entire run.
Nail only after every joint is fully seated.
Handle Final Rows Near Walls

Switch to Hand-Toenailing
Most floor nailers can’t fit within 2 to 3 rows of the wall. When the tool body or mallet hits the baseboard, switch to hand-toenailing.
Remove base shoe molding if possible to gain clearance. This may allow you to use the nailer for one extra row.
For the remaining boards:
- Dry-fit the last few rows to mark cut lines.
- Cut planks to size (tongue side facing wall).
- Use wedges to tighten against the previous row.
- Pre-drill pilot holes at a 45-degree angle through the tongue.
- Drive finish nails manually with a hammer.
This mimics the nailer’s action and keeps fasteners hidden.
Face-Nail the Last Row if Needed
For the very last row, face-nailing may be necessary if there’s no tongue to nail into.
Drive nails straight down through the face of the board near the wall. Space them every 10 inches.
Counter-sink the nails slightly with a nail set. Fill holes with matching wood filler.
On prefinished floors, use manufacturer-supplied putty for an invisible repair.
Glue for Extra Stability
If nailing space is extremely limited (such as under cabinets), apply flooring adhesive to the subfloor before setting the final plank.
Press the board firmly into place and weight it until cured. This prevents movement even without mechanical fasteners.
Never rely on glue alone for the entire floor. Nails or staples are required for structural integrity.
Troubleshoot Common Problems
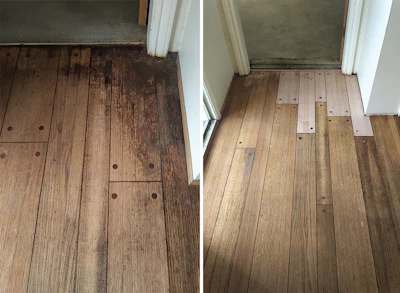
Fix Splitting Tongues
Splitting usually happens when:
- Fastener gauge is too thick (e.g., 15-gauge on 3/8″ plank)
- Air pressure is too high
- Fasteners are dull or misaligned
- Wood is brittle (e.g., reclaimed or kiln-dried hardwood)
Solution: Switch to 16-gauge cleats, reduce PSI, or pre-drill pilot holes. Always test on scrap first.
Use sharp, high-quality fasteners, since cheap staples increase split risk.
Stop Squeaky Floors
Squeaks are often caused by:
- Using staples on solid hardwood (restricts movement)
- Loose joints due to improper tapping
- Under-driven or missing fasteners
Solution: Use cleats for solid wood. Ensure every joint is tight before nailing. Verify fasteners are fully seated.
If squeaks appear later, inject adhesive through small drilled holes between boards.
Resolve Improper Nail Depth
Nails that are proud (sticking out) or overdriven (below surface) indicate pressure issues.
- Low PSI or small compressor → under-driven nails
- Excessive PSI → overdriven nails or damaged wood
Use a 4-gallon or larger compressor that maintains 90 PSI under load. Test fire frequently during long runs.
Adjust the regulator in 5-PSI increments until depth is perfect.
Maintain and Finish the Floor
Clean and Inspect After Installation
Once all planks are secured, remove spacers and inspect the entire floor.
Look for:
- Protruding nails
- Gaps between boards
- Dents or scratches
- Misaligned seams
Use a nail punch to sink any high nails. Fill with wood putty.
Clean the surface with a manufacturer-approved wood floor cleaner. Avoid water or steam mops.
Prepare for Finishing or Furniture
If installing unfinished solid hardwood, sand and finish the floor now. This seals the wood and hides minor nail marks.
For prefinished flooring, sweep and buff with a dry pad. Avoid heavy traffic for 24 hours.
Reinstall baseboards or shoe molding to cover the expansion gap.
Allow the floor to acclimate and settle for at least 48 hours before placing heavy furniture.
Follow the Pro Checklist
Verify Setup Before You Start
Use this final checklist to avoid rework:
- Compressor is 4+ gallons and maintains 90 PSI
- Air hose and fittings are secure and leak-free
- Adapter plate matches flooring thickness
- Correct fasteners (cleats or staples) are loaded
- Test fire looks perfect on scrap
- Safety goggles and ear protection are on
- Starter row is hand-nailed and straight
- Expansion gaps are marked with spacers
- Manufacturer’s fastener guidelines are followed
Skipping any step risks poor results. Take time to get it right.
Know When to Rent vs. Buy
For one-time projects, renting a floor nailer is often cheaper and more practical. Rental centers offer combo kits with compressor, hose, and tool.
Buy only if you plan multiple installations or work professionally.
Ensure the rental tool is compatible with your flooring type and fasteners.
Frequently Asked Questions About Floor Nailers
What size air compressor do I need for a floor nailer?
You need a compressor with at least a 4-gallon tank that can maintain 90 PSI. Undersized “pancake” compressors lose pressure during repeated firing, which leads to under-driven nails and poor installation quality.
Can I use staples instead of cleats for solid hardwood?
No. Staples restrict the natural expansion and contraction of solid hardwood, which causes tension, squeaks, or splitting over time. Use L-shaped cleats for solid wood to allow proper movement.
How do I know if I’m using the right fastener gauge?
Check your flooring manufacturer’s specifications. As a general rule, use 15 or 16-gauge cleats for 3/4″ solid hardwood, 16-gauge staples or cleats for 1/2″ to 5/8″ engineered planks, and 18-gauge staples for thin 3/8″ engineered boards.
Why does my floor nailer keep jamming?
Jams usually result from using the wrong adapter plate, dull fasteners, or misaligned positioning. Ensure the tool sits flush against the tongue before firing, and use sharp, high-quality fasteners matched to your flooring thickness.
How do I fix squeaky floors after installation?
Squeaks typically mean loose joints or improper fasteners. For prevention, tap every board tight before nailing and use cleats on solid wood. If squeaks appear later, inject construction adhesive through small holes drilled between the boards.
Should I rent or buy a floor nailer?
Rent for one-time DIY projects to save money. Buy only if you plan multiple installations or work in flooring professionally. Rental kits often include the compressor, hose, and tool together for convenience.
Key Takeaways for Using a Floor Nailer Successfully
Mastering how to use a floor nailer comes down to three essentials: choosing the right tool and fasteners, setting up your compressor correctly, and maintaining a precise 45-degree angle for every nail. Always test fire on scrap material before touching your actual floor, and never skip tightening joints with a tapping block before fastening.
For the final rows near the wall, switch to hand-toenailing or face-nailing to avoid damaging your tool or the baseboards. With patience and attention to detail, you’ll achieve a smooth, durable, squeak-free floor that looks like it was installed by a professional.
Your next step: gather your equipment, test your setup on scrap wood, and begin your installation with confidence.