How to Install Hardwood Floor with Finish Nailer
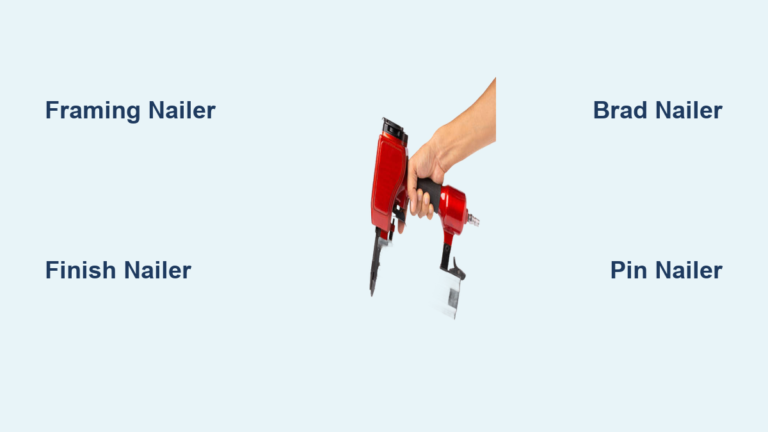
Installing hardwood flooring yourself can feel intimidating, especially when bulky flooring nailers don’t fit your space. Many DIYers abandon the project or settle for less professional results simply because they lack access to specialized tools. The good news is that you can install a hardwood floor with a finish nailer successfully when you understand the right techniques, gauges, and patterns to use.
This guide breaks down everything you need to know about using a finish nailer for hardwood installation. You’ll learn which situations call for this approach, how to select proper fasteners, and how to avoid the costly mistakes that derail most DIY flooring projects.
When a Finish Nailer Works for Hardwood Installation
Small Rooms Under 100 Square Feet
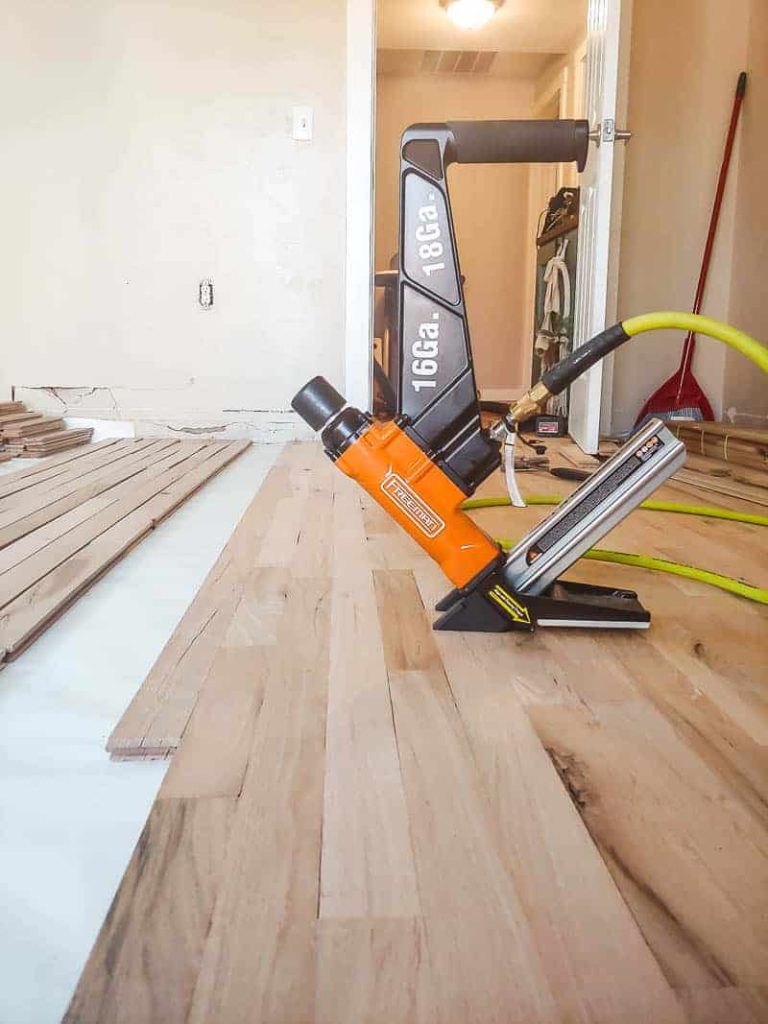
A finish nailer becomes your best friend in compact spaces like half-bathrooms, closets, and laundry rooms. These rooms typically measure under 100 square feet, making them perfect candidates for finish nailing throughout the entire floor. The reduced foot traffic in these areas means your fasteners face less stress over time.
For a 32-square-foot bathroom renovation, a 16-gauge finish nailer handles the job from first row to last without requiring you to rent or buy a dedicated flooring nailer.
Narrow Hallways Under 40 Inches Wide
Hallways present unique challenges because swinging a mallet for a manual flooring nailer requires clearance you simply don’t have. A pneumatic finish nailer lets you work within inches of the wall, making blind nailing possible even in tight corridors.
Starting from one end and working forward keeps your air hose behind you and your workflow consistent. This approach eliminates the frustration of trying to angle a flooring nailer in spaces designed for walking, not hammering.
First and Last Rows of Any Installation
Even professional installers use finish nailers for perimeter rows. The first row against the wall requires face nailing because there’s no angle for blind fastening. The final three to four rows lack space for any pneumatic flooring tool, forcing you to either face nail or hand-drive nails.
A 15-gauge or 16-gauge finish nailer provides clean, consistent fastening for these critical edge sections. The result is a seamless transition between your main flooring field and the walls.
Choosing the Right Fastener Gauge
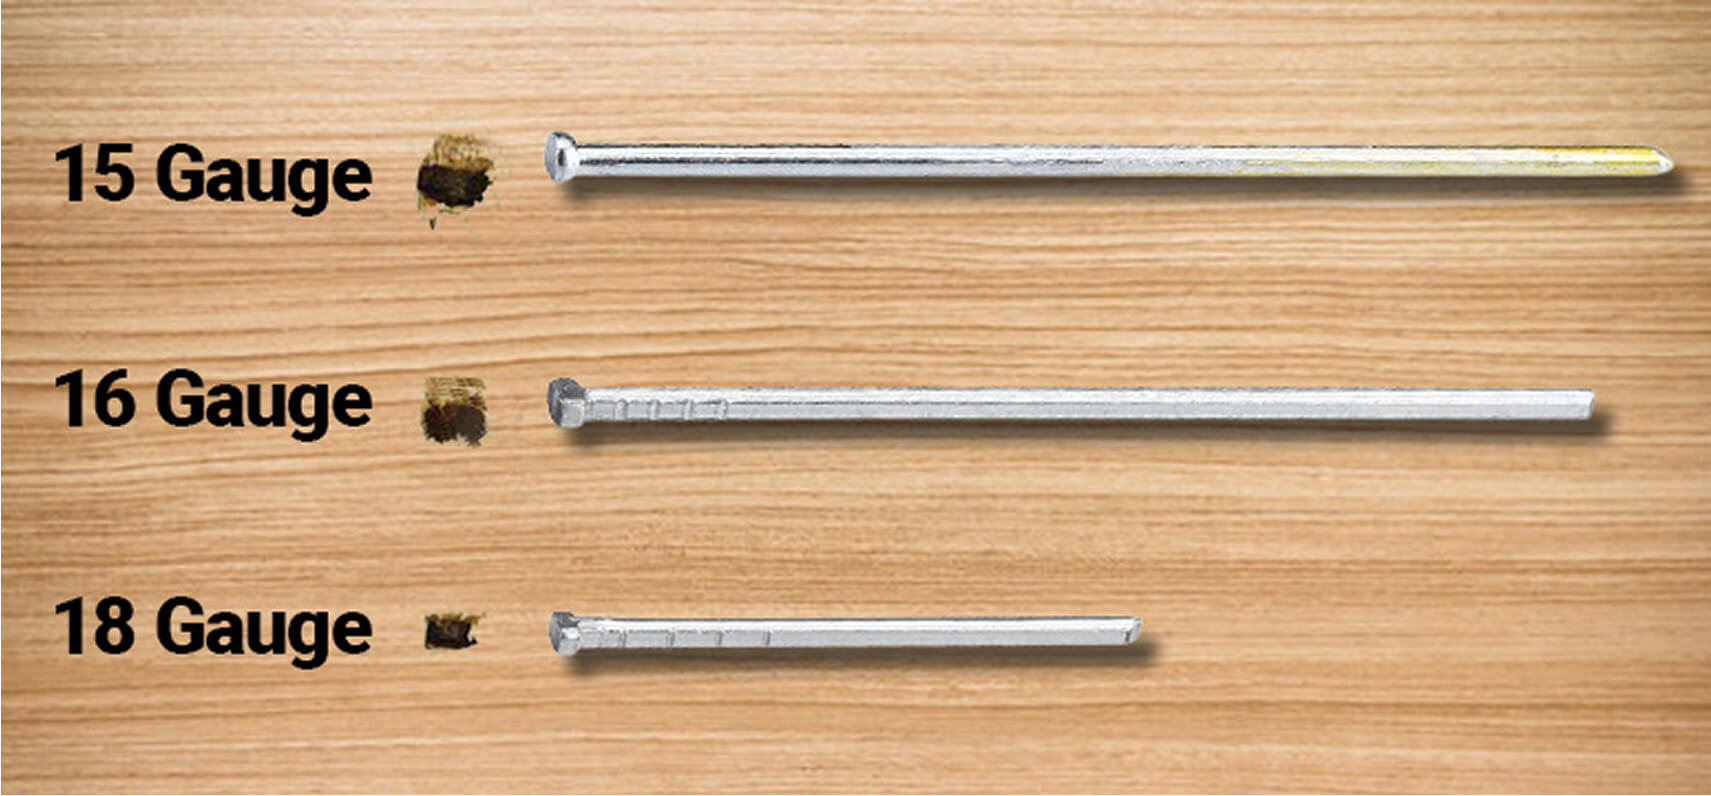
15-Gauge Finish Nails for Maximum Strength
Reach for 15-gauge nails when installing 3/4-inch solid hardwood without a flooring nailer. These thick fasteners deliver the holding power needed to resist nail pops and loosening in high-traffic zones. Pair them with 2-inch nails to ensure full penetration into the subfloor.
Avoid 15-gauge nails on planks thinner than 1/2 inch, especially dense species like maple. The thickness can cause splitting, particularly near board ends. Pre-drilling pilot holes within 2 inches of board ends prevents this common failure.
16-Gauge Finish Nails for Versatile Applications
The 16-gauge nail strikes the best balance between holding power and splitting risk for most DIY hardwood projects. Use 1-1/2-inch nails for 1/2-inch engineered planks or 2-inch nails for solid 3/4-inch boards. This gauge handles blind nailing through the tongue effectively and works with most mid-range pneumatic finish nailers.
For engineered hardwood between 3/8-inch and 5/8-inch thick, 16-gauge nails provide reliable fastening without damaging the layered core.
18-Gauge Finish Nails for Thin or Prefinished Floors
Reserve 18-gauge nails for thin engineered flooring at 3/8-inch thickness or for face-nailing prefinished boards where hole visibility matters. These nails create tiny dimples that blend easily with wood filler.
Never rely on 18-gauge nails alone for 3/4-inch solid wood installations. They lack the structural strength to withstand foot traffic and seasonal movement, leading to loosening and squeaks over time.
Comparing Cleats, Staples, and Finish Nails
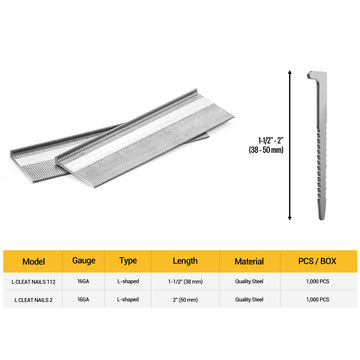
Why L-Cleats Dominate Solid Hardwood Installation
L-shaped cleats remain the gold standard for solid hardwood because their design accommodates natural wood movement. The angled leg drives into the tongue while the flat base rests against it, allowing boards to expand and contract with humidity changes without stress.
Since finish nailers use straight nails, you must compensate by driving fasteners at opposing angles and maintaining proper expansion gaps at walls. This technique mimics the mechanical advantage cleats provide naturally.
When Staples Make Sense
Staples with a 16-gauge crown offer superior holding power through their dual-prong design. They excel with engineered hardwood featuring plywood cores, locking boards securely to the subfloor.
On solid 3/4-inch hardwood, staples can restrict natural expansion and increase the risk of cupping or splitting. Stick with cleats or finish nails for solid wood unless your manufacturer specifically recommends staples.
Making Finish Nails Work as a Compromise
Straight finish nails cannot replicate the mechanical advantage of cleats, but proper technique bridges the gap. Drive nails at a 45-degree angle through the tongue for blind nailing. Using opposing angles (alternating left-to-right and right-to-left on adjacent boards) creates a locking effect that resists lateral movement.
Always set nail heads slightly below the surface to prevent interference with the groove of the next board.
Nailing Patterns and Spacing for Success
Blind Nailing Through the Tongue
Follow these steps for clean blind nailing:
- Position the nailer at a 40 to 45-degree angle
- Align the tip with the center of the tongue
- Fire the nail so it exits through the bottom edge without protruding
- Verify the next board fits snugly with no gaps or resistance
If nails poke through the bottom of the tongue, adjust your angle steeper or switch to shorter nails. Practice on scrap pieces first to dial in your depth and placement.
Face Nailing First and Last Rows
The first row against the wall requires face nailing. Drill pilot holes every 6 inches to prevent splitting, then drive 2-inch 15-gauge nails at a slight angle into the subfloor. Set nail heads with a punch and fill with color-matched wood putty after installation.
For the final three to four rows, face nail through the board face near the groove. Space nails every 6 inches for 15-gauge fasteners and every 8 inches for 16-gauge. Fill holes with filler and sand smooth once the installation is complete.
Optimal Spacing for Finish Nailers
Because finish nails lack the holding power of cleats, tighter spacing is essential:
- 6-inch centers for 15-gauge nails on solid hardwood
- 8-inch centers for 16-gauge nails on engineered flooring
- 10-inch centers with opposing angles as a minimum
Closer spacing prevents board lifting and reduces noise over time. In high-traffic hallways, consider relying on proper nailing and expansion gaps rather than adhesive, which can restrict natural wood movement.
Setting Up Your Compressor and Nailer

Compressor Requirements for Consistent Performance
A finish nailer needs steady air pressure to drive nails flush every time. Use a compressor with a minimum 4-gallon tank, sustained output of 90 PSI, and a CFM rating matching your nailer’s demand.
Small pancake compressors often stall during rapid firing, resulting in under-driven nails that sit proud of the surface. A larger, oil-lubricated compressor ensures reliability throughout your installation.
Adjusting Depth and Pressure
Before installing your first board, complete this setup process:
- Set your compressor to 100 PSI for hard woods like maple and hickory
- Test fire on scrap flooring over a 2×4 subfloor
- Adjust depth so the nail head sits flush or 1/16 inch below the surface
- Confirm the mating board’s groove slides over smoothly
If nails sit too high, increase pressure. If they split the wood, reduce pressure or switch to a thinner gauge.
Solving Common Installation Challenges
Handling the Last Row Problem
When the final rows leave no room for even a finish nailer, you have three options:
- Hand nail through pilot holes in the tongue using a hammer and nail set
- Face nail the last three to four rows and fill the holes with wood putty
- Apply construction adhesive to the subfloor for engineered flooring only, and only if the manufacturer approves
Never glue solid hardwood directly to the subfloor. This restricts natural movement and causes buckling when humidity levels change.
Starting at the Wall Versus the Center
Always start at the wall, not the center of the room. Starting in the middle forces you to nail through grooves on one side, which is difficult and risks splitting boards. Snap a chalk line to mark a straight starting point, and scribe the first row if your wall is out of square.
Starting at the wall keeps nailing consistent and makes alignment easier throughout the installation.
Material-Specific Installation Tips

Solid Hardwood at 3/4-Inch Thickness
Solid hardwood demands strong fastening to withstand movement and traffic. Use 15-gauge finish nails at 2 inches long with 6-inch spacing and opposing angles for stability. Avoid 18-gauge nails since they won’t hold long-term under foot traffic.
Let the floor acclimate for 5 to 7 days before installation. Maintain a 1/4-inch expansion gap at all walls to allow for seasonal movement.
Engineered Hardwood from 3/8 to 5/8 Inches
Engineered wood offers more stability and forgiveness during installation. Use 16-gauge or 18-gauge nails with 1-1/2-inch length for 1/2-inch planks or 1-1/4-inch length for 3/8-inch planks.
You can use a finish nailer for the entire installation on engineered floors. For extra security, apply a bead of adhesive along tongue joints after checking manufacturer guidelines.
Adjusting for Hard Versus Soft Wood Species
Dense species like maple, hickory, and oak require 15-gauge nails and approximately 100 PSI pressure. Pre-drill near ends to prevent splitting in these hard woods.
Softer species like pine, alder, and poplar dent more easily. Use 16-gauge or 18-gauge nails to minimize hole size and reduce pressure to avoid sinking nails too deep.
Avoiding Costly Installation Mistakes
Splitting the Tongue
Splitting occurs when nails are too thick for the wood, when you nail too close to board ends, or when pilot holes are insufficient. Switch to 16-gauge nails, pre-drill within 2 inches of board ends, or adjust your angle to avoid stress points.
Nails Protruding from the Tongue Bottom
When nails stick out the bottom of the tongue, the next board cannot sit flat. Increase your nailing angle to 45 degrees or use shorter nails. Always test on scrap pieces before installing real planks.
Loose or Squeaky Boards
Inadequate fastening causes loose boards and squeaks. Too few nails, under-driven nails, or wrong gauge fasteners all contribute. Add nails at 6-inch intervals, ensure full depth, and upgrade to 15-gauge if you’re using 18-gauge on solid wood.
Groove Interference
When nail heads aren’t set deep enough, they block the groove of the next board. Increase air pressure or adjust your depth setting until nails sit flush or slightly below the surface.
Frequently Asked Questions About Installing Hardwood Floors with a Finish Nailer
Can You Install a Whole Hardwood Floor with Just a Finish Nailer?
Yes, you can install an entire hardwood floor with a finish nailer in small rooms under 100 square feet or in tight spaces where a flooring nailer won’t fit. For larger rooms, use a flooring nailer for the main field and a finish nailer for the first and last rows and any tight spots.
What Gauge Finish Nails Work Best for 3/4-Inch Hardwood?
Use 15-gauge finish nails at 2 inches long for 3/4-inch solid hardwood. This gauge provides the holding power needed to resist loosening and nail pops. Avoid 18-gauge nails for solid wood since they lack sufficient structural strength.
How Far Apart Should You Space Finish Nails on Hardwood?
Space finish nails at 6-inch centers for 15-gauge on solid hardwood and 8-inch centers for 16-gauge on engineered flooring. Tighter spacing compensates for the lower holding power compared to flooring cleats.
Do You Need to Pre-Drill When Using a Finish Nailer?
Pre-drill pilot holes within 2 inches of board ends when working with hard woods like maple or hickory. This prevents splitting. For softer woods and the middle sections of boards, the finish nailer drives nails cleanly without pre-drilling.
Should You Glue the Last Rows When Using a Finish Nailer?
Do not glue solid hardwood to the subfloor under any circumstances. This restricts natural movement and causes buckling. For engineered flooring, adhesive is acceptable only if the manufacturer specifically approves it.
What Air Pressure Do You Need for a Finish Nailer on Hardwood?
Set your compressor to 100 PSI for hard woods like maple and hickory. Softer woods may require lower pressure to avoid sinking nails too deep. Always test on scrap material before installing your first board.
Key Takeaways for Installing Hardwood Floors with a Finish Nailer
A finish nailer serves as a valuable tool for hardwood flooring when you understand its strengths and limitations. Use 15-gauge or 16-gauge nails for solid wood, space them at 6-inch intervals, and always test your setup on scrap material before starting your installation.
Start at the wall, maintain a 1/4-inch expansion gap, and use opposing angles to maximize holding power. For your next step, gather your scrap flooring pieces, set up your compressor, and spend 10 minutes practicing blind nailing before committing to your first row. This small investment of time prevents the most common and costly installation mistakes.