Paslode Framing Nailer Assembly Guide
If your Paslode framing nailer won’t fire, jams frequently, or loses power, the issue may be a simple assembly error after maintenance. Proper Paslode framing nailer assembly is critical for reliable performance and tool longevity. Whether you’re reassembling after cleaning or replacing internal components, following the correct sequence ensures safe, consistent operation. This guide walks you through the essential steps, common mistakes, and model-specific insights for correctly assembling your Paslode framing nailer, focusing on the Cordless XPro 30° Framing Nailer (906800) and Pneumatic PowerMaster Plus™ 30° Framing Nailer (501000).
You’ll learn how to align internal mechanisms, reinstall the driver blade, secure the cylinder, and verify proper operation, all while avoiding costly errors that lead to misfires or damage.
Identify Your Framing Nailer Model
Before beginning reassembly, confirm your exact model. Assembly steps differ between cordless and pneumatic tools.
Cordless vs. Pneumatic Differences
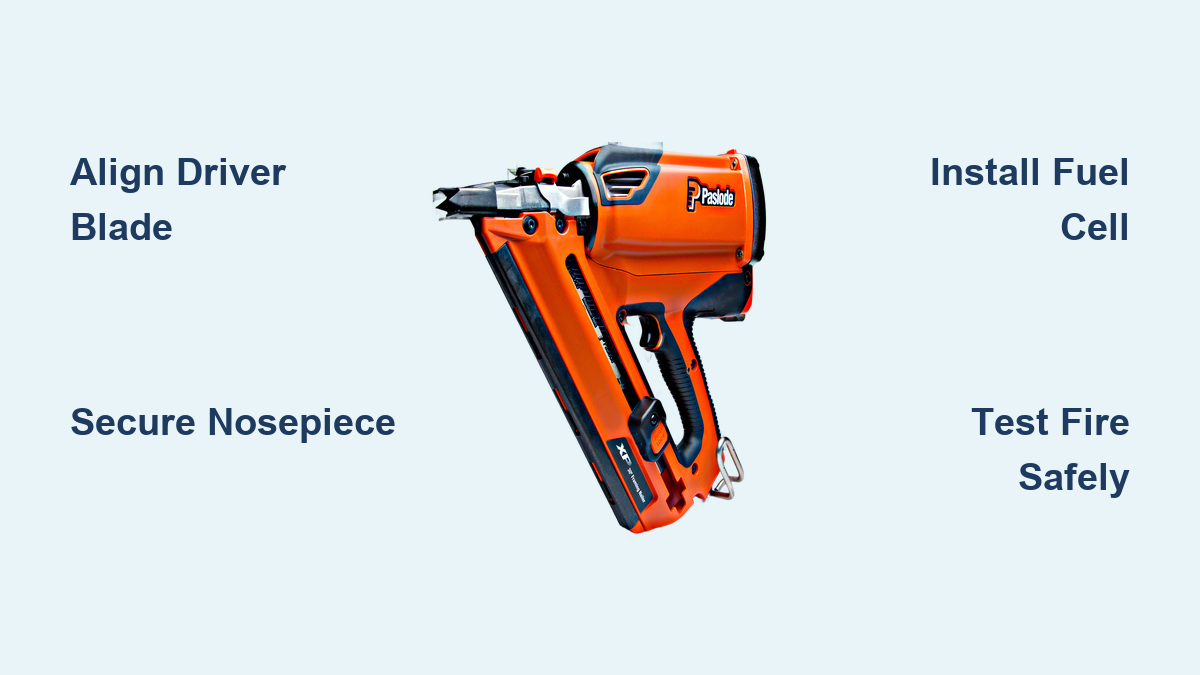
- Cordless models (e.g., 906800) use a combustion-powered system with a fuel cell and battery.
- Pneumatic models (e.g., 501000) rely on compressed air and have simpler internal mechanics.
- Internal components like the driver blade, cylinder, and valve assembly differ significantly.
Locate the Item Number
Check the label on the tool’s body or base:
– Cordless XPro 30° Framing Nailer: Item #906800
– PowerMaster Plus™ 30° Framing Nailer: Item #501000
Refer to the Paslode operating manual for the 906800 or the operating manual for the 501000 before proceeding.
Essential Tools for Reassembly
Use the right tools to avoid stripping screws or damaging components during your Paslode framing nailer assembly.
Required Repair Tools for Paslode 906800 & 501000
- Hex key set (3mm, 5mm)
- Phillips #2 screwdriver
- Needle-nose pliers
- Small hammer or mallet
- Clean microfiber cloth
- Replacement O-rings (if worn)
Pro Tip: Lay out all parts on a clean surface and take photos during disassembly to guide reassembly.
Disassemble for Access (If Needed)
If the tool was previously taken apart, ensure it’s fully disassembled to a neutral state before beginning.
Remove the Nosepiece Assembly
- Place the nailer on a flat surface, nose down.
- Locate the nosepiece lock pin or retaining screw.
- Use a 5mm hex key to remove the pin.
- Gently pull the nosepiece straight off.
⚠️ Warning: Do not force the nosepiece. If stuck, check for residual nails or debris.
Extract the Driver Blade
- With the nosepiece removed, the driver blade should be visible.
- Carefully lift it upward. Do not tilt.
- Inspect for wear, bending, or chipping.
Visual Cue: A damaged blade has chipped edges or a mushroomed tip.
Reinstall the Driver Blade Correctly

The driver blade must be aligned perfectly to avoid jams and misfires.
Align the Blade with the Cylinder
- Ensure the driver blade flat side matches the cylinder guide slot.
- Insert the blade straight down into the cylinder.
- It should slide smoothly without resistance.
Verify Blade Depth
- The top of the blade should sit slightly below the cylinder housing.
- If too high, it can interfere with the piston.
- If too low, it won’t drive nails fully.
Common Mistake: Installing the blade upside down causes immediate misfires.
Reattach the Nosepiece Securely
Improper nosepiece alignment is a leading cause of misfires after reassembly.
Slide Nosepiece Onto Body
- Align the nose housing with the front of the tool.
- Push firmly until it clicks into place.
- Reinsert the nosepiece lock pin using the hex key.
Test for Stability
- Wiggle the nosepiece. There should be zero play.
- If loose, reseat and retighten the pin.
Pro Tip: Apply a drop of thread locker on the pin screw if it loosens frequently.
Reassemble the Magazine (Cordless Models Only)
For Paslode 906800, the magazine feeds nails via spring pressure and requires proper reassembly.
Insert the Nail Pusher and Spring
- Place the pusher rod into the magazine tube.
- Compress the coil spring and slide it over the rod.
- Insert the assembly into the magazine housing.
Lock the Retaining Clip
- Slide the retaining clip into the slot at the end of the magazine.
- Press until it snaps into place.
Check: The pusher should move smoothly when depressed.
Reinstall Battery and Fuel Cell (Cordless Only)
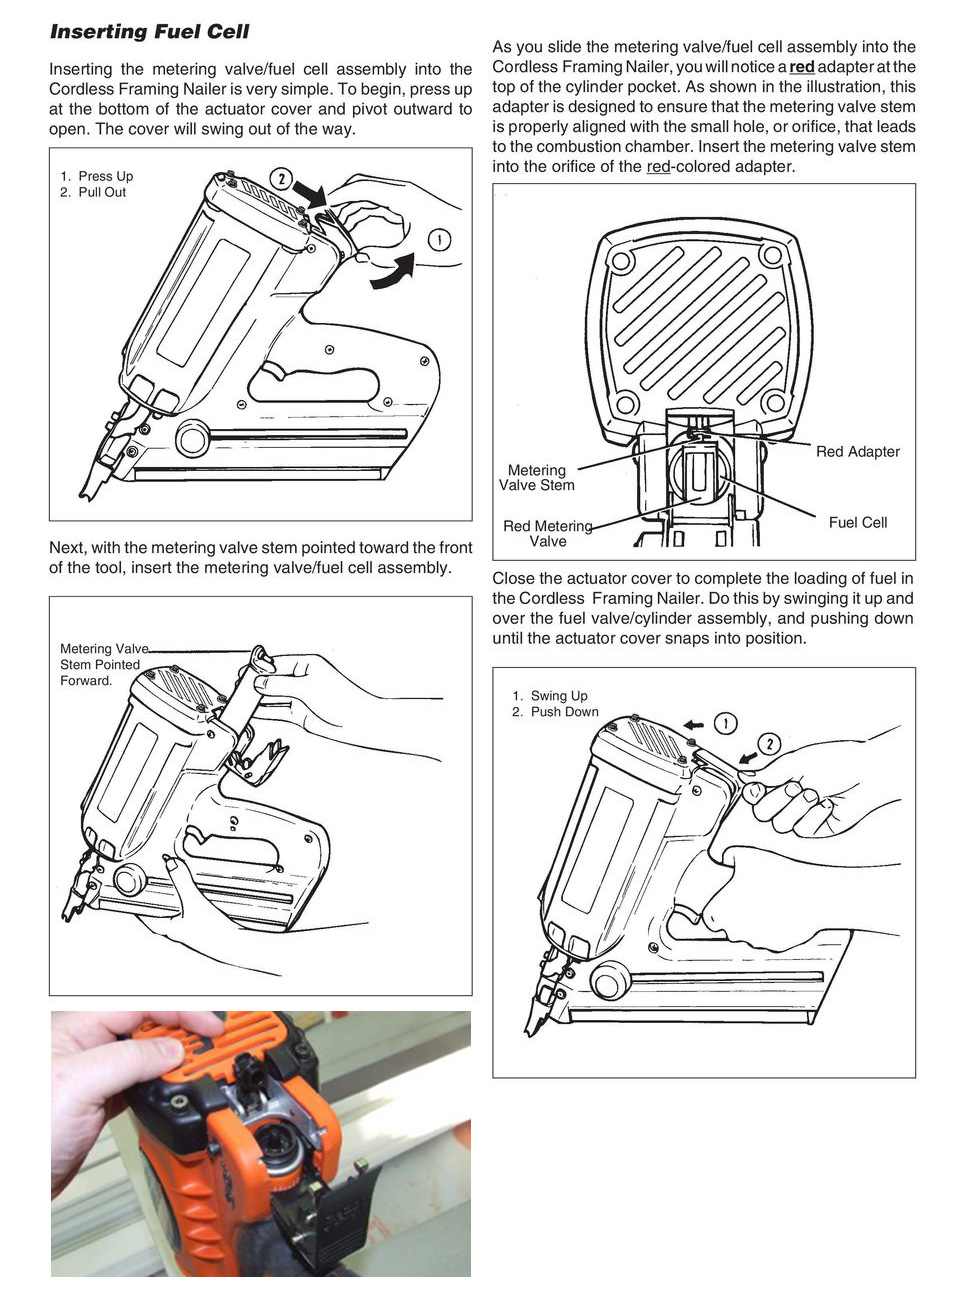
Cordless models require both power sources to complete the Paslode framing nailer assembly.
Insert Fuel Cell First
- Open the fuel chamber on the base.
- Insert a fresh Paslode IM350 fuel cell.
- Close the door securely.
Attach the Battery
- Slide a charged 2.4V lithium-ion battery into the rear slot.
- Ensure it clicks and locks.
🔋 Note: Never operate without both fuel and battery. This prevents dry-firing and internal damage.
Check Cylinder and Piston Alignment (Pneumatic Models)
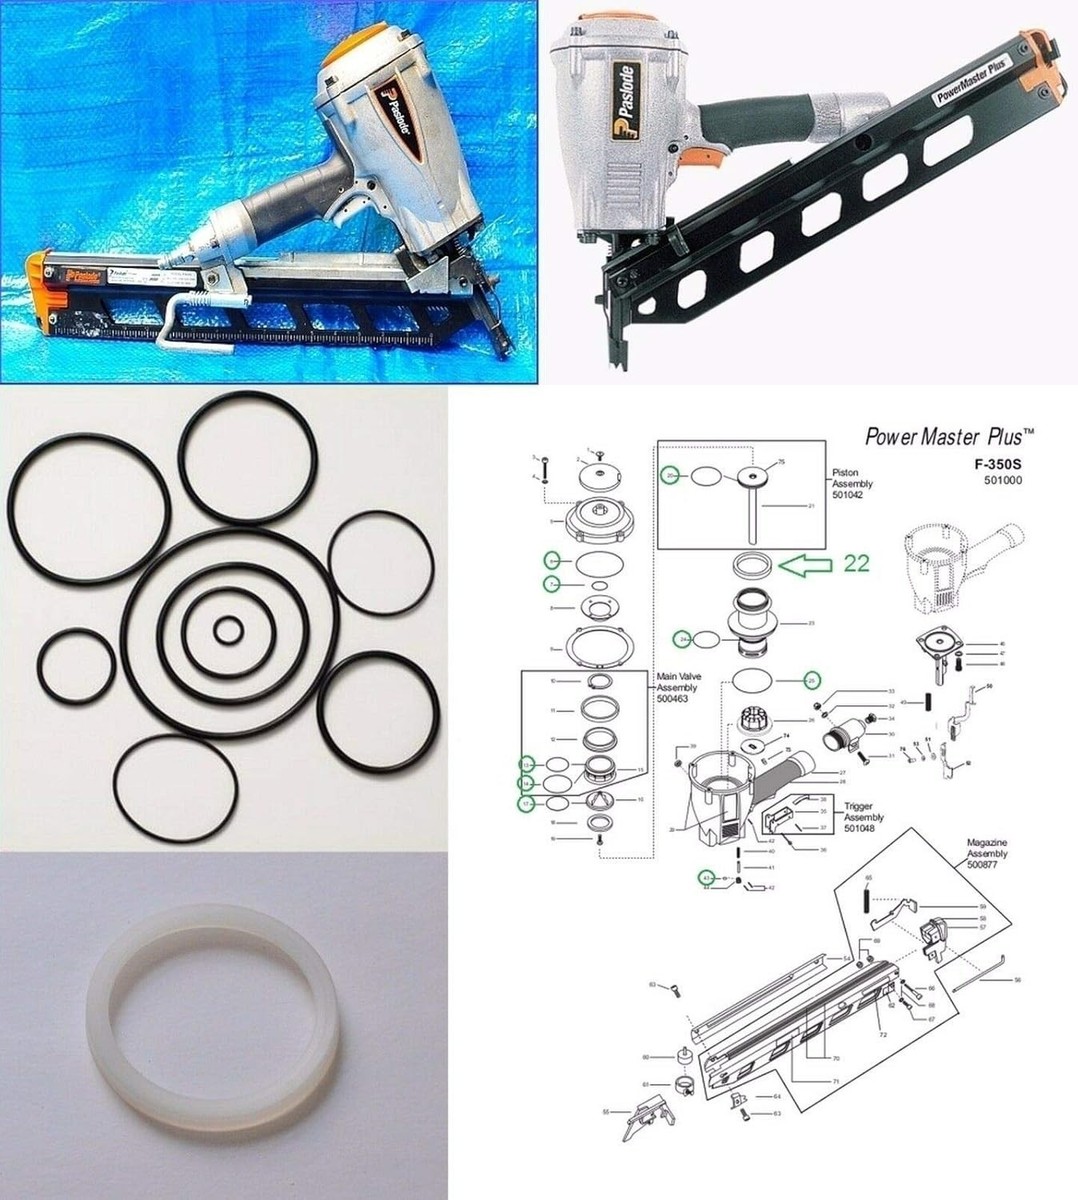
For PowerMaster Plus (501000), proper cylinder alignment affects air compression and drive power.
Inspect the Cylinder Seal
- Look for cracks or worn O-rings.
- Replace if the seal is brittle or flattened.
Reinstall the Cylinder
- Lower the cylinder over the driver blade.
- Align the air inlet with the tool body.
- Secure with retaining bolts. Do not over-tighten.
Visual Cue: The piston should move freely when air is applied.
Test Fire Safely
Always test after reassembly, safely and off the workpiece.
Perform a Dry-Fire Test
- Point the nailer at a safe surface (e.g., scrap wood).
- Engage the safety and pull the trigger.
- Listen for the “pop” and drive cycle.
Evaluate Performance
- Normal: Sharp firing sound, driver returns fully.
- Issue: Weak pop, no return indicates misalignment or fuel issue (cordless).
- Issue: Air leak means check O-rings and cylinder fit (pneumatic).
Never dry-fire more than 3 times, as this damages internal components.
Troubleshoot Common Assembly Errors
Even small mistakes can disable your nailer after Paslode framing nailer assembly.
Nailer Won’t Fire After Reassembly
Blade Misalignment
- ✅ Fix: Recheck driver blade orientation and depth.
Loose Nosepiece
- ✅ Fix: Reinsert and tighten the nosepiece pin.
Air Leak (Pneumatic)
- ✅ Fix: Replace damaged O-rings; ensure cylinder is seated.
No Combustion (Cordless)
- ✅ Fix: Verify fuel cell and battery are installed and charged.
Maintain Proper Assembly Over Time
Regular checks prevent future disassembly needs and extend tool life.
Monthly Inspection Steps
- Remove nosepiece and inspect for debris.
- Clean driver blade and cylinder with a dry cloth.
- Check all screws and pins for tightness.
- Lubricate O-rings with tool-specific grease (not oil).
Pro Tip: Keep spare O-rings and nose pins in your tool kit.
Prevent Future Disassembly Issues
Avoid unnecessary teardowns with proper handling and maintenance habits.
Avoid These Mistakes
- Forcing parts during disassembly
- Using incorrect tools that strip screws
- Skipping cleaning steps before reassembly
- Mixing up parts from different models
Expert Note: Only disassemble beyond basic cleaning if you’re troubleshooting a confirmed issue.
Access Official Schematics and Manuals
Need visual confirmation? Use Paslode’s official resources for accurate Paslode framing nailer assembly diagrams.
Where to Find Assembly Diagrams
- Cordless XPro 30° (906800): Cleaning Procedure PDF
- PowerMaster Plus (501000): Tool Schematic PDF
These schematics show exact part placement and assembly order for each model.
Frequently Asked Questions About Paslode Framing Nailer Assembly
How Do I Know Which Paslode Framing Nailer Model I Have?
Check the label on the tool’s body or base for the item number. The Cordless XPro 30° is Item #906800, and the Pneumatic PowerMaster Plus™ 30° is Item #501000. This number appears in all official manuals and schematics.
Can I Use the Same Assembly Steps for Cordless and Pneumatic Paslode Nailers?
No. Cordless models (906800) use a fuel cell and battery system with different internal components than pneumatic models (501000). Always confirm your model before beginning reassembly.
Where Can I Find Official Assembly Diagrams for My Paslode Nailer?
Official diagrams are available on the Paslode website:
– 906800: Cleaning Procedure PDF
– 501000: Tool Schematic PDF
These show exact part placement and assembly order.
What Should I Do If My Paslode Nailer Won’t Fire After Reassembly?
Check the most common issues first: driver blade orientation, nosepiece tightness, and (for pneumatic models) O-ring condition. For cordless models, verify the fuel cell and battery are properly installed and charged. Refer to the troubleshooting guide above for specific fixes.
How Often Should I Inspect My Paslode Framing Nailer?
Perform a basic inspection monthly, including nosepiece debris checks, driver blade cleaning, and screw tightness verification. This prevents unexpected failures and extends tool life.
Key Takeaways for Successful Paslode Framing Nailer Assembly
Correct Paslode framing nailer assembly ensures reliable performance on the job site. Always identify your model (906800 or 501000) before starting, and use only the correct tools to avoid component damage. Pay close attention to driver blade orientation, nosepiece alignment, and (for cordless models) proper fuel cell and battery installation. After assembly, perform a safe dry-fire test to confirm everything works correctly. Download the official schematics and manual for your specific model before beginning any reassembly work.