Fix Milwaukee Framing Nailer Not Sinking Nails
You’re halfway through framing a wall, and your Milwaukee framing nailer leaves nail heads sticking above the surface. Some nails barely break through, while others sink halfway and stop. This frustrating problem wastes time, compromises structural strength, and tests your patience on every shot.
The good news: a Milwaukee framing nailer not sinking nails is almost always fixable without replacing the tool. Most causes trace back to air pressure, depth settings, nail quality, or simple maintenance oversights. In this guide, you’ll learn the seven most common reasons your nailer fails to drive nails flush and exactly how to correct each one.
Check Air Pressure and Hose Setup
Test Air Pressure Directly at the Tool
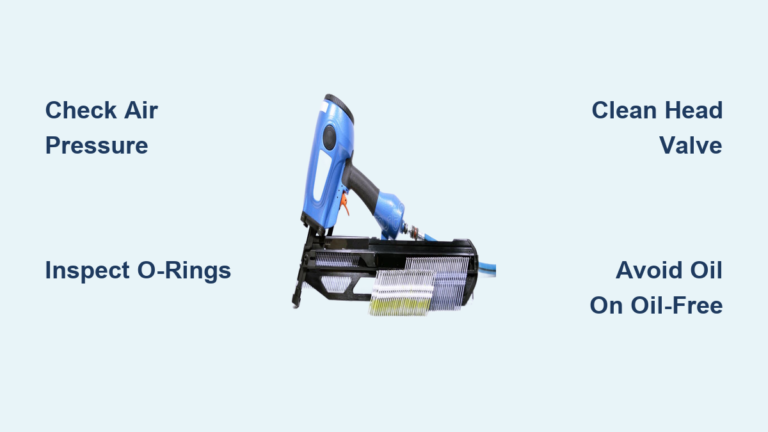
Air pressure is the leading cause of inconsistent nail depth. Milwaukee pneumatic framing nailers perform best between 80 and 100 PSI. Even if your compressor gauge reads correctly, pressure often drops before reaching the tool due to hose length, restrictions, or leaks.
Attach a gauge directly to the nailer’s air inlet for an accurate reading. If pressure falls below 80 PSI, raise your compressor regulator until the tool receives proper airflow. Also confirm:
- Hose diameter: Use a 3/8-inch hose for runs longer than 25 feet
- Hose length: Keep total length under 100 feet when possible
- Connection integrity: Listen for hissing or apply soapy water to detect leaks
Low pressure reduces piston force, leaving nail heads proud or only partially driven.
Inspect the Air Hose and Fittings
A damaged, kinked, or undersized hose starves the tool of air. Walk the full length of your hose and look for crushed sections, cracked couplers, or frayed ends. Mismatched quick-connect fittings often create partial seals that bleed pressure.
Replace worn components with Milwaukee-compatible or ANSI-rated fittings. Adding a lubricated swivel connector improves airflow and reduces drag during repositioning.
Adjust Depth and Drive Settings
Set the Depth Adjustment Knob Correctly
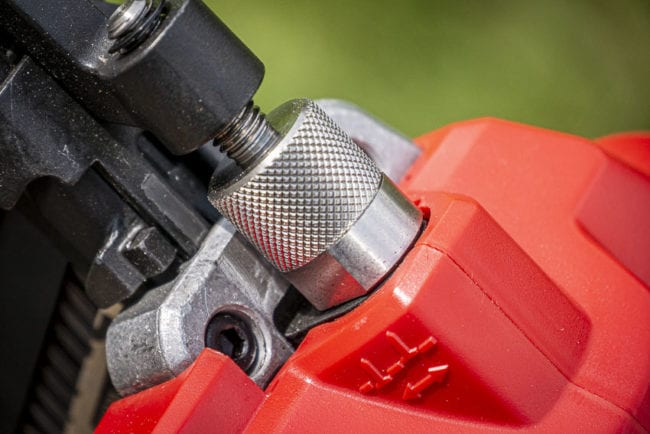
Your Milwaukee nailer includes a depth adjustment dial near the nose or magazine. When nails sit above the surface, this setting is likely too shallow. Turn the knob clockwise to drive deeper and counterclockwise to reduce depth.
Make small adjustments and test on scrap lumber matching your project material. The ideal depth sinks the nail head just below the wood surface without splitting the grain. Never force the dial past its stops—doing so damages internal threads.
Match Settings to Wood Density
Hardwoods like oak and hickory resist nail penetration far more than softwoods like pine or fir. If you recently switched materials, your previous setting may no longer provide enough driving force.
For dense lumber:
- Raise air pressure toward 100 PSI
- Pre-drill pilot holes through knots or extra-hard sections
- Use sharp, full-round head framing nails rated for structural work
Switching between SPF and pressure-treated southern yellow pine without adjusting settings often causes underdriven nails.
Clear Jams and Clean the Nailer
Remove Nail Jams and Nose Obstructions
A jammed nail or debris lodged in the nose prevents the piston from completing its full stroke. If your nailer fires but the nail barely penetrates, stop work immediately and clear the jam.
Follow these steps:
- Disconnect the air supply completely
- Open the magazine and remove all remaining nails
- Use the clearance tool (often stored under the air cap) to dislodge the stuck nail
- Inspect the driver blade for bending or chipping
Reassemble carefully and test fire on scrap wood before resuming your project.
Clean Internal Components on a Schedule
Dirt, sawdust, and old oil buildup rob your nailer of impact energy. Plan to clean your tool every 10,000 nails or monthly under heavy use.
Disassemble per the owner’s manual by removing the nose cap, cylinder, and driver blade. Wipe the cylinder bore with a lint-free cloth, then apply Milwaukee-recommended pneumatic oil to the driver blade and O-rings. A dirty or dry driver can lose up to 20% of impact energy—more than enough to cause inconsistent sinking.
Verify Nail Compatibility and Quality
Use the Correct Gauge, Length, and Head Style
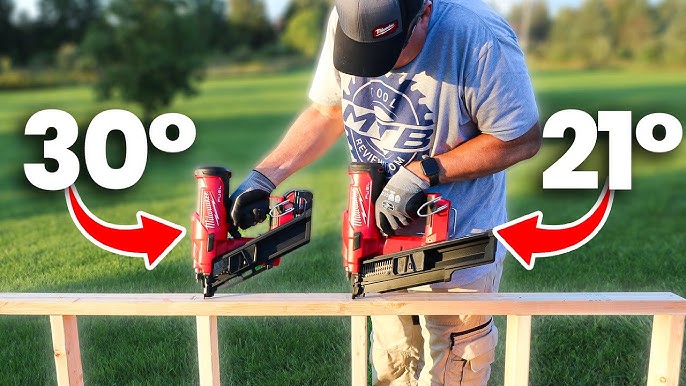
Milwaukee framing nailers are engineered for specific nail types. Most models use .113-inch nails at 30 degrees or .131-inch nails at 21 degrees, ranging from 2 inches to 3-1/2 inches long. Using clipped-head, finish, or siding nails causes misfires and weak drives.
Before loading a new strip, confirm:
- Head style: Full-round head only
- Shank type: Common or sinker design, not masonry or ring-shank
- Collation: Plastic, paper, or wire must match your nailer’s specifications
Mismatched nails feed poorly and reduce driving power on every shot.
Inspect Nails Before Loading
Rusted, bent, or poorly collated nails jam the magazine and fail to seat properly in the firing chamber. Buy from reputable suppliers and store nails in a dry location.
Open a strip and check whether the nails sit straight, the collation stays intact, and the heads appear uniform. Even one bent nail can disrupt feeding for the next several shots.
Examine Firing Mode and Trigger Technique
Choose the Right Firing Mode for the Job
Milwaukee framing nailers offer sequential and contact (bump) firing modes. In sequential mode, you must press the nose against the work surface before pulling the trigger. This improves safety but can produce shallow drives if contact is light.
In contact mode, you can rapid-fire by holding the trigger and bumping the nose. This delivers faster performance but requires firm, consistent pressure.
For best results:
- Use contact mode for open framing and high-speed work
- Use sequential mode for angled nailing or precision tasks
- Always press the nose firmly against the surface before firing
Confirm the Safety Tip Works Properly
The nose safety tip must depress fully for each shot. Dirt, damage, or misalignment limits piston travel and weakens the drive. Clean around the tip regularly and replace it if you notice cracks or bending.
Address Moisture and Temperature Issues
Avoid Nailing Damp or Frozen Lumber
Wet or frozen wood dramatically increases resistance. Ice trapped inside the grain can stop a nail completely, even with correct pressure and settings. Store lumber under cover and inspect it before framing.
If the wood feels damp, allow it to dry indoors before use. In cold weather, you can increase air pressure slightly within manufacturer limits and apply a de-icer to the work surface. Nailing through frozen SPF is a frequent cause of shallow drives during winter projects.
Keep the Tool Within Operating Temperature
Milwaukee nailers work best between 32°F and 100°F. Below freezing, internal oil thickens and seals stiffen, slowing the piston. Keep the nailer indoors when not in use and warm it with body heat before starting each shift.
Switching to cold-weather tool oil helps maintain smooth cycling in low temperatures and keeps every nail flush.
Replace Worn Parts Before They Fail

Inspect the Driver Blade Regularly
The driver blade transfers energy from the piston to the nail. Over time, the tip can mushroom, bend, or crack, reducing driving force.
Watch for these warning signs:
- Pitting or chipping on the contact tip
- A visibly bent shaft
- Excessive wobble during firing
Replace the driver blade every 50,000 nails or sooner if damage appears. Always use genuine Milwaukee replacement parts for proper fit and performance.
Check O-Rings and Seals for Leaks
Worn O-rings allow air to escape from the cylinder, weakening each shot. Symptoms include a soft firing sound, slow cycling, or nails that fail to eject fully.
Disassemble the tool and inspect every O-ring for cracks or flattening. Lubricate seals during reassembly and replace any that show wear.
Build a Preventive Maintenance Routine
Oil the Nailer Before Every Shift
Dry operation is the fastest path to power loss. Add 3 to 5 drops of pneumatic tool oil into the air inlet each morning before use. Fire the tool 10 to 15 times onto scrap wood to distribute oil throughout the cylinder.
In dusty environments, repeat this process during long shifts to keep internal parts protected.
Schedule Monthly Deep Cleaning
Monthly maintenance prevents the gradual power loss that comes from internal buildup. Your routine should include:
- Full disassembly following the owner’s manual
- Cleaning the cylinder and valve assembly
- Replacing any worn parts discovered during inspection
- Testing air pressure and drive depth on scrap lumber
A well-maintained Milwaukee framing nailer delivers reliable performance for years, while neglect shortens both lifespan and driving consistency.
Frequently Asked Questions About Milwaukee Framing Nailers Not Sinking Nails
What PSI Should a Milwaukee Framing Nailer Run At?
Milwaukee pneumatic framing nailers perform best between 80 and 100 PSI. Check pressure directly at the tool’s air inlet, since hose length and fittings can cause significant drops from your compressor reading.
Why Are Some Nails Flush and Others Not?
Inconsistent depth usually points to fluctuating air pressure, dirty internal components, or uneven firing technique. Verify stable pressure, clean the nailer, and press the nose firmly against the surface on every shot.
Can I Use Any Framing Nails in a Milwaukee Nailer?
No. Milwaukee nailers require specific nail types—typically .113-inch 30-degree or .131-inch 21-degree full-round head framing nails. Using clipped-head or non-compatible nails causes misfires, jams, and weak penetration.
How Often Should I Oil My Milwaukee Framing Nailer?
Add pneumatic tool oil to the air inlet at the start of every work shift, and add a few more drops during long sessions in dusty conditions. Daily lubrication keeps the piston cycling smoothly and prevents premature wear.
Does Cold Weather Affect Nail Depth?
Yes. Cold temperatures thicken internal oil and stiffen seals, reducing piston speed. Keep the tool warm between uses, switch to cold-weather oil, and store the nailer indoors when possible during winter projects.
When Should I Replace the Driver Blade?
Replace the driver blade every 50,000 nails or immediately if you notice pitting, bending, or wobble during firing. A damaged blade transfers far less energy and leaves nails proud of the surface.
Key Takeaways for Fixing a Milwaukee Framing Nailer Not Sinking Nails
Start every troubleshooting session with air pressure, since it causes most depth problems. Adjust the depth dial to match your wood type, and clean the nose and magazine regularly to prevent jams. Always use manufacturer-approved nails in the correct gauge and length, and choose the firing mode that fits your task. Address moisture and temperature before assuming something is broken, and replace worn parts at the first sign of damage.
Your next step is simple: check your compressor gauge, test pressure at the nailer inlet, and run a few shots on scrap lumber matching your project material. Most depth issues resolve within minutes once you match the tool’s settings to your working conditions.